
Most missed bird frames trace back to a handful of causes, and each cause has a small, inexpensive fix.
A reflex sight does nothing for a dead battery, and a lens hood will not steady a front-heavy lens.
Buying bird photography accessories by cause, rather than by what looks useful, keeps the money for the problem that is costing you keepers.
Sort your misses before you buy anything: acquisition, shake, handling, light and power
Open a recent session in your culling software and sort the rejects into five piles. Each pile points at a different accessory.
- Acquisition: the bird is out of frame, clipped at the edge, or the focus point landed on branches because you never got the lens onto the bird in time.
- Shake: the whole frame is soft, including the perch and the background.
- Handling: the frames are soft or badly framed late in the session, or the lens sags and wanders when you track.
- Light: the image is sharp but washed out, with low contrast, a haze across the frame, or flare spots.
- Power: the session ended early, or the camera died as a bird landed.
The shake pile needs one extra check, because subject motion looks similar.
If the bird is blurred but the perch and background are crisp, the shutter speed was too slow for the bird’s movement.
No accessory fixes that; raise the shutter speed. If everything in the frame is smeared in the same direction, the camera moved, and the support accessories below apply.
Count each pile.
The largest one decides what you buy first, and the last section of this article turns that count into a buying order. If your culling workflow needs tidying first, the editing software stack article covers how to cull quickly.
A reflex sight for finding small and fast birds before the auto-focus ever gets a chance
Autofocus can only track a bird that is inside the frame.
At 600mm on a full-frame body the horizontal field of view is roughly 3.4 degrees, so a warbler that hops two feet is already gone from the viewfinder.
Finding it again through the lens, with the image magnified and shaky, takes seconds that the bird does not give you.
A reflex sight (a red-dot sight on the hot shoe) gives you an unmagnified view with a dot showing where the lens is pointing.
You keep both eyes open, find the bird with your naked eye, put the dot on it, and the lens is nearly on target when you lift it.
This helps most with:
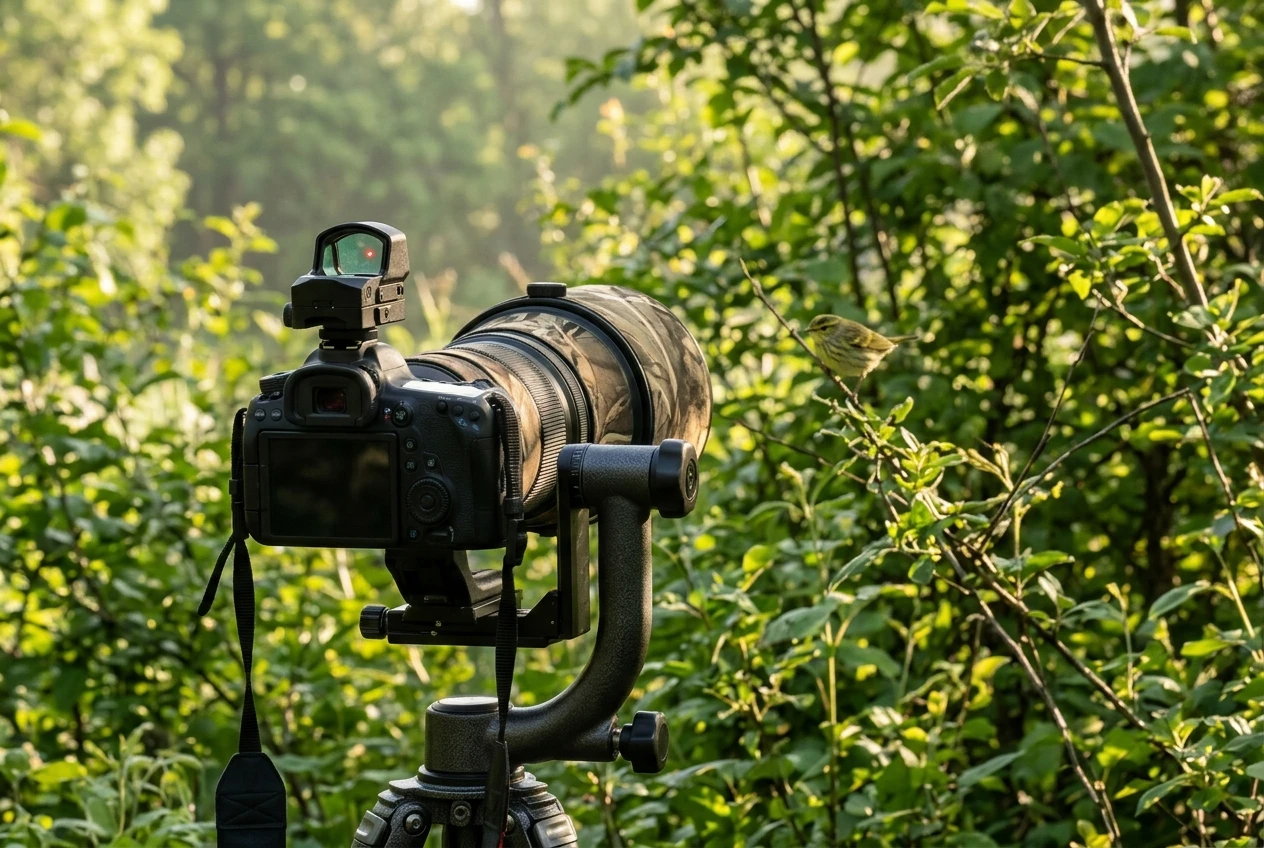
- small songbirds moving through foliage
- birds in flight, where you need to get on the bird quickly and then let tracking take over
- shorebirds that run along the waterline in short bursts
Set-up matters more than the price. The sight sits above the lens axis, so it is only accurate at the distance where you aligned it.
Zero it on something at typical shooting range, such as a post 20 to 30 meters away, and expect small offsets on very close birds.
Check that the mount fits your hot shoe and does not block a hot-shoe flash or the top-plate controls you use.
Two free habits work alongside it.
Set the lens focus limiter to the range you actually shoot in, so the lens does not hunt through the whole distance scale when it loses the bird.
If you use a zoom, start a little wider to find the bird, then zoom in once the focus point is on it.
If your misses are mostly “never got on the bird,” this is the accessory for that pile, and none of the others will fix it.
Lens plates, Arca-Swiss clamps and collar feet: balance and fast support changes with a long lens
Support gear is covered elsewhere on this site, including monopod versus tripod and fluid versus gimbal heads.
This section covers the small parts that connect your lens to any of them.
Arca-Swiss is a dovetail standard: a plate with angled edges that slides into a matching clamp. If your tripod head, monopod head and any hand-held strap or bracket all use Arca-Swiss clamps, one plate lets you move the lens between them in seconds.
That matters when a bird lands while you are walking with the lens on a monopod and you want to switch to a tripod without fumbling with screws.
For a long telephoto, the plate should go on the lens, not the camera body.
The lens collar foot is the mounting point built to carry the weight, and it sits near the balance point of the lens and body together.
Mounting a long lens by the camera body puts all the weight on the camera’s tripod socket and tips the whole rig forward.
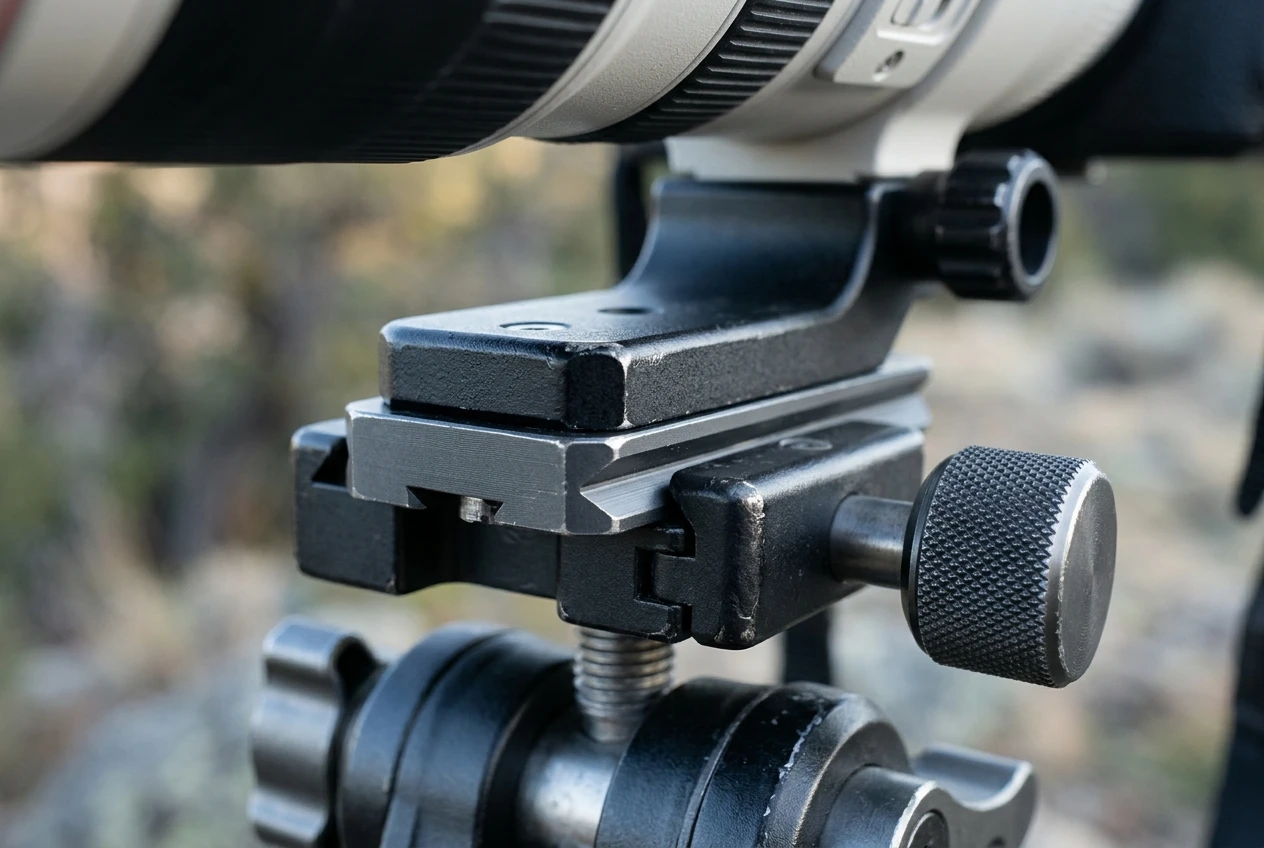
You have two options:
- An Arca-compatible replacement foot: it swaps for the original collar foot and removes the need for a separate plate. Check that it is made for your exact lens model.
- A plate bolted to the existing foot: a cheaper route that works if the plate is long enough to slide forward and back.
A long plate or foot is useful because balance changes with the camera body and any teleconverter.
Sliding the lens in the clamp until it stays level when released lets you track a bird without fighting the weight.
A rig that balances level also tires your arm less on a monopod and holds steady better on a gimbal. If your misses cluster late in a session, with sagging framing and soft frames, balance is a likely cause.
Choose a plate with an anti-twist lip or a stop screw so it cannot rotate in the clamp, and tighten the clamp fully before you let go of the lens.
A lens that slides out of a half-tightened clamp costs far more than any missed frame.
When a remote release or electronic shutter helps, and when it adds nothing on a hand-held lens
A remote release removes your finger from the shutter button.
That helps in only one situation: the camera is on a support and you are shooting a bird that stays still.
Pressing the button on a tripod-mounted long lens can shift the camera slightly, and at slow shutter speeds that shows up as softness in the first fraction of the exposure.
Use a remote release when:
- the lens is on a tripod at a feeder, nest, or perch where birds return to the same spot
- you are in a blind and want to keep your hands off the camera
- you are shooting at slower shutter speeds, such as a bird at rest in dim light
It adds nothing when you shoot hand-held.
Your body moves far more than a button press does, and a remote does not track or focus for you. It also does not solve motion blur from the bird, which is a shutter-speed problem.
Shutter type is a separate consideration.
On a DSLR, mirror slap can add vibration at certain shutter speeds, and mirror lock-up or a delayed exposure mode reduces it.
On a mirrorless body, an electronic first-curtain or fully electronic shutter removes shutter vibration and is silent, which also stops it from startling nearby birds.
The cost of a fully electronic shutter is rolling shutter: fast wingbeats and a swinging head can distort because the sensor reads out line by line.
Some artificial lights, especially LED and fluorescent, can add banding to electronic-shutter frames. For birds in flight, check your frames before you commit to it.
A basic wired or wireless release is inexpensive.
The built-in two-second self-timer does the same job for a single static shot, so buy a remote only if you find yourself using that timer repeatedly.
Lens hoods and stray light: what they protect against and where they cost you
A lens hood blocks light from outside the frame from reaching the front element.
Without it, that light bounces between glass surfaces and lowers contrast across the image, sometimes adding visible flare spots.
This shows up in the “light” pile as sharp frames that look washed out, most often when the sun is low or off to one side.
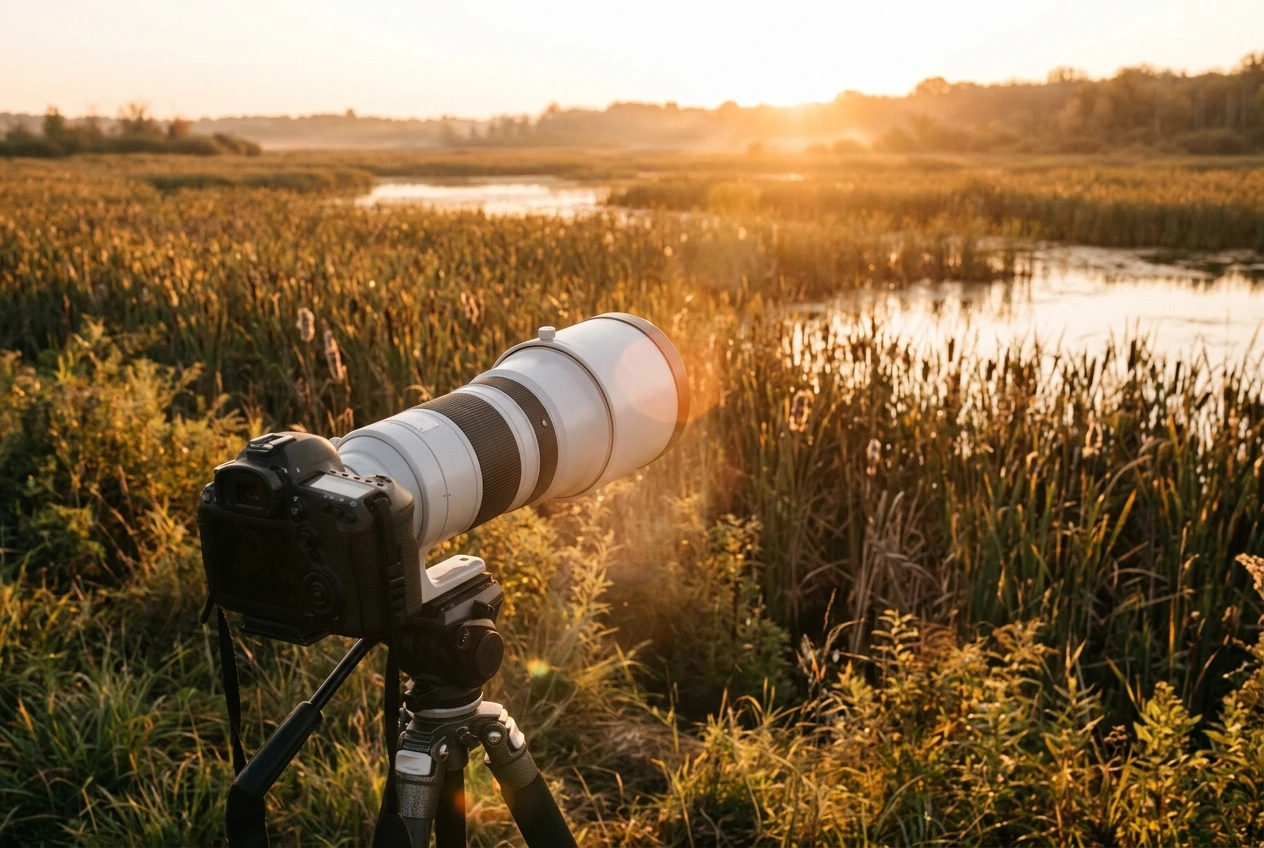
A hood also protects the front element from bumps, branches, and raindrops, which is a practical benefit on its own.
Many telephoto lenses ship with a hood, so first check whether you already own one and whether it is mounted.
Hoods reversed for transport are often left that way in the field.
If your lens did not include one, buy the model made for it, since a generic hood can be the wrong length or shape.
The hood has limits:
- It cannot block the sun when the sun is inside the frame. For backlit shots, the fix is changing your position or angle, which the lighting guide covers as a composition choice.
- On zoom lenses, a hood that is too long for the wide end can darken the corners. Use the one made for that lens.
- It adds length and catches wind on a lightweight support, which can add vibration in gusts.
- It adds a little bulk in a bag, though most hoods reverse and clip on.
If your haze-and-flare pile is small, a missing hood is the cheapest fix of all. If the flare comes from shooting into the sun on purpose, no hood will remove it.
Spare batteries and cold-weather power: keeping a long session alive
A dead battery loses frames at the worst time, because birds often appear when the light and activity peak, and that is late in a session when the battery is lowest.
Spares are the simplest accessory on this list.
Mirrorless bodies generally drain faster than DSLRs because the view-finder and sensor run continuously, a trade-off the mirrorless versus DSLR article covers in more depth.
Practical points for keeping power through a long day:
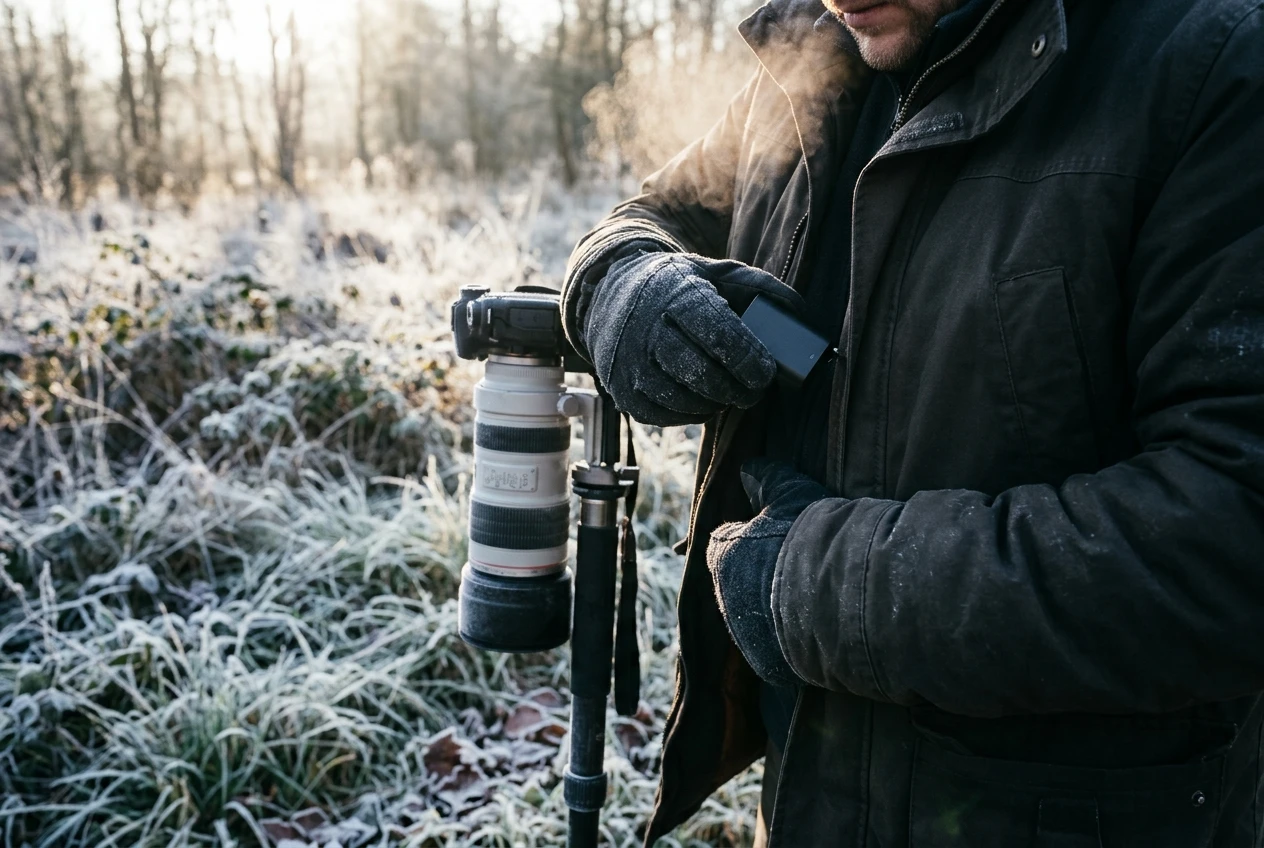
- Buy batteries made for your exact body. Check that they are the right model, and be cautious with unbranded cells that may not report charge accurately.
- Start every session with all batteries fully charged, and carry the spare where you can reach it without unpacking.
- Cold temporarily reduces the capacity a battery delivers. Keep spares in an inside pocket close to your body and swap a cold battery for a warm one when the level drops. A battery that seemed empty in the cold often recovers some charge once warmed.
- Turn off image review, wireless features, and any stabilization you do not need, since these use power you can save.
For cold, wet, or salty conditions, the gear protection guide covers the rest.
If you run a battery grip, it holds additional cells and balances a front-heavy lens a little better, but check that your body supports one.
Camouflage wraps and lens coats: what they change for the bird and what they do not
A camouflage wrap or neoprene lens coat covers the lens in a muted pattern.
A large white or pale lens is easy for a bird to see, so a cover reduces that visual contrast and breaks up the outline. It also protects the finish from scratches and light splashes.
What it does not change matters as much.
Birds react to movement, silhouette, and your approach far more than to the color of a lens.
A wrap will not hide fast arm movements, a person standing upright in the open, or a direct approach to a nervous bird. It does not affect sharpness, autofocus, or exposure, so it will not recover any frames from the piles above.
It is most useful in a blind or at a fixed perch where the lens sits in view of birds for a long time. For walking and stalking, your clothing, pace, and posture do more. A blind built around your lens hides the whole setup rather than only the lens.
Treat a wrap as low priority unless birds consistently flush when the lens points at them.
The order to buy in, based on which miss costs you the most frames
Go back to your five piles and buy for the biggest one first.
- Largest pile is acquisition: buy a reflex sight, set the focus limiter, and practice finding the bird with your eyes before raising the lens.
- Largest pile is shake on a support: fit an Arca-compatible foot or plate, balance the lens level, and add a remote release or use the self-timer for static birds.
- Largest pile is handling and late-session fatigue: fix balance with the lens foot position first, then check whether your support suits the situation.
- Largest pile is low contrast and flare: mount the correct hood, and change your shooting angle when the sun is in the frame.
- Largest pile is lost shooting time: buy spare batteries and keep them warm.
Camouflage covers come last, and only if birds flush at the sight of the lens.
If two piles are close in size, start with the cheaper fix. Hoods, plates, and batteries usually cost less than a sight, so they are low-risk first purchases when the evidence is unclear.
Name the one kind of miss that costs you the most keepers, buy only the accessory that fixes it, and shoot a full session before adding another.