
Bird flight photography is more than just snapping a few quick pictures at the park.
It’s an exhilarating challenge that combines timing, precision, and a deep understanding of nature in motion.
Capturing these majestic creatures mid-air can create stunning results, serving as a testament to their beauty and strength.
For many photography enthusiasts, mastering bird flight photography isn’t just a hobby—it’s an art form.
Each photograph tells a story, freezing a moment in time that reveals the grace and power of flying birds.
Whether it’s a swooping hawk or a fleeting songbird, every shot you nail boosts your craft and confidence.
So what’s in store if you’re looking to elevate your photography game?
In this article, I’m gonna share the nuts and bolts of becoming a bird flight photography ace.
From technical camera settings to practical shooting techniques and beyond, you’ll find guidance tailored for both beginners and seasoned photographers.
Buckle up for a journey into the sky and start capturing those breathtaking images!
Building a Strong Foundation: Research and Observation
When it comes to photographing birds in flight, understanding your subject is half the battle won.
Birds aren’t just pretty subjects; they have intricate behaviors and patterns of movement that, once cracked, can make your photo game strong.
This is where a bit of research and keen observation come in.
Getting familiar with bird behavior can pay off big time when you’re out shooting.
Many seasoned photographers spend time studying the birds they plan to photograph, noting details like their takeoff signals and flight patterns.
For instance, bigger birds like herons or eagles have predictable routines—they often relieve themselves just before taking off.
Spotting something like this may give you that valuable split-second warning for capturing a magical takeoff shot.
But it`s not all about spending hours reading up. A lot of learning happens right there in the field.
By watching birds closely, you start identifying their habits. The more you shoot, the more you recognize patterns, which helps you anticipate their next move.
Don’t be afraid to simply sit and watch, camera in hand, ready to capture that perfect frame.
Finding the right locations for this kind of photography is key too. Research spots where bird activities are high—nature reserves, wetlands, or coastal areas.
These places often offer diverse species and plentiful flight action, giving you loads of chances to practice and improve your skills.
So, arm yourself with knowledge and get out there; your lens will thank you!
Getting to Know Your Equipment: Camera Settings and Techniques
Mastering bird flight photography has a lot to do with getting your camera settings just right.
It’s not just about clicking randomly, hoping for the best. Instead, precision and understanding your gear are key.
Continuous autofocus is a must-have feature. This setting keeps your subject in focus even as it moves, ensuring that the bird is sharp and clear.
For those using Nikon, look for AF-C mode, and if you’re a Canon user, it’s called AI Servo. Either way, these modes make sure the camera sticks to your subject like glue.
Now, let’s talk back-button focusing.
This nifty technique allows you to separate the focusing and shutter-release functions, giving you more control.
You won’t need to switch between different focusing modes constantly—just hold down the back button to engage focus and release it once you’re ready to shoot.
It’s particularly useful when you’re shooting subjects with unpredictable movements.
Then there’s the challenge of selecting the right autofocus arrangement.
Group autofocus is a personal favorite as it uses multiple focus points, which is great for tracking birds against various backgrounds.
If you’re tracking a bird across a clear blue sky or through cluttered environments like dense bush, this setting has your back by prioritizing what’s nearest to your camera.
Each of these techniques adds another piece to the puzzle of bird photography.
Don’t be afraid to experiment and see what works best for you. The magic happens when preparation meets opportunity, so the better you know your gear, the easier it’ll be to capture those breathtaking images.
Experimenting with Exposure: ISO, Shutter Speed, and Aperture
Exposure settings can make or break your bird flight shots, and with birds moving so fast, precision is everything.
Let’s talk about ISO first.
Auto ISO is a lifesaver in situations where light conditions change rapidly. Set the minimum ISO to 1000, but let your camera do the heavy lifting in selecting the exact ISO for each shot.
This lets you maintain consistency in shutter speed, which is crucial when your feathery friend is darting in and out of shadows.
Shutter speed is your best friend when it comes to freezing the action.
For most birds in flight, a speed of at least 1/1000 is advisable, but for those speedsters out there, pushing it up to 1/2000 or even 1/3200 ensures crisp, sharp images.
Your shutter speed needs to be quick enough to capture every detail without blur, so your camera might automatically select an aperture and ISO that work with your chosen speed.
Keep an eye on those settings and adjust as necessary.
Choosing the right aperture adds depth to your shots. When birds are in flight, you want more than just a pin-sharp beak.
A wider aperture, around f/5.6 or f/8, gives you leeway to capture the entire bird in clear detail.
On gloomy days, a wide-open aperture can maximize light intake, keeping your images bright and lively.
The best part?
You’re the maestro here. Tweak these settings as per the situation and your creative vision.
The whole idea is to find balance within your exposure triangle—shutter speed, aperture, and ISO—so each image really captures the essence of the bird and the movement.
Trial and error will be part of your journey, but that’s where the magic lies.
Each attempt teaches you something new, helping you refine your technique. So go ahead, play around, and you’ll see your success rate soar.
Practical Techniques and Field Strategies
Dialing in the right technique can turn an average outing into a photo shoot full of spectacular shots.
One crucial element to keep in your toolkit is matrix or evaluative metering.
This metering mode is particularly handy when lighting is erratic, like when birds are zooming between sun and shade.
It evaluates the entire frame, helping you get a balanced exposure without constantly fiddling with settings.
Burst mode is another indispensable feature. It’s your safety net for capturing the perfect moment.
With burst mode, you’re less likely to miss a fantastic shot thanks to multiple frames per second.
On Nikon, you’ll want the CH setting, which allows many frames to be taken consecutively.
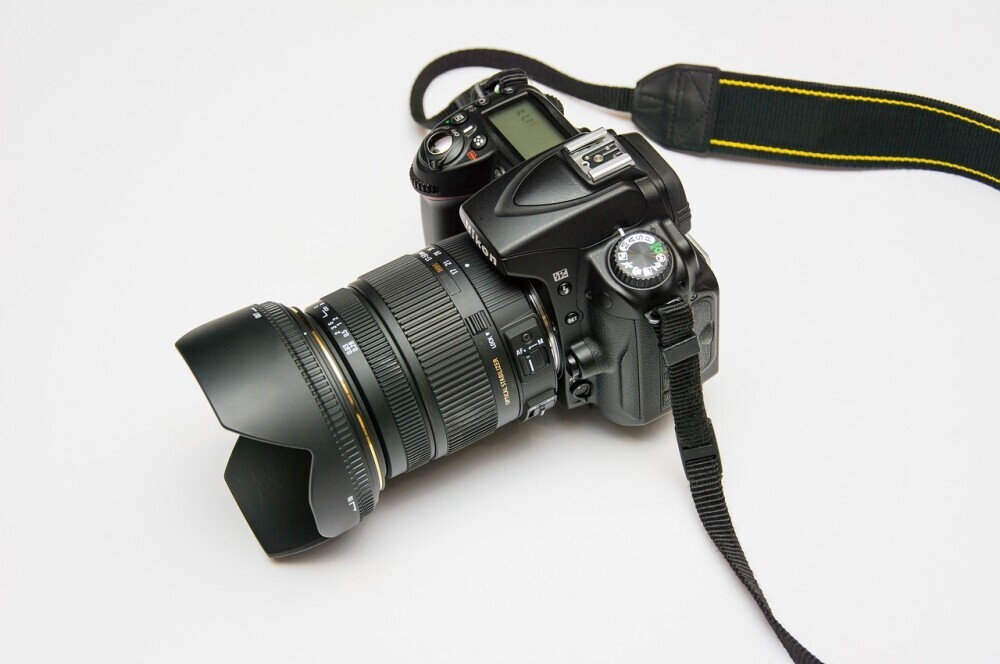
Confidently anticipate the action and fill your camera’s memory with potential winning shots.
Translating theory into fieldwork is where skills truly sharpen.
The unpredictability of birds in their natural habitat means you’ll need to think on your feet and adjust strategies on the fly.
Sometimes, it’s the little adjustments that make a difference, like changing your position for better lighting or adjusting settings according to changing weather.
A practical tip is to spend time shooting in areas where birds are used to human presence.
Parks or reserves can offer a great starting point, where birds may be more relaxed and provide more photographic opportunities.
With practice, you’ll start noticing what works best for you in different scenarios.
Real-world experience is the greatest teacher.
Get out there, keep practicing, and you’ll find that your field strategies improve naturally.
Each shot is a stepping stone toward that perfect image, so embrace every challenge and watch your skills soar.
Reflecting on Growth and Mastery: Sharing Pro Tips
Achieving a high success rate with bird flight photography doesn’t happen overnight.
It’s a journey of patience, practice, and a whole lot of learning.
I’ll be honest—every photographer messes up at first, but each blunder is a lesson waiting to be learned.
So, how did I get to a place where I’m hitting that 90%+ success mark?
It’s all about refining techniques over time. Continuous practice in different environments has been crucial.
Trying out a variety of settings, from bright sunny days to overcast conditions, helped me understand what works best overall.
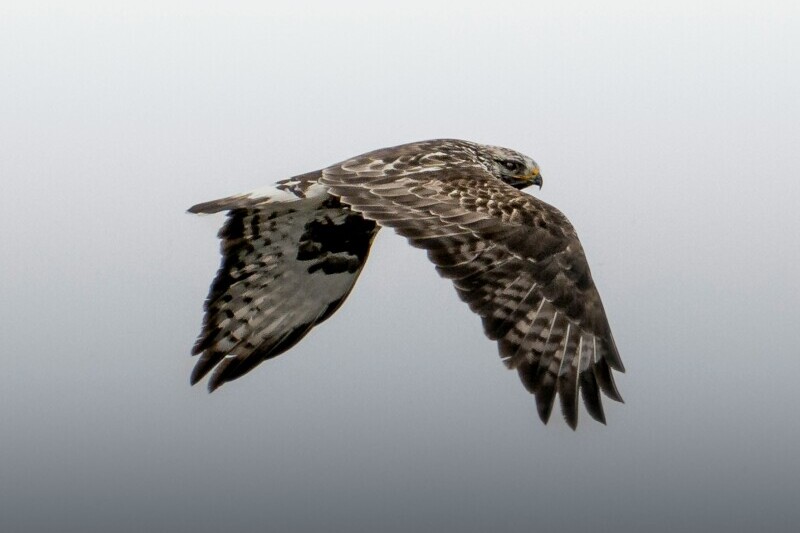
Plus, don’t underestimate the power of reviewing your work.
Analyzing what went right or wrong in each image is invaluable.
It’s not just about nailing technical settings. The more you shoot, the more your intuition sharpens.
You start anticipating bird movements much quicker and become adept at predicting what a subject might do next.
This instinct is invaluable when you’re trying to capture those fleeting moments that make a photo stand out.
Some key tips can make a world of difference. Always keep experimenting—photography isn’t a one-size-fits-all thing.
Stay flexible and ready to shift your approach as needed.
Also, don’t skimp on practice. The more you shoot, the more your confidence builds, and muscle memory kicks in.
To those coming up in this craft, don’t worry if you’re not there yet.
Every shutter click brings you closer to mastery. Celebrate small victories and reflect on each experience.
Your dedication and passion are what will get you to where you want to be.
Technique
Getting good at photographing birds in flight is less about luck and way more about the technique.
First step?
Diving into some solid research. The more you know about birds and their habits, the more prepared you are to catch them during memorable moments.
Sure, a bird might just seem like it’s flapping about, but once you recognize its patterns – like when it’s about to take off or soar – you’ll be ready to capitalize on those moments with precision and style.
Location is also key.
Find places where birds are plenty and active, like local parks, nature reserves, or coastal regions.
Locations with diverse bird populations give you more to practice with and can add some exciting variety to your shots.
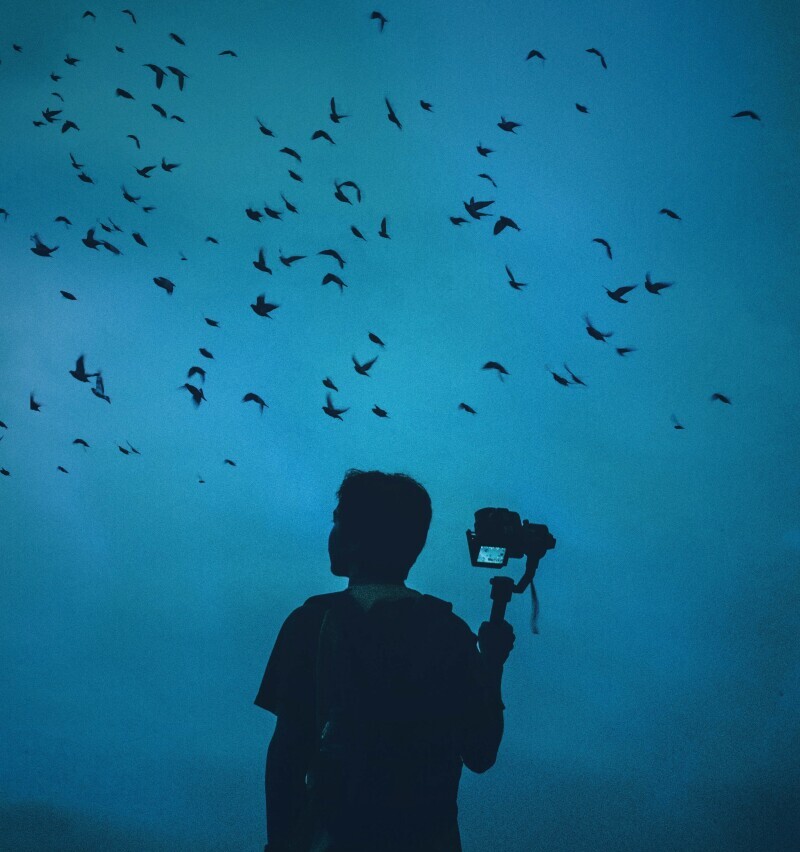
Plus, when birds are used to humans, you can get closer without disturbing them, which makes for more intimate and detailed photographs.
Practice is the real magic ingredient for honing your skills.
Spend as much time as you can watching and shooting birds. Don’t fret about missed shots or blurry images; those are part of what’ll make you better over time.
Every day out with your camera is an opportunity to apply the lessons learned from past experiences and experiment with new settings or perspectives.
These practices create a foundation that allows your unique style to develop.
Keep your eyes open, your camera ready, and take the time to enjoy the learning process.
It doesn’t just boost your portfolio; it makes each outing a little adventure where you are not only capturing photos but also stories.
Getting Creative in Bird Flight Photography
Bird flight photography is where art and nature collide, offering endless creative possibilities.
Moving beyond technique, creativity is your playground, where you can express personal flair in capturing images that speak volumes.
One simple way to shake things up is by experimenting with different times of day.
Sunrise and sunset offer dramatic lighting that adds mood and depth to your shots.
The golden and blue hours bathe your photos in beautiful hues, which can transform a simple bird photo into something spectacular.
Consider the backgrounds and elements of your shots too. A bird silhouetted against a vibrant sunset or the contrast of a bird against a stormy sky can depict an entirely new narrative.
Play with angles and perspectives—shooting from a low angle can provide dynamic results and place viewers into the bird’s world, creating a sense of awe and wonder.
And never shy away from using all the capabilities of your camera.
I’m shooting with a Nikon D850, but these principles hold true for any camera model.
Understand what your equipment can do and push it to its limits. Test out different lenses, or even filters, to add a unique touch to your photos.
Creativity fuels your passion and adds character to your work. Approach every shoot with curiosity and an open mind, and you’ll find yourself creating images that aren’t just photos but pieces of visual art.
In this boundless pursuit, there are endless ways to grow and innovate, so keep exploring and let your imagination take flight.
Frequently Asked Questions About Bird Flight Photography
1. What is the best camera setting for bird flight photography?
The best starting settings for bird flight photography are a fast shutter speed, continuous autofocus, and burst mode. Try using 1/1000s to 1/3200s, AF-C or AI Servo, and high-speed continuous shooting. These settings help you freeze motion and keep the bird sharp while it moves.
2. What shutter speed should I use for birds in flight?
For most birds in flight, start with 1/1000s. For fast birds, small birds, or wing action, use 1/2000s to 1/3200s. Larger birds like herons, eagles, and vultures may be easier to capture at slightly slower speeds, but faster shutter speeds give you sharper results.
3. What lens is best for photographing birds in flight?
A telephoto lens is best for bird flight photography. A 300mm lens can work for beginners, but 400mm, 500mm, or 600mm lenses give better reach for distant birds. Zoom lenses like 100-400mm, 150-600mm, or 200-600mm are excellent because they allow flexibility when birds fly closer or farther away.
4. Is autofocus important for bird flight photography?
Yes, autofocus is extremely important. Birds move quickly and unpredictably, so continuous autofocus helps your camera track the bird while it flies. Use AF-C on Nikon/Sony or AI Servo on Canon to keep moving birds sharp.
5. Should I use burst mode for birds in flight?
Yes. Burst mode increases your chance of capturing the best wing position, sharpest frame, and most dramatic moment.
Bird flight happens quickly, so shooting several frames per second gives you more usable images to choose from.
Affiliate opportunity:
Recommend high-speed SD cards or CFexpress cards for fast burst shooting.
6. What is the best time of day for bird flight photography?
Early morning and late afternoon are the best times. Birds are usually more active, and the light is softer and warmer.
This helps you avoid harsh shadows and gives your bird flight images a more beautiful natural glow.
7. How do I get sharper bird flight photos?
To get sharper flight photos, use a fast shutter speed, continuous autofocus, burst mode, and proper panning technique.
Keep your elbows stable, follow the bird smoothly, and continue tracking even after pressing the shutter. Also make sure your lens is clean and your shutter speed is high enough.
8. Where should I practice bird flight photography?
Start in places where birds are active and used to people, such as parks, wetlands, lakes, rivers, coastlines, and nature reserves. Large birds like herons, gulls, ducks, and raptors are easier for beginners because they move more predictably than small songbirds.
9. Do I need an expensive camera for bird flight photography?
No, you do not need the most expensive camera to begin. A camera with good autofocus, burst shooting, and a telephoto lens can help you get started.
However, cameras with advanced subject tracking and faster frame rates can make bird flight photography easier.
10. How can beginners improve bird flight photography quickly?
Beginners can improve quickly by practicing on larger, slower birds, using simple camera settings, studying bird behavior, and reviewing photos after every outing.
Do not worry about missed shots at first. Every blurry image teaches you something about timing, focus, exposure, or technique.
Conclusion: Mastering Bird Flight Photography Takes Practice, Patience, and Preparation
Bird flight photography is one of the most exciting skills you can develop as a bird photographer.
It challenges your timing, camera control, field awareness, and understanding of bird behavior.
At first, many shots may come out blurry, poorly framed, or missed completely—but that is part of the learning process.
The key is to keep practicing. Learn how birds move, use continuous autofocus, choose fast shutter speeds, shoot in burst mode, and position yourself where the light works in your favor.
Over time, you will begin to anticipate takeoffs, turns, wing positions, and landing moments before they happen.
The more you understand your subject and your equipment, the better your results will become.
If you are serious about improving your bird flight photography, start by strengthening your gear and technique.
You may also find these related guides helpful:
- Best Cameras For Bird Photography In 2026
- Best Lenses For Bird Photography
- Importance Of Light In Bird Photography
- How To Plan A Bird Photography Outing
If you want sharper, cleaner, and more professional bird flight photos, explore my recommended bird photography cameras, telephoto lenses, tripods, memory cards, and field accessories.
The right gear will not replace practice, but it can make your learning curve much easier and help you capture more successful shots in the field.
Happy bird photographing!!!!!!!!!
This post is an outstanding deep dive into what truly goes into mastering bird flight photography. I love how you break everything down—from understanding bird behavior to fine-tuning exposure—while keeping the focus on building real skill, not relying on luck. Your emphasis on observation is spot on; anticipating takeoff or flight patterns can completely transform the quality of a photo. The guidance on autofocus modes, back-button focusing, and exposure settings is incredibly practical and easy to apply in the field. I also appreciate how you highlight the importance of experimenting with different conditions, reviewing shots, and letting intuition develop over time. The reminder that growth comes from patience, practice, and paying attention makes the craft feel both accessible and inspiring. Your encouragement to embrace creativity—lighting, angles, backgrounds—adds the perfect finishing touch. This is exactly the kind of insight photographers need to keep progressing.
Do you ever use a drone for bird pics?
Thank you Andrejs for the kind words. I’m super excited you found the tips useful.
Yes, I do use drones for bird pics sometimes, but it’s a whole different ball game. I’ve got a Mavic 2 Pro, and it’s amazing for capturing birds in flight, but it’s all about respecting the birds’ space and following the rules.
I only use it for shots that would be impossible or too disturbing to get on foot, like capturing a flock’s behavior or a bird’s habitat from a unique angle.
Check out my website in the near future I will have articles looking at drone use in bird photography.
How about you, Andrejs? Do you have any experience with drones in bird photography.