
Capturing birds of prey while they are in action is probably one of the most exciting and challenging parts of wildlife photography.
Raptors like eagles, hawks, and falcons are fast, powerful, and not always predictable.
Getting those sharp, dramatic photos—especially of hunting, diving, or fast flight—takes a mix of timing, good technique, and a bit of patience.
I have spent more than a few hours waiting, tracking, and learning from near-misses, so here is an all-in-one guide to help you nail those epic shots.

Why Birds of Prey Action Photography is Tricky (And Awesome)
Getting a sharp photo of a raptor is a lot tougher than snapping a perched songbird.
Birds of prey move super fast, especially during eye-catching moments like hunting or territorial flights.
Every second counts, and the right shot can happen and vanish in the blink of an eye.
You do not need the priciest gear, since sharp action shots usually come down to knowing your camera, understanding bird behavior, and being in the right place at the right time.
So, here is what I will cover:
- How to read raptor behavior for perfect timing
- Best camera settings for sharp, clear action shots
- Pro tips for tracking and focusing
- How lighting and composition amp up drama
- Recommended gear
Understanding Birds of Prey Behavior
Knowing your subject always pays off in wildlife photography.
Raptors use different techniques to hunt and fly, and spotting their tell-tale moves really gives a boost to your timing for action shots.
Here are some behaviors to watch:
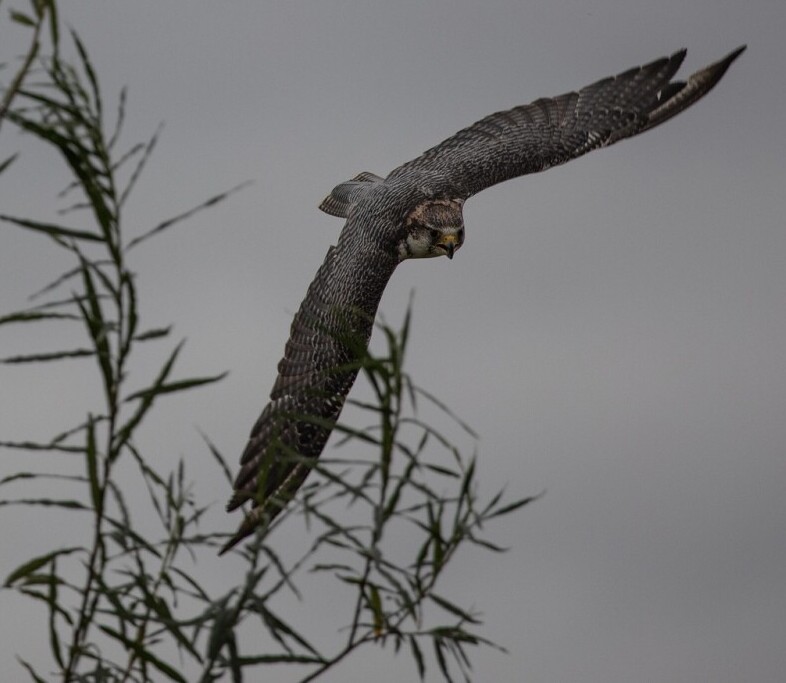
- Soaring and Gliding: Hawks and eagles ride thermals, scanning below for prey. Watch for sudden changes; they will often tuck wings and stoop when they spot something.
- Diving and Stooping: Falcons are famous for their high-speed dives. They will often circle, gain altitude, and then tuck in for those blistering fast drops.
- Perch and Strike: Many raptors sit on high posts or dead trees. Watch closely, since a tilt of their head or muscle tension signals they might launch into action.
- Wind Usage: Birds of prey often use head-winds for take off or hunting flights. Look for locations where the wind and open areas work in their favor.
Learning these patterns really helps you anticipate what comes next, so you are ready for the action instead of playing catch-up.
Spending extra time just watching raptors—without even lifting your camera—will pay huge dividends when you are tracking them in the wild.
Best Locations and Timing for Action Shots
Ideal Locations
- Open fields and grasslands: Great for harriers and hawks hunting rodents.
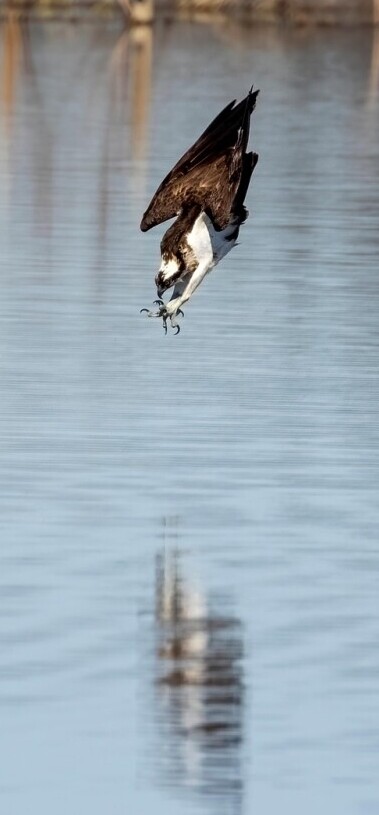
- Lakes, rivers, and coastlines: Ospreys, eagles, and kites often hunt over water.
- Cliffs and mountainous areas: Perfect for eagles, falcons, and vultures catching thermals or hunting.
Best Time of Day
- Early morning: Birds are active and hunting, plus the light is usually softer.
- Late afternoon: Raptors often hunt again before dusk, and golden light adds a nice effect.
Why Open Spaces Matter
Shooting in open areas makes tracking birds way easier and gives you clean backgrounds.
Busy landscapes, power lines, or dense woods can mess up autofocus and make your photos look cluttered.
When planning your outing, scout locations ahead of time to figure out where raptors are most likely to appear, and where you will have the cleanest views.
In addition, open spaces allow you to catch different types of raptor action, whether it is soaring, diving, or even hunting across long distances.
They help you keep the bird isolated in your frame, which is especially valuable when using long telephoto lenses.
Camera Settings for Birds of Prey in Action
Your camera settings matter a ton when you want action shots that are both sharp and dramatic.
It is important to set these before raptors get close, so you are not scrambling at the last moment.
Shutter Speed
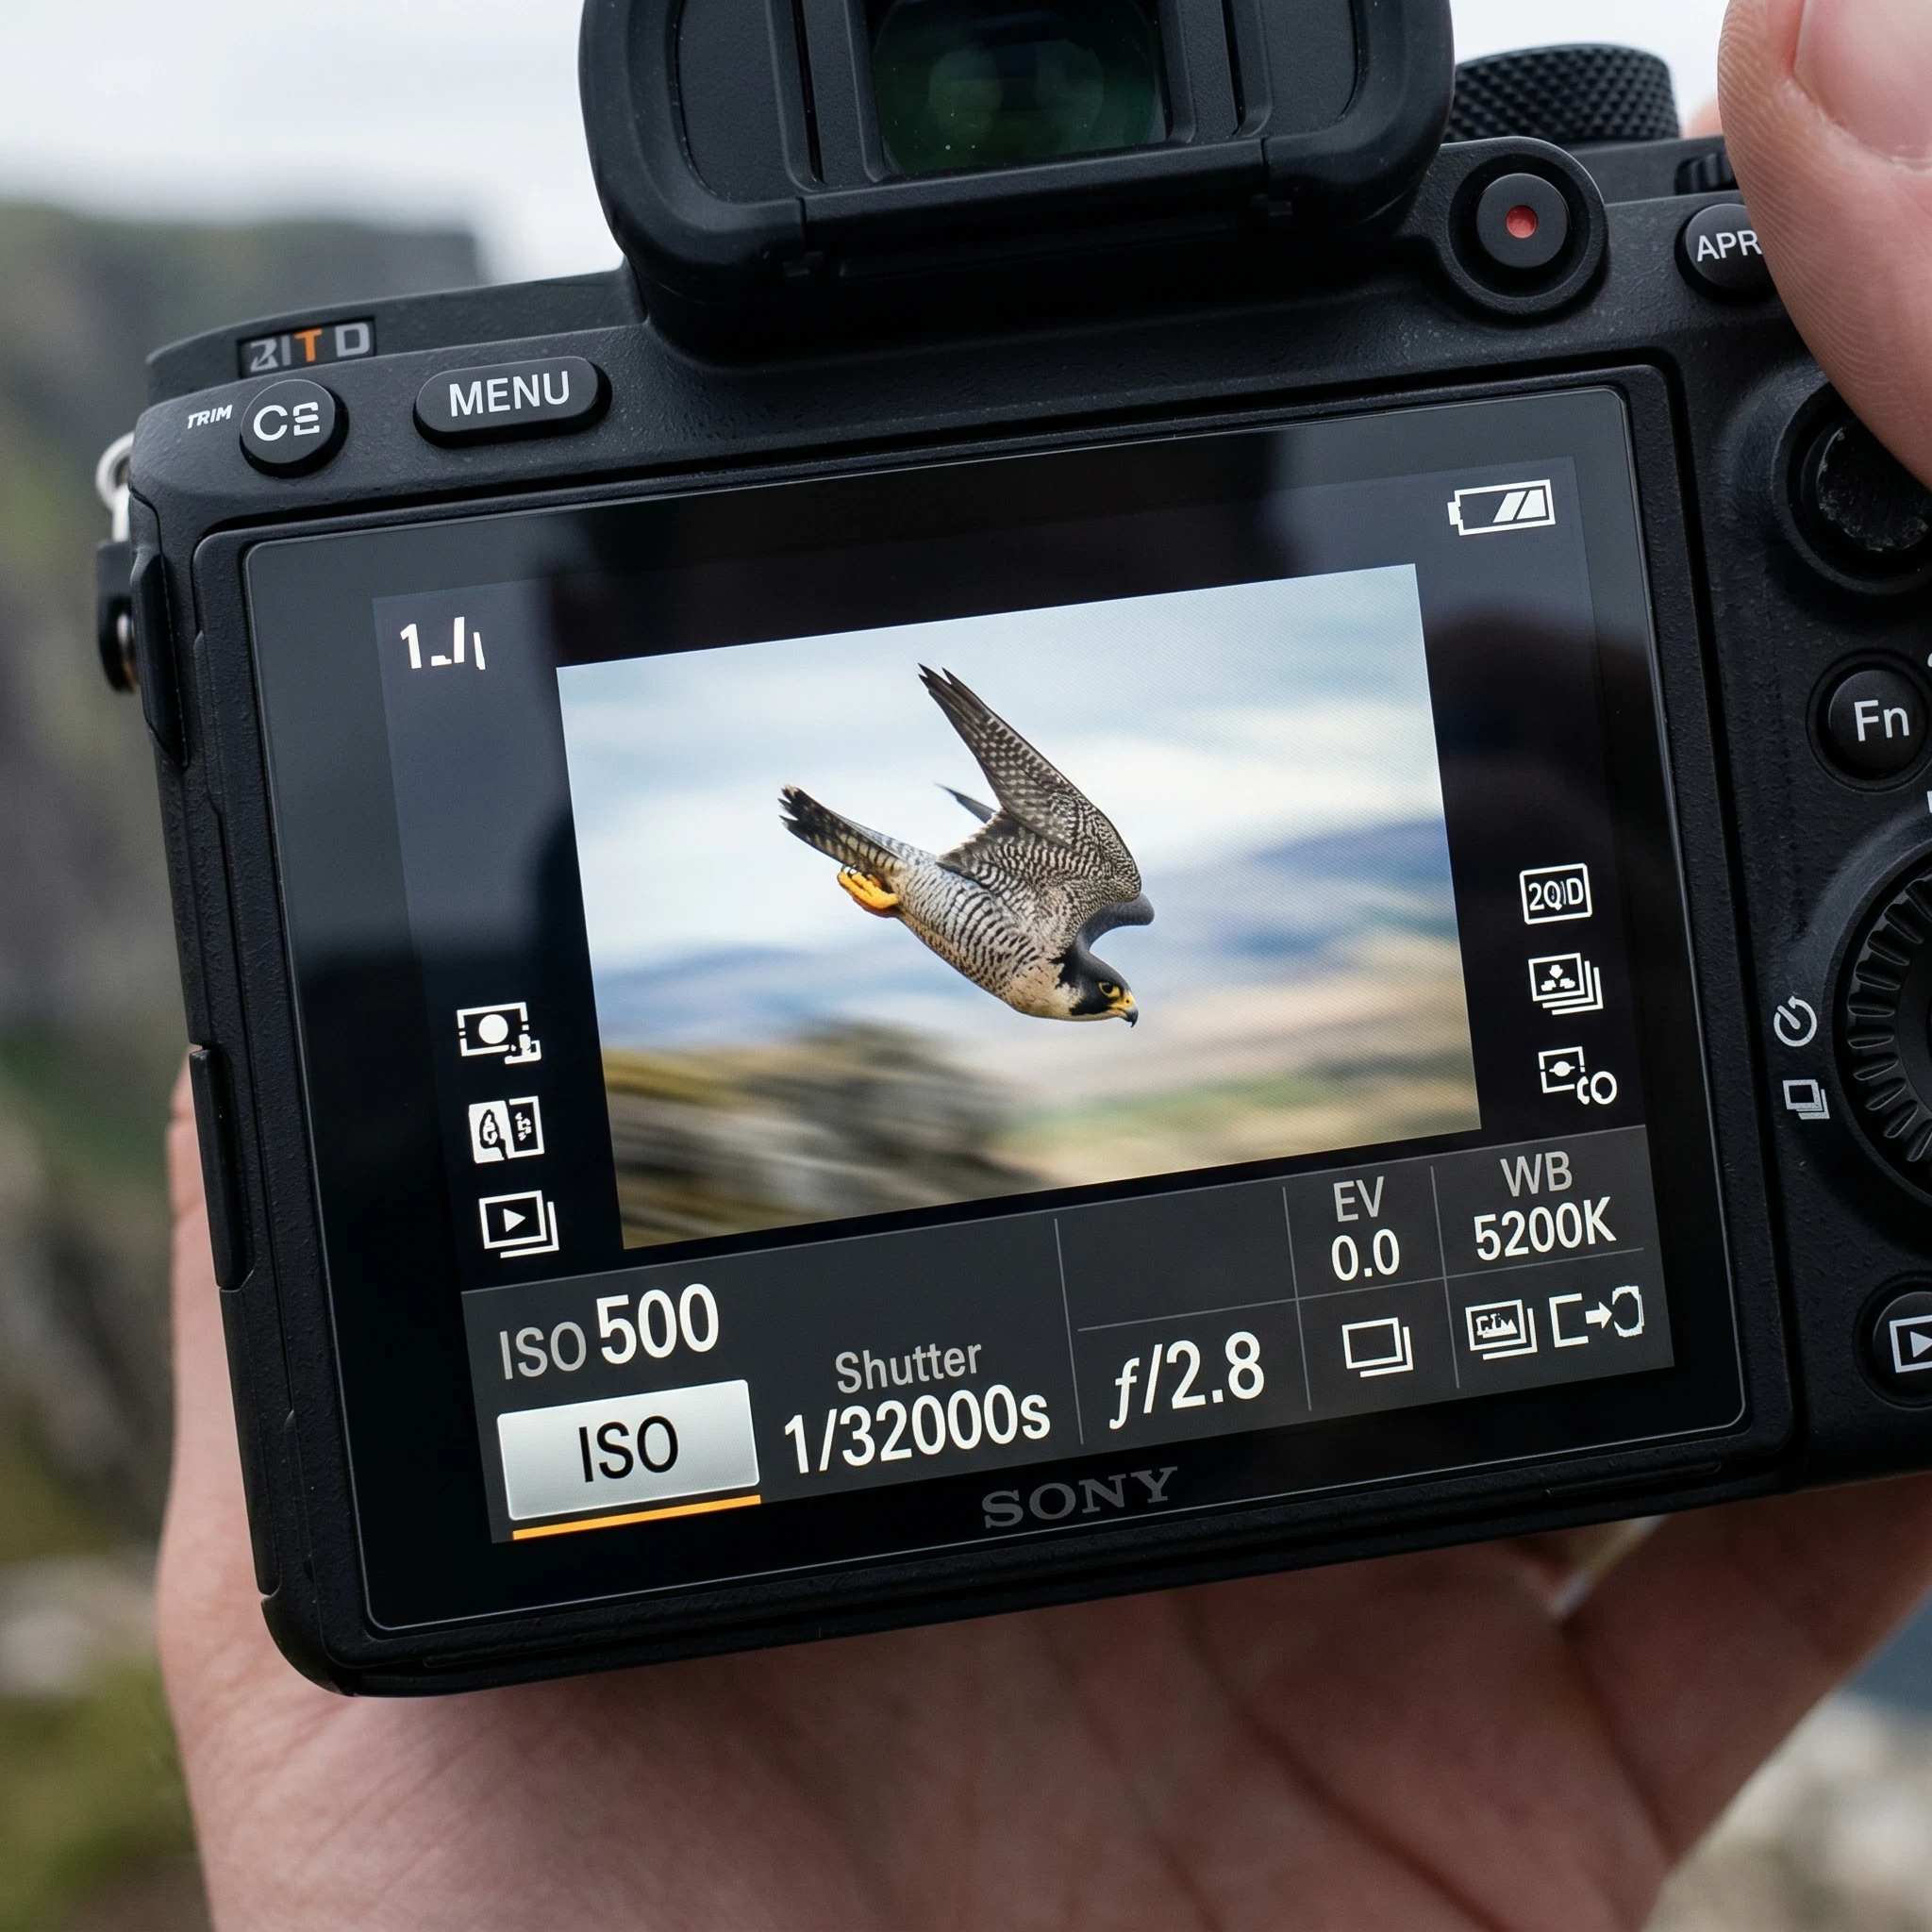
- Minimum: 1/2500 sec will usually stop wing blur on fast raptors.
- Ideal Range: 1/3200–1/4000 sec (or even faster if you have enough light).
Aperture
- f/4–f/5.6: Helps isolate the bird from the background, providing a bit of background blur.
- f/6.3–f/8: Gives you a bit more depth of field for sharpness when tracking unpredictable movement.
ISO
- Don’t be afraid to raise ISO to keep your shutter speed fast. Today’s cameras handle ISO 1600–3200 pretty well, so accept a little noise for a sharper shot.
Auto-focus Settings
- Continuous Autofocus: (AF-C for Nikon/Sony, AI Servo for Canon) keeps the bird in focus as it moves.
- Dynamic/Zone AF: Allows the camera to use several AF points to track unpredictable flight paths.
Burst Mode
- Turn on highspeed burst or continuous shooting. Capturing several images per second increases your odds of getting a killer pose.
Choosing the right settings is a balance between light and speed.
Practice adjusting them quickly—often the light changes as clouds pass or birds move into shade, so getting familiar with your camera helps you react in real time and not miss a split-second shot.
Best Lenses and Gear for Raptor Action Photography
Recommended Lenses
- 400–600mm Telephoto Lenses: These give you enough reach for distant birds but still allow for tight, detailed shots.
- Primes: Fast and sharp, but you wi-ll have to “zoom with your feet” to recompose.
- Zooms (e.g., 100-400mm, 200-600mm): More flexible for birds that move closer or farther without warning.
Support Gear
- Handheld shooting is often better for following raptors, but a monopod or gimbal can help if your setup gets heavy.
Accessories That Help
- High-speed memory cards (for those big burst sequences)
- Extra batteries (big lenses drain power quickly)
- A comfy camera strap for walking or hiking
- Weather protection for you and your gear (rain covers, lens hoods, etc.)
Products like the Sandisk Extreme Pro and Peak Design straps are worth checking out for durability and performance.
Using the right gear also means making sure your batteries are charged, your lens glass is clean, and your cards have enough space.
Preparing for all kinds of weather is key for long days in the field.
Lightweight rain covers are a lifesaver, and good gloves keep you comfortable when mornings get chilly.
Mastering Tracking and Panning Techniques
Smooth Panning
Swing your camera smoothly while matching the bird’s speed and direction.
Keeping both elbows tucked in and twisting from the waist helps avoid jerky movements.
Test your panning with common birds or even cars before trying on fast raptors; muscle memory is your friend here.
Lead the Bird
Try to leave space in front of the raptor when composing your shot—this gives your photo a dynamic sense of movement.
Following the bird with your focus point just ahead of its beak also helps you nail focus as it moves quickly through the frame.
Focus on the Head
You want the eye and beak sharp. Modern cameras with animal eye detection help, but if yours does not have it, keep your focus point on the bird’s head and recompose quickly as it moves.
Sharp eyes are the difference between a keeper and an also-ran shot.
Capturing Hunting, Strikes, and Epic Moments
Anticipate the Strike
Watch for signs that a bird is about to hunt—hovering, head tilts, or sudden drops.
Pre-focusing on a likely strike area gives you a better chance of catching the action right at the peak.
Use Burst Mode
Shoot in short bursts as the bird makes a move.
You will have a sequence to choose the best wing position or the exact moment of talons-on-prey.
Stay Ready
Keep your camera up and finger on the shutter. A lot of great moments last less than a second, so staying alert is super important.
Birds of prey do not send an email before they dive—sometimes action just erupts, and if you are ready you will catch it.
Some wild moments to check out for include snatching prey from water, mid-air food passes between adults, aerial dogfights, and juveniles learning to fly.
Each offers a slightly different challenge and visual pay-off.
Positioning and Field Strategy
Choose the Right Spot
Position yourself so that birds are flying toward or across your viewpoint, not away.
Set up where you have a clear line of sight and where backgrounds are simple (sky or blurred field).
Use Natural Light Direction
Shoot with the sun behind you or to your side.
This lights up the bird, shows off colors, and reduces harsh shadows under wings or tails.
If you have to shoot into the light, expose for the bird’s lighter parts, and use burst mode to up your odds.
Keep Your Distance
Never get so close that you disturb a raptor. Besides being better for the birds, it is easier to work with long lenses and keep your subject relaxed.
Use your longest lens to keep a respectful distance, especially around nests or young birds.
Scout your area in advance to spot the best vantage points.
Camouflage clothing and natural cover can help you get closer without making the bird nervous, but always put the welfare of wildlife above any photo opportunity.
Lighting Techniques for Action Shots
Front Lighting
With the sun at your back, you will get clean, well-lit shots showing off plumage detail and colors.
Especially useful when you want sharp, magazine-quality images.
Side Lighting
Side light adds shadows and definition to wings and feathers, which can make your images pop.
It also adds depth if you are photographing against a grassy or rocky background.
Backlighting
Backlighting creates silhouettes or gives a dramatic shimmering edge to wings.
It is a good move when you want moodier, artsy shots, especially during sunrise or sunset.
Experiment to see how different lighting angles step up your final results.
Composition Tricks for Dramatic Raptor Action Shots
Capture Wing Position
Timing your burst so wings are fully outstretched makes a shot feel powerful and dynamic.
Reviewing burst sequences helps pick the perfect moment.
Shots with wings up, out, or even slightly blurred can show a completely different feeling.
Use Clean Backgrounds
Shooting against the sky or a distant hill keeps the focus on the bird and reduces distractions.
You can often move a bit to shift a messy background out of frame.
Even simple adjustments in your position can make a so-so image into a wall-hanger.
Include the Environment
Tight shots of the bird are awesome, but sometimes pulling back a bit to include trees, water, or prey tells more of the story, especially if you catch a hunt or interaction.
Do not be afraid to mix in some variety by shooting both close-ups and wide scenes in the same outing.
Stuff That Trips People Up: Common Mistakes
- Using slow shutter speeds (anything slower than 1/2000 is risky for fast action)
- Poor tracking; that jerky or late panning makes blurry shots more likely
- Letting busy backgrounds distract or “hide” the bird
- Missing focus on the eye (the shot usually gets skipped in post if the eye is soft)
- Not being ready for sudden action (keep your camera up and remember, birds do not give warnings!)
Work on each of these areas.
Often, it is a small change—like adjusting your stance or boosting shutter speed—that makes the difference between a missed shot and a winner.
Beginner Practice Plan for Raptors
- Start with bigger, slower birds like vultures, red-tailed hawks, or ospreys; they give you more time to learn tracking and panning.
- Practice keeping a bird in the same spot in your view-finder, even if you are not shooting.
- As you get better, try photographing faster species like kestrels or peregrines.
- Go back to the same areas; familiar settings help you learn how birds behave and move in certain spots.
Pair up with other birders or photographers to share tips and get feedback.
Local wildlife reserves, parks, or birdwatching societies are great places to learn and expand your comfort zone.
Quick Settings & Gear Checklist
- Shutter speed: 1/2500 to 1/4000+
- Aperture: f/4–f/8
- AF-C (continuous autofocus) + burst mode enabled
- Telephoto lens: 400mm or more
- Fast memory cards and spare batteries
Keep this checklist on your phone or write it on a card in your bag.
When you arrive at your shooting spot, setting these up first means you will be ready when a raptor shows up.
Frequently Asked Questions
What shutter speed is best for birds of prey?
For fast raptors, you’re looking at 1/2500 second or faster. 1/3200 or even 1/4000+ is best for snappy wing action.
What lens should I use for raptor photography?
A 400–600mm telephoto is perfect for keeping a comfortable distance and getting closeup shots. A flexible zoom like a 100-400mm or 200-600mm works great for moving subjects.
How do I photograph birds hunting?
Learn to read their behavior, use burst mode, prefocus on hotspots, and stay patient. The trick is being ready the moment action happens.
Why are my action shots blurry?
This usually comes from shutter speed being too slow, missed focus, or shaky tracking. Double-check your settings (high shutter speed, AF-C, and good panning form).
Related Reads Worth Checking Out
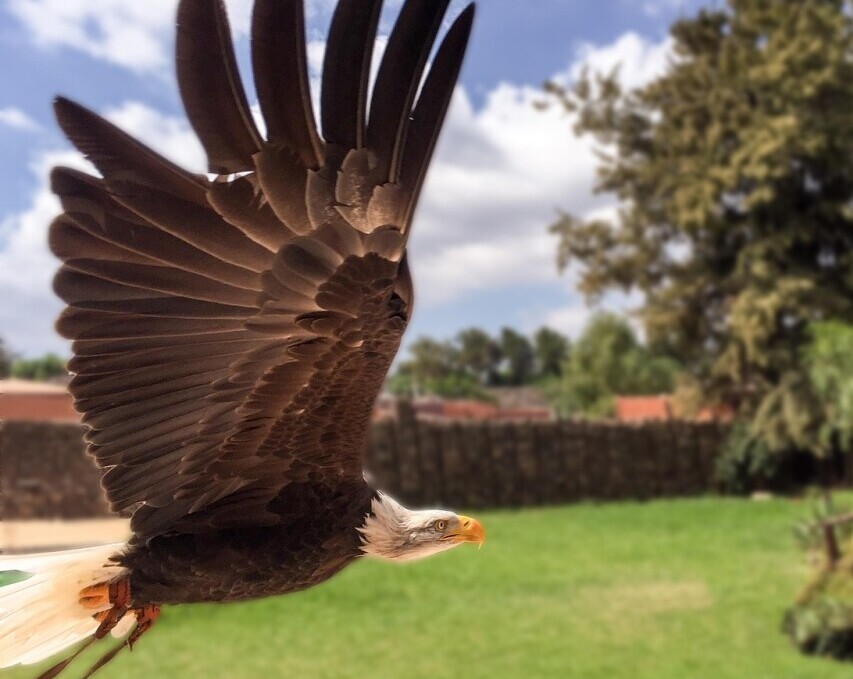
- Capturing the Beauty of the Bald Eagle
- Best Lighting Techniques for Bird Photography
- Photographing Rare and Elusive Birds
Getting showstopping action photos of birds of prey comes down to practice, patience, and a little bit of planning.
Every raptor, flight, and hunt is a chance to learn new things and get closer to nailing that legendary shot.
If you stick with it, your images will show real drama and beauty!
Leave a question or comment in the box below and I will be happy to get back to you!!!
Happy bird photographing!!!!!!
Capturing birds of prey in action is one of those things that looks easier than it actually is. From my experience, timing and patience are everything, and even when you think you’re ready, the unpredictability of their movement makes it challenging.
What stood out to me is how important it is to understand the bird’s behavior, not just rely on camera settings. I’ve noticed that anticipating movement makes a bigger difference than just having fast shutter speed alone.
In my opinion, this kind of photography is less about gear and more about practice, observation, and persistence the technical side matters, but it’s the field experience that really sharpens your shots.
Hi Monica,
“Anticipating movement makes a bigger difference than just having fast shutter speed alone.” Read that twice, everyone.
You just summarized 5 years of my own trial-and-error in one sentence.
Thank you for saying it from experience.“Looks easier than it actually is” — that’s the trap with raptors.
Social media is full of perfect stoop shots. Nobody posts the 900 frames where the falcon turned the other way 0.2 seconds before you pressed the shutter.
The unpredictability is what makes the sharp ones feel like winning the lottery.
You are exactly right: Gear sets the floor. Field craft sets the ceiling.Fast shutter speed gets you a frozen bird.
Anticipation gets you a story — talons out, nictitating membrane down, prey locked.
That is the difference between “sharp” and “dramatic
.”One thing I’ve learned that matches your “practice, observation, persistence” point:
Raptors hunt in patterns, not chaos.
Red-tails ride thermals in loops. Ospreys circle 3 times before a dive. Kestrels hover, then dip their head 2x before the drop.
Once you log 20 hours watching one species, you start seeing the tell.
Your finger starts moving before the bird does.
That is when keeper rates jump.
“Field experience sharpens your shots” — I am stealing that line. Because it is literally true.
Field hours = sharpness. Not megapixels.The tech side matters, but only to not ruin the moment you already predicted.
Camera captures.
You create.
Thanks for keeping the conversation honest.
Beginners need to hear this from someone who’s felt the frustration of “I was ready, but…” What raptor behavior surprised you most once you started really watching?
Best regards,
Raymond