
Photographing exotic birds in flight is a real test for any wildlife photographer, but it is a rewarding challenge.
When you manage to freeze that vibrant burst of feathers midair, the feeling makes all the effort worth it.
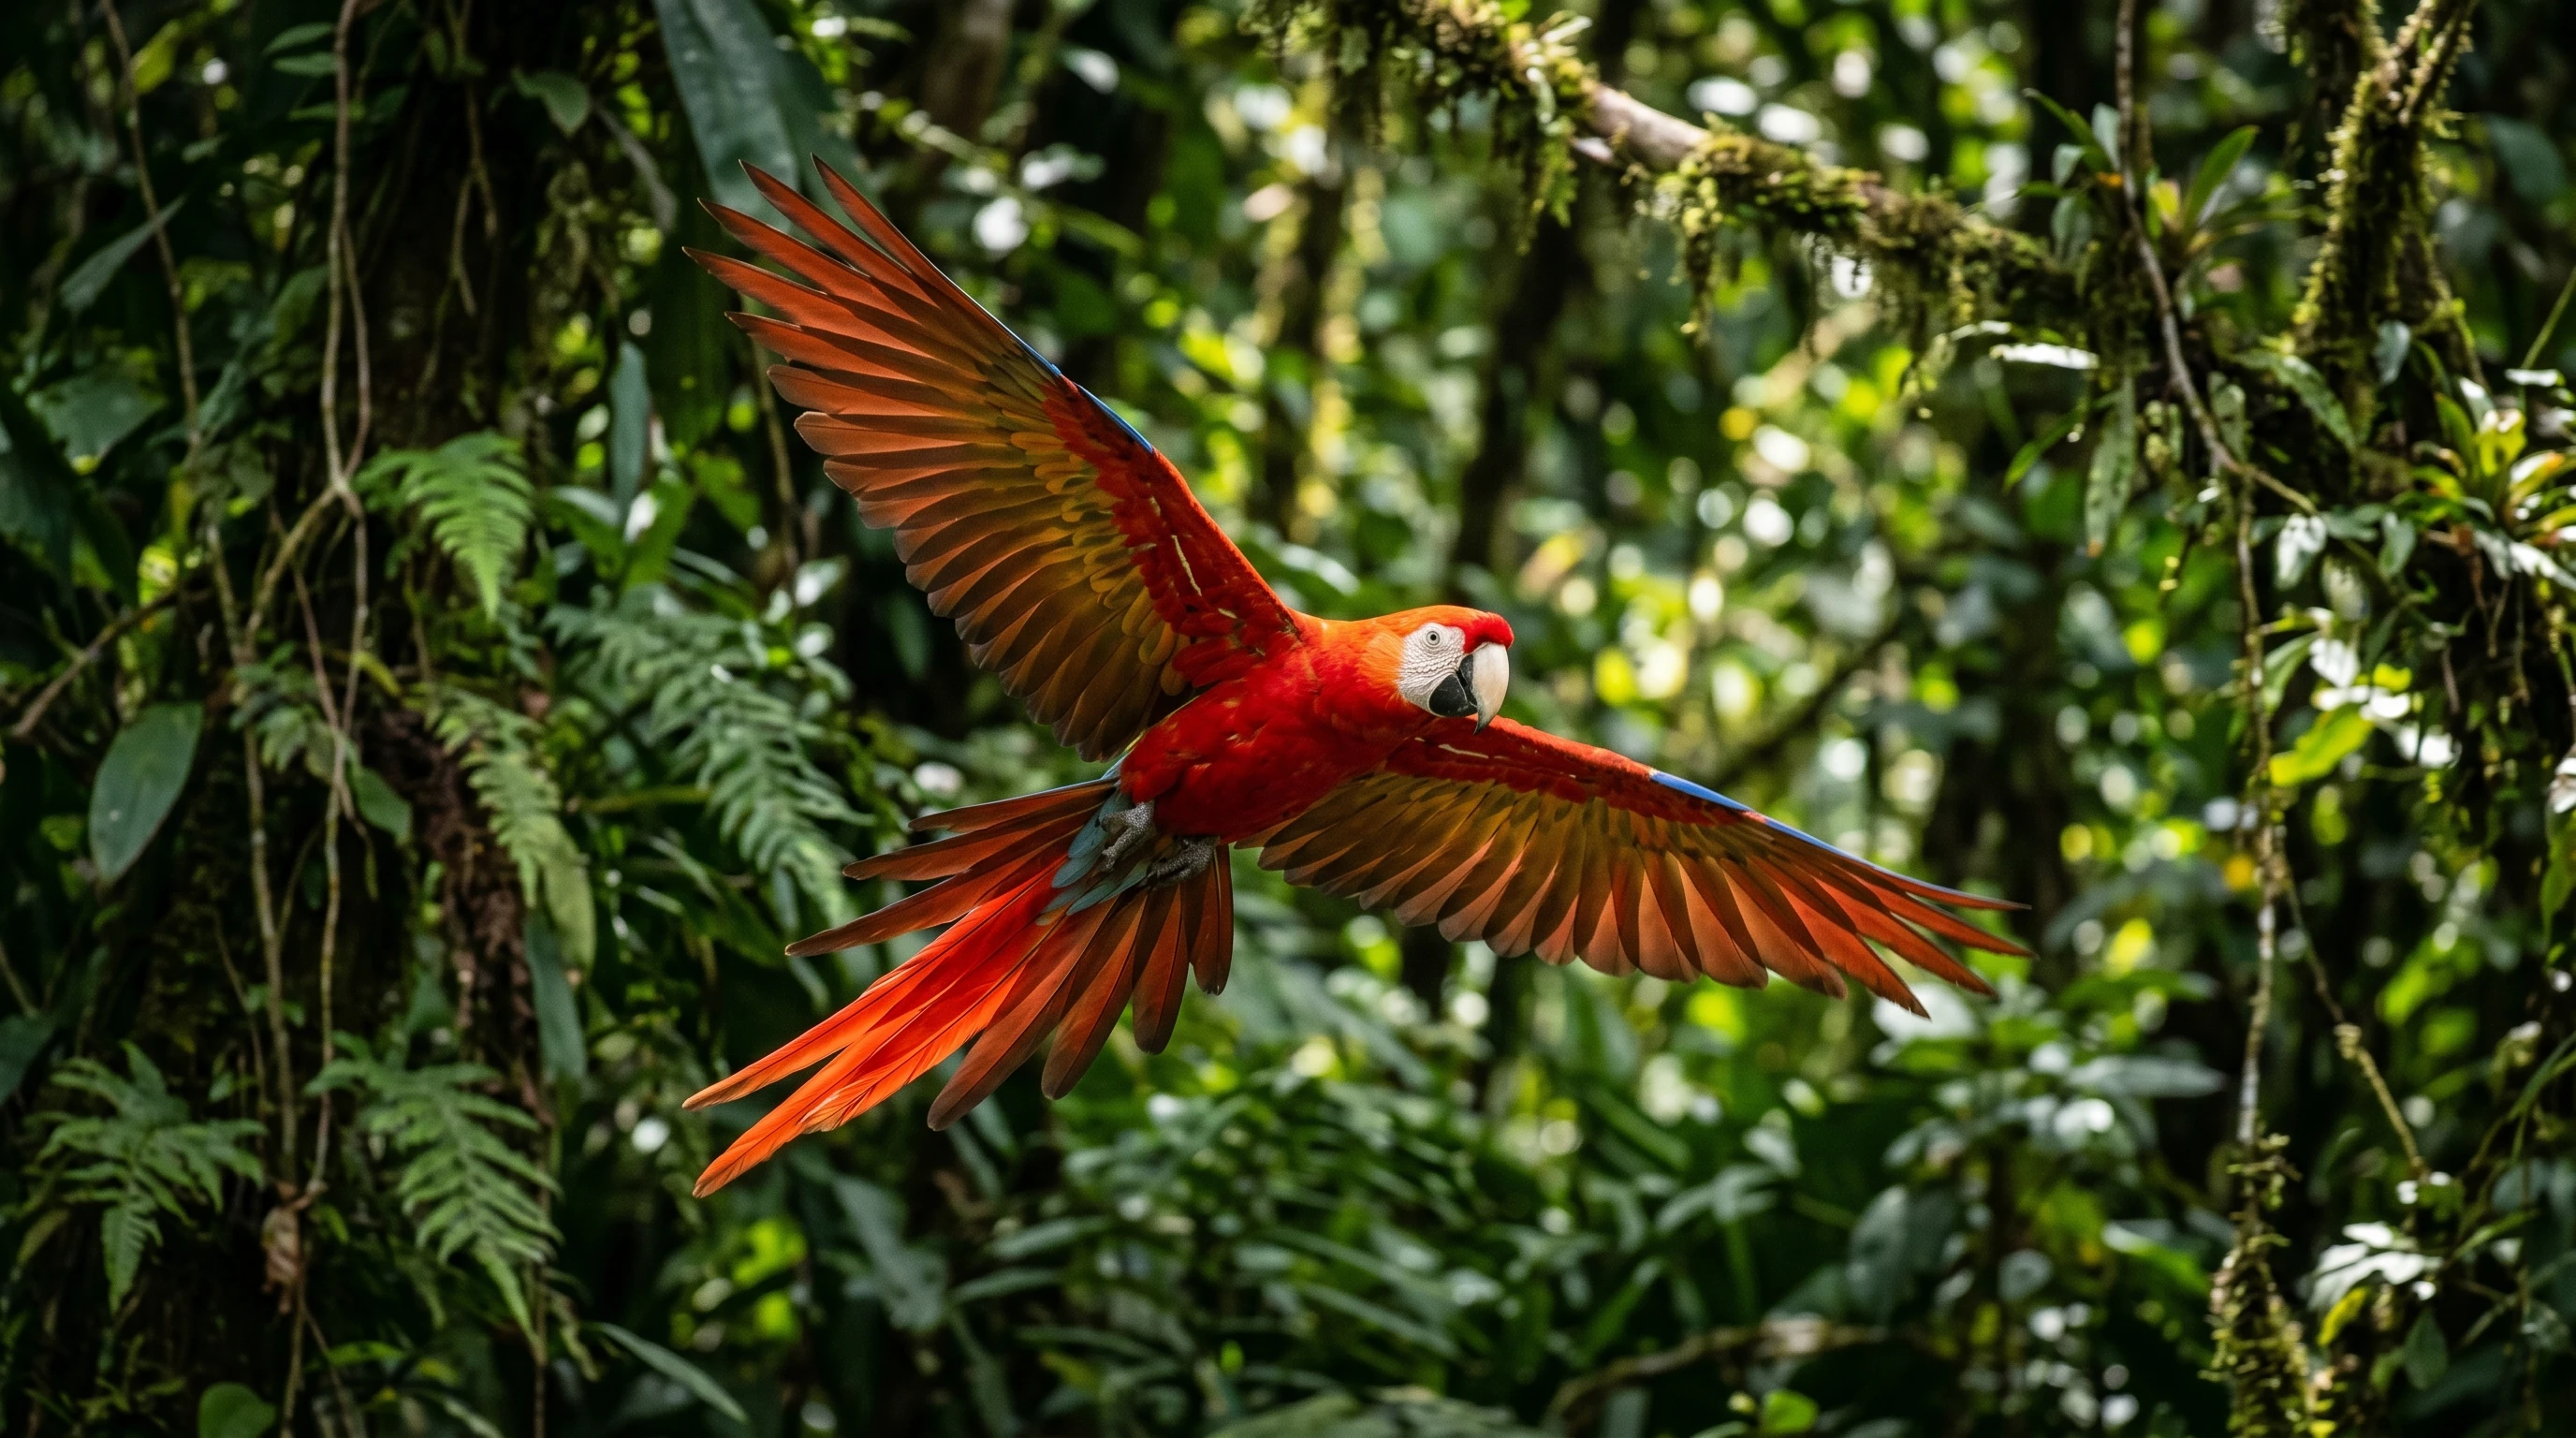
Snapping sharp, dramatic images of species like the Scarlet Macaw or Bird-off-paradise does not just take high-end gear; in my experience, strong tracking technique and slick timing matter way more.
Here, I will lay out what works best, what does not, and how to adapt for those wild, unpredictable moments when a rare bird suddenly launches into the sky.
What Makes Photographing Exotic Birds in Flight Tricky?
Exotic birds are not just colorful.
They are quick, alert, and love darting around in every possible direction. You might spend hours waiting for action, only to get a few real chances at decent flight shots.
Here is what makes it so challenging:
- Fast and unpredictable flight: Birds like macaws or bee-eaters can vanish from your view in a split second. Their wing beats are incredibly fast, making timing critical.
- Busy backgrounds: Dense rainforests and jungles add clutter that can totally throw off your auto-focus.
- Changing lighting: Cloud cover, sudden sunbeams, and deep shadows force you to adjust your camera quickly.
- Distance and limited access: Many exotic birds prefer high branches or dense foliage, making clean flight paths a rare find. Patience is key.
Top Spots and Timing for Birds in Flight Photography
Great Places to Try
- Rainforests and jungle edges: These zones are hot-spots, especially at sunrise or sunset.
- Open clearings within forests: Birds often travel between tree lines. Clearings give you room to track and focus without much clutter.
- Riverbanks and wetlands: Birds gather for water and food, offering open sightlines and less background mess.
Best Time of Day
Early mornings are prime: birds are most active, and the light is soft and rich.
Later afternoons can bring richer colors and dramatic shadows as well.
Avoid direct midday sunlight, which can wash out colors and cause harsh contrasts.
Why Open Space Helps
The wider the open area, the easier it is to follow birds, keep them separated from hectic backgrounds, and catch that special wing position.
Open skies or distant treetops help the bird stand out and let you nail focus more easily.
Perfect Camera Settings for Flight Shots
Getting sharp flight images is all about fine-tuning your camera’s settings and reacting quickly; you do not need to chase the newest gear every season.
Here is what I rely on for steady results:
Shutter Speed: Freeze the Action
- Minimum for small and fast birds: 1/2500 sec
- Ideal: 1/3200–1/4000 sec or faster
Anything slower and you risk motion blur, especially at the wings or wing tips.
Aperture: Control Your Depth
- f/4 to f/5.6 works well for focusing on the bird and blurring the background with creamy bokeh.
- f/6.3 to f/8 helps if you want a touch more depth when shooting flocks or birds at varying distances.
ISO: Do not Worry About Some Noise
Do not be afraid to boost ISO—1600 or 3200 is totally fair game to preserve fast shutter speeds.
It is better to fix a bit of grain in editing than miss sharpness and clarity in the moment, especially under jungle canopy or early dawn.
Autofocus Settings
- Continuous autofocus (AF-C/AI Servo): This is the must have setting. Your camera will keep tracking as the bird moves across the frame.
- Dynamic or zone autofocus: Select a group of focus points to let your camera track the action around your target better.
- Target the head or upper body: If the face and eye are sharp, the photo will really stand out, even if the edges of the wings are a touch soft.
Burst Mode: Capture the Peak Moment
Switch your camera to highspeed continuous shooting.
You will fire off multiple frames per attempt and boost your odds of getting that prime mid-flight pose.
Recommended Gear for Birds in Flight Images
While technique and persistence matter most, solid gear still helps.
Here is what I use and recommend:
Lenses
- 400-600mm telephoto: These let you reach distant birds and fill the frame without heavy cropping.
- Fast primes (f/4 to f/5.6): These offer clean backgrounds and maximum light, which proves invaluable in low light environments.
- Zooms (100-400mm, 200-600mm): Not quite as bright, but practical for tracking birds flying nearer than you planned. Flexibility goes a long way.
Support Gear
- Handheld shooting: Handy for tracking erratic flight paths quickly and reacting to sudden movements.
- Monopod or gimbal head: Helps if you are using heavy lenses or shooting all day, but they can limit rapid movement.
Accessories
- High speed memory cards: Absolutely crucial so you never miss a shot due to card lag.
- Extra batteries: You will go through batteries quickly out in the wild—always have backups ready.
- Comfortable, durable camera strap: Keeps your camera ready to go and supports those long waits in the field.
- Protective filter: Shields your lens from rain, dust, or bumps, which are all common in the wild.
Tracking and Panning: Keeping Up with Super Fast Birds
Spot-on settings do not mean a thing if you cannot keep a moving bird sharply in the frame and well-focused.
Here what has helped me nail those shots:
Smooth, Steady Panning
Pan with your body and camera in unison to match the bird’s movement.
Instead of jerky motions, use your waist or shoulders for a smooth twist.
Consistent practice on local birds will tune up your technique.
Lead the Bird
Always leave some space in front of the bird while framing. This keeps your photos from looking cramped and emphasizes motion.
Focus on the Head and Eye
Sharp eyes grab a viewer’s attention fast.
Rely on autofocus and keep your mind on tracking the head; a soft wing edge now and then won’t matter as much.
Field Tactics and Position Tips
Anticipate and Position Yourself
- Look for birds following predictable paths: maybe flying between fruit trees or favorite perches. Staying alert to these “routines” can make a huge difference.
- Face where you expect them to appear, so you are already lined up for them flying toward you or sideways, which leads to stronger images.
Choose Open or Clean Backgrounds
Try to position yourself so that sky or distant treetops form your background.
Open spaces make auto-focus easier and bring out eye-catching colors against the plain background.
Watch for Movement Cues
Learn the subtle signals that birds give before taking off, such as lifted crests, quick wing stretches, or alert head turns.
Catching these behaviors in advance means you would not be caught off-guard at the critical moment.
Lighting Tactics for Birds in Flight
Lighting makes all the difference for brilliant bird images, especially with species that sport intense colors.
Here is how I get the best out of natural light:
Front Lighting
Shooting with sunlight behind you boosts colors and reveals feather details.
This orientation optimizes autofocus accuracy and dims down unwanted silhouettes.
Side Lighting
Side light brings out feather texture, depth, and shape in your photos.
It can create cool drama with shadow, but be aware not to lose too much visual detail.
Backlighting
Back or rim lighting can give your subjects a glowing effect or result in powerful silhouettes.
Just be prepared for more autofocus challenges and sometimes needing to raise your exposure.
Composition Ideas for Dramatic, Dynamic Photos
Give Room to Move
Always allow empty space ahead of the flying bird.
This creates the feeling of motion and prevents your photo from looking awkwardly tight.
Pay Attention to Wings
Wing position is a big deal for a strong shot.
Frames where wings are fully stretched or perfectly symmetric always stand out the most.
Shoot in bursts to improve your chances.
Use Contrast for Separation
A pale sky or blurred foliage behind your subject helps it stand out.
Try hard to compose so branches or leaves do not cut through the bird’s body in the final image.
Common Pitfalls (And How to Dodge Them)
- Using too slow a shutter speed; blurry photos are almost inevitable.
- Struggling with tracking, or letting birds get too close or far before snapping.
- Shooting with backgrounds that distract from your subject (watch for messy foliage, branches, or people).
- Forgetting burst mode, or missing the most expressive wing position because you only take one frame.
- Standing in the wrong position—always keep sun angle and open backgrounds in mind.
Smart Practice Plan for Beginners
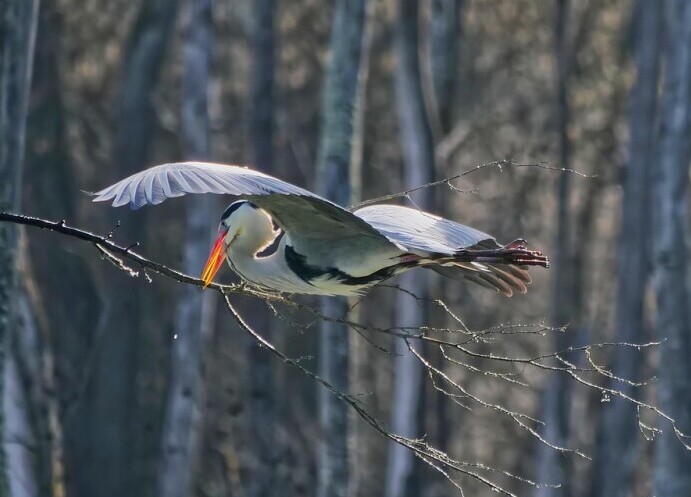
- Start with bigger birds like herons, egrets, or ibises; their slower, more predictable flight is much easier to track.
- Use early sessions to just practice your panning and focus, even if you miss more shots than you keep.
- Work up to small, zippy birds as your reflexes sharpen.
- Return to the same spots and get familiar with local bird habits. Learning patterns helps your timing and success massively.
Quick Checklist: Settings and Gear Before the Action
- Shutter speed: 1/2500 to 1/4000+
- Aperture: f/4 to f/8 based on your setup and lighting
- Continuous autofocus and highspeed burst mode
- Telephoto lens, ideally 400mm or more
- Reliably fast memory cards—lag can ruin crucial shots
Frequently Asked Questions
What shutter speed is best for birds in flight?
Go for at least 1/2500 second for small, fast species. When the light is good, move up to 1/3200 or 1/4000. The results are sharper wings and crystal clear eyes.
What lens should I use for bird-in-flight photography?
Look for lenses in the 400600mm range for distant or small birds, with zooms adding flexibility and primes providing speed and lower weight.
How do I track birds in flight?
Rely on continuous autofocus, wide or zone focus area modes, and lots of regular practice with steady panning. Keeping both eyes open lets you spot sudden direction changes too.
Why are my bird photos blurry?
Most often, blur comes from a shutter speed that’s too slow or autofocus not catching your target. Always doublecheck burst mode and AF-C are enabled, bump ISO as needed, and make sure your technique is steady.
Staying Patient: Lessons from the Field
Photographing birds in flight is not solved just by upgrading your camera or chasing trends.
The best gains come from getting out there, experimenting, and learning both from misses and successes.
Every morning outdoors brings new insights.
Exotic birds brag color, energy, and unpredictability, giving exactly the kind of thrill that wildlife shooters cherish.
Your best friend is patience—enjoy the ride, and don’t beat yourself up if you miss a shot.
Try again tomorrow and celebrate the small wins along the way.
Want to learn even more about bird and nature photography?
If this guide helped you, check out these topics for the next step:
- Photographing Exotic Birds in Their Natural Habitat
- Best Lighting Techniques for Bird Photography
- Capturing Bird Feathers in Detail
Happy bird photography!!!!
Photographing birds in flight has always seemed tricky to me, so it was interesting to see how much preparation and observation go into getting those sharp, dramatic shots. I like how you highlighted the importance of understanding your subject’s movement instead of just relying on gear alone. That perspective makes the process feel more approachable.
Would you recommend practicing on common local birds first before trying to capture more exotic ones, or does it make more sense to jump straight into the challenge?
Hi Monica,
You nailed it — reading movement beats buying gear every time.
That mindset is what makes flight shots approachable.Definitely practice on common local birds first.
Exotics are rare + unpredictable.
If you are still learning panning, AF tracking, and takeoff cues, you’ll burn shots you cannot get back.
Pigeons, gulls, sparrows are your flight school: they teach you to predict launches, track erratic motion, and nail exposure fast.
Master a pigeon banking into sun and a macaw will feel easy.
My rule: “Reps before rarities.” The pros shoot pigeons between trips.What birds are common near you?
I will suggest two drills to start.
Best regards,
Raymond.