
Photographing ducks and geese is one of the most rewarding (and honestly, approachable) ways to get into wildlife photography.
These birds are everywhere from local ponds to massive migration stops, and catching them in just the right light feels both challenging and pretty addictive.
I find waterfowl are great for learning camera settings, developing fieldcraft, and building confidence without needing an expensive guided trip.
Light, angle, and timing matter far more than owning the fanciest camera setup.
This guide covers what you need to know for getting tack-sharp, eye-catching shots of ducks and geese, whether perched, swimming, or launching into flight.
Why Waterfowl Make Awesome Subjects (Especially for Beginners)
There are a couple of reasons ducks and geese are perfect when you are picking up bird photography.
For one thing, they are predictable, and you will find them doing the same behaviors at the same spots day after day.
Plus, most are not as skittish as smaller songbirds or elusive raptors, so you get more chances to practice your skills.
You also do not need to head to remote wild places; loads of birds are comfortable in city parks, golf course ponds, and public lakes close to home, making practice way more accessible.
This article covers:
- How to find and read waterfowl behavior (so you can focus before the action starts)
- Best spots and timing for gorgeous photos
- Camera settings that actually work for birds on water and in flight
- Lighting and composition pointers that bring images to life
- Gear breakdowns, with some handy recommendations
Understanding Waterfowl Behavior
Recognizing common duck and goose behaviors makes it way easier to anticipate their movement and capture those action shots.
Here is what to watch for:
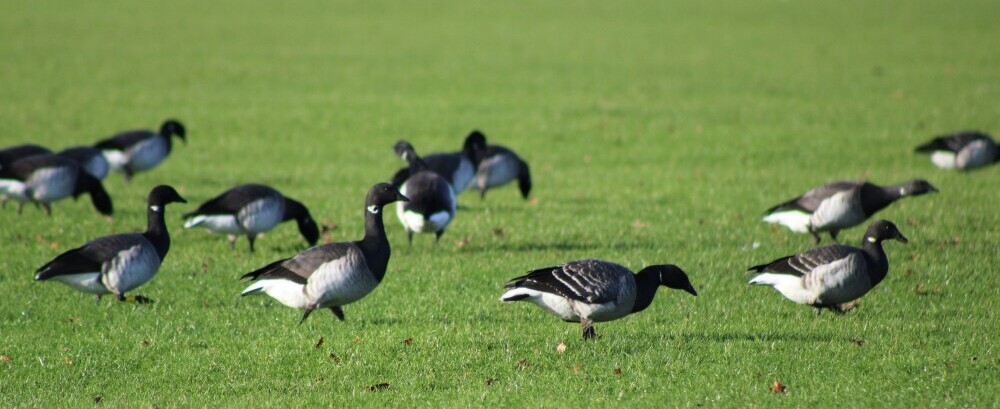
- Feeding patterns: Ducks usually feed on the water’s surface or tip up to dabble, while geese tend to graze along grass and shorelines. Birds that are feeding heavily will probably stick around for a while, giving you more time to shoot.
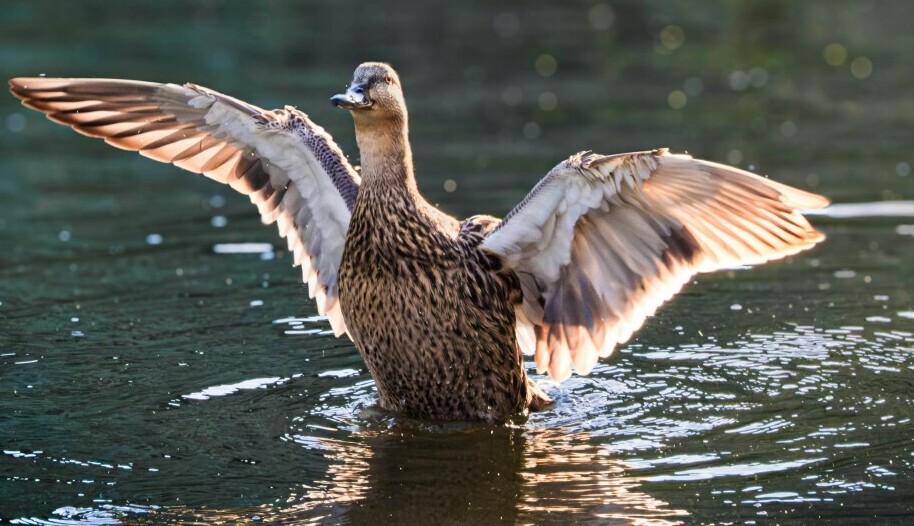
- Swimming and resting: Paddling birds may preen, shake, yawn, or stretch—these movements look awesome in photos. You might also see some unique behaviors, such as head-dunking or underwater foraging in certain species.
- Takeoff patterns: Ducks often “run” across the top of the water before getting airborne, flapping and splashing along the way. Geese are famous for this too, and you will spot clues like head stretches and tense, alert postures before take-off.
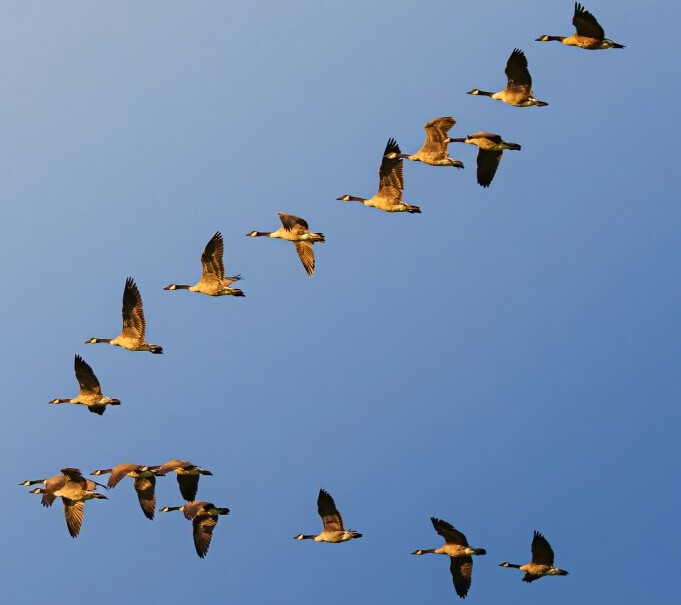
- Flight formations: Geese frequently launch and fly in V-shaped formations or line up with family groups. Tracking these lines makes for dramatic wide images that really catch the eye.
Watching behaviors helps set up your shot before the main event.
You will spot when birds are likely to move, take off, or interact, leading to way more keepers.
With a bit of patience, you will start to predict these moves and feel a deeper connection to your subjects.
Spending time with the birds and learning their routines is a sure fire way to improve your timing and overall results.
Best Locations and Times for Waterfowl Photography
Great Places to Find Ducks and Geese
- Lakes and ponds: These are the classic spots, especially if there are open banks where you can move close or shoot low. Many towns have public access spots that work beautifully for beginners and experienced photographers alike.
- Slow rivers and wetlands: You will often see more interesting water and plant backgrounds, plus plenty of birds wading or swimming. Wetlands can also provide chances to photograph species you might not find on park ponds.
- Coastal estuaries: Salt marshes support huge numbers of waterfowl, especially in winter, with lots of wild and open scenery. These locations often host rarities during migration and reveal endless backgrounds and moods.
- Public parks: City parks with ponds are ideal for practicing. The birds are used to people and let you get closer for clean portraits or reflections. These locations are also family friendly and accessible all year.
Best Times of Day
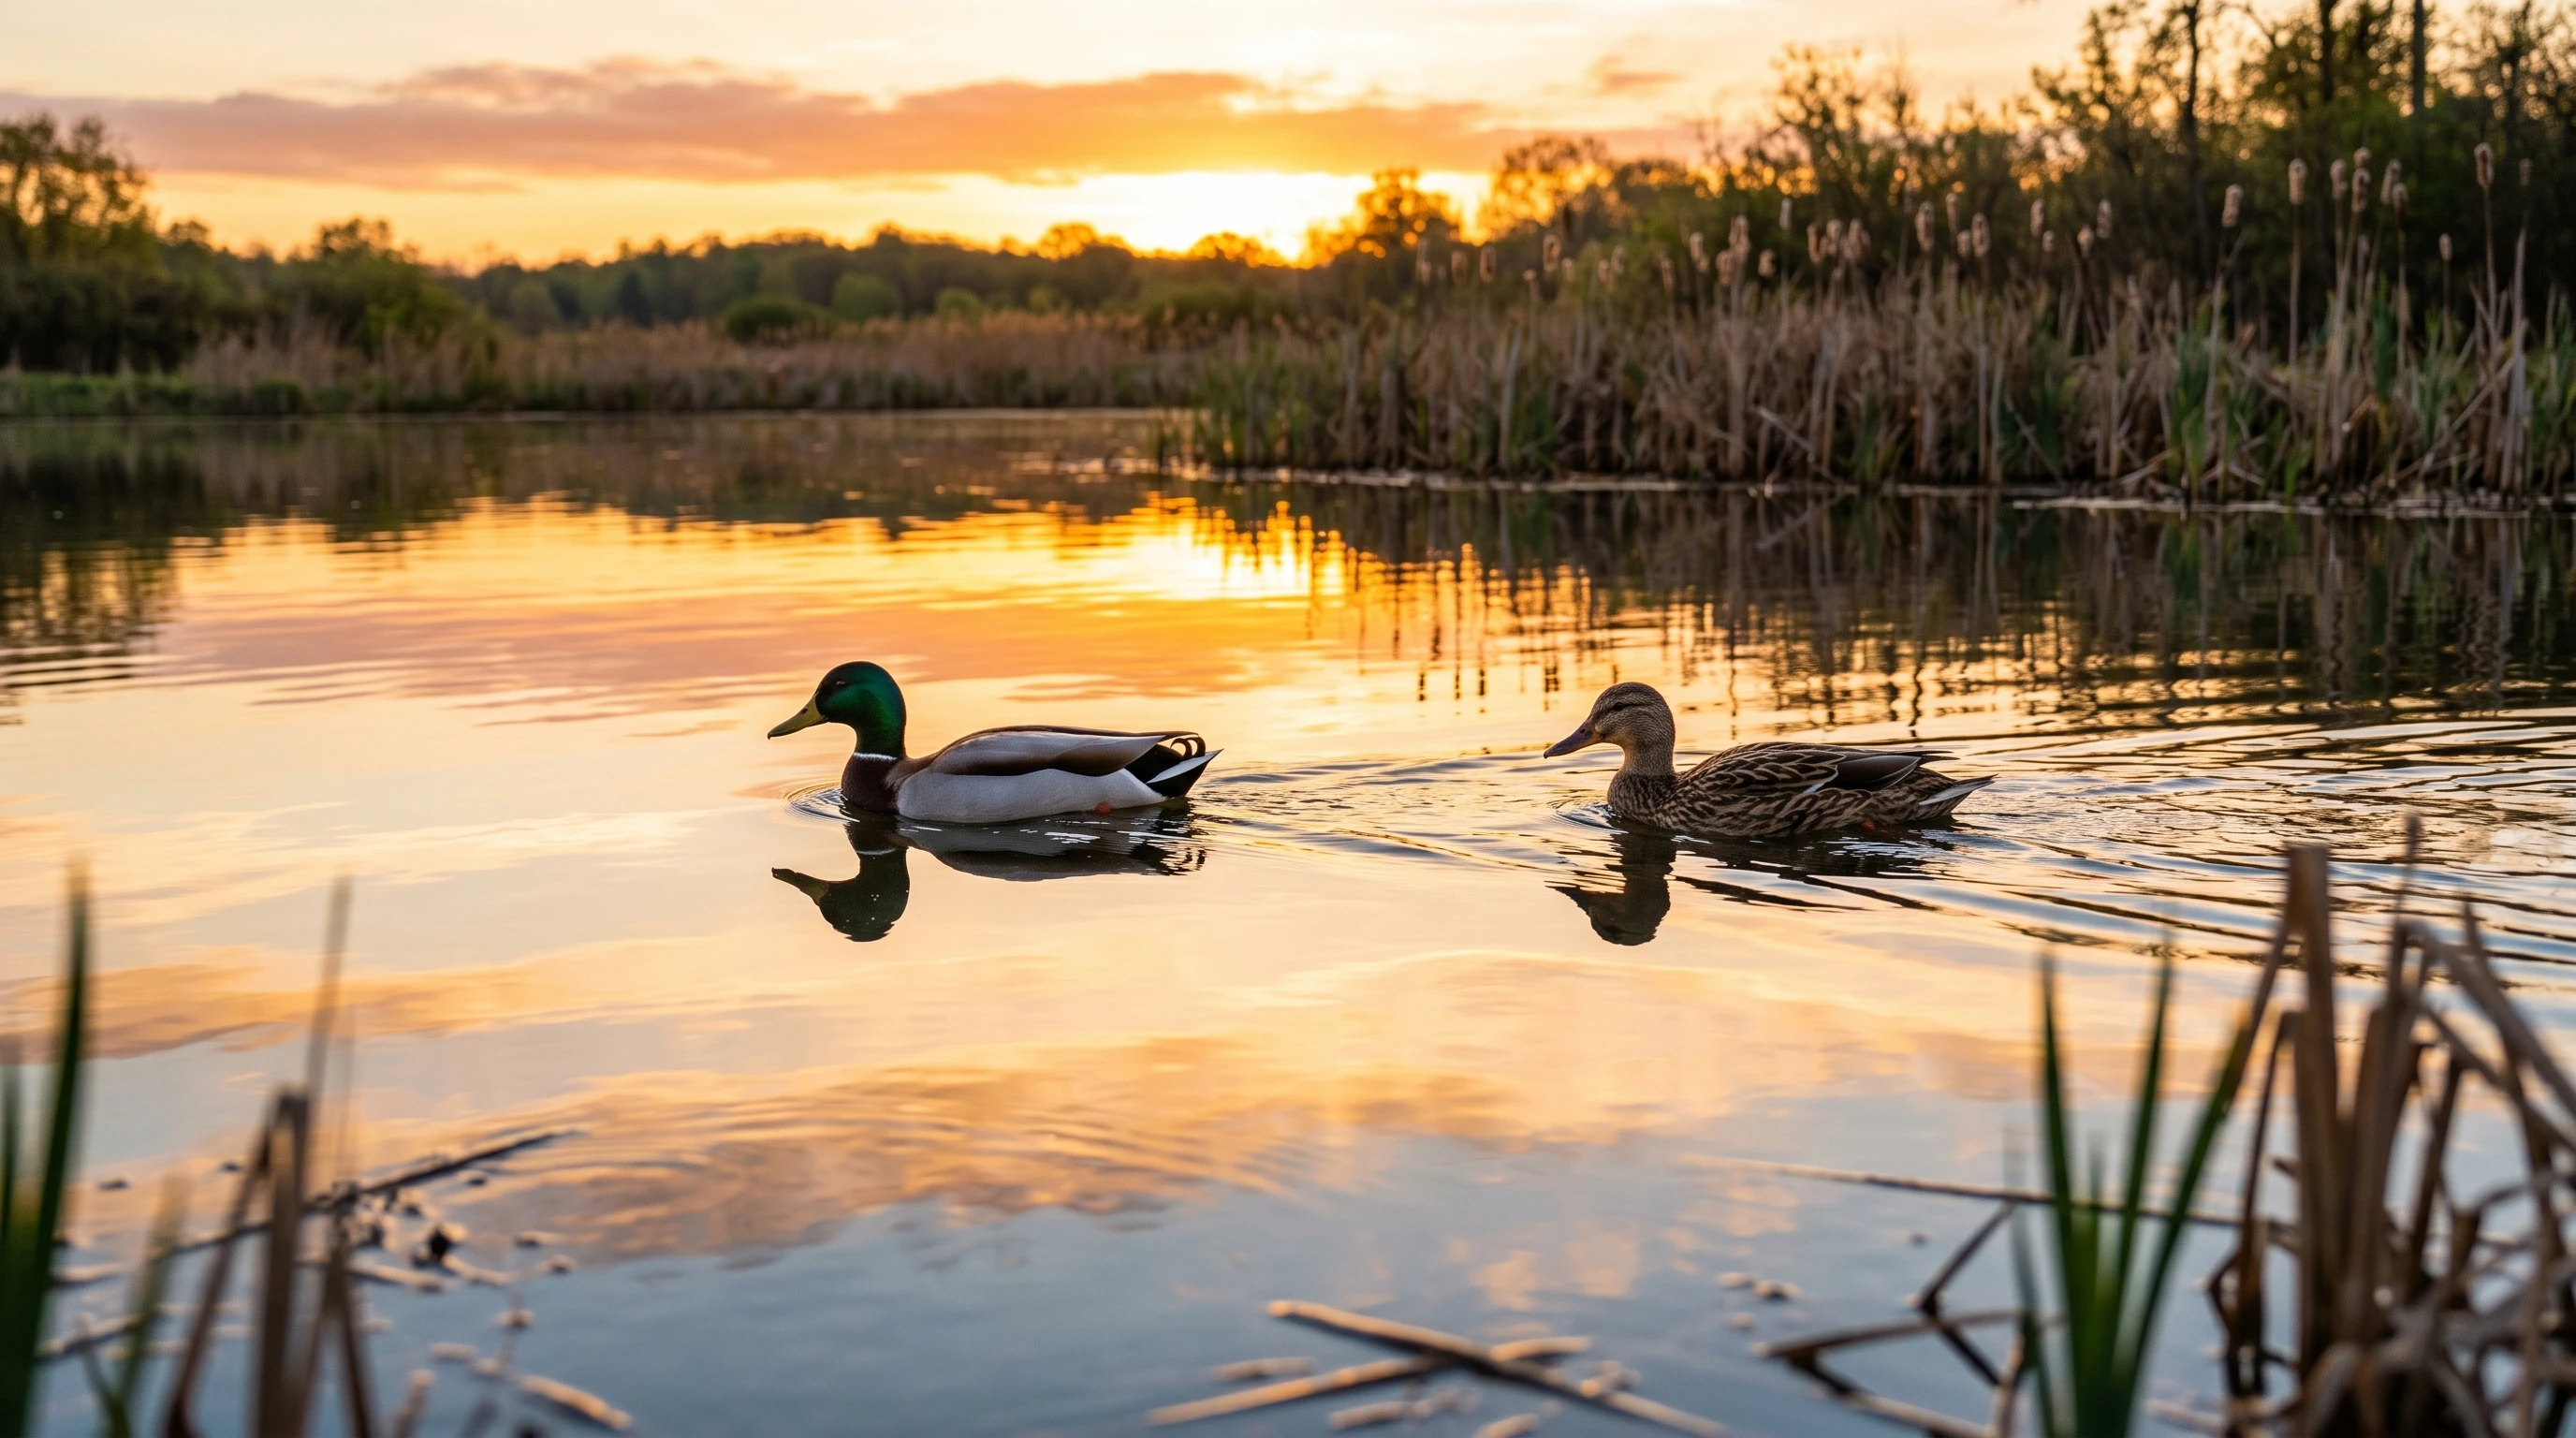
- Early morning and golden hour: The hour after sunrise offers soft, angled light for rich colors and less harsh shadows. Water reflects beautifully, and the air is often smoother so you pick up those perfect reflections.
- Late afternoon: Warmer tones and long shadows can give your images loads of mood, especially when the sun starts to set behind your subjects. The softer light helps avoid overexposing white birds and brings out feather detail.
Seasonal Tips
- Migration seasons (spring/fall): You might see huge mixed flocks and a variety of species passing through your favorite spots. Be ready for surprise visitors and changing numbers day by day.
- Winter: In colder regions, lakes and rivers that stay open can concentrate birds into bigger groups. This makes them easier to track down and photograph, especially when ice pushes more birds together in smaller areas.
- Summer: Breeding birds and ducklings add fresh opportunities. Be careful not to disturb nests or chicks; stick to public paths and keep your distance to avoid stress. Watching families grow up can provide charming storylines in your photos.
Camera Settings for Ducks and Geese
I am constantly adjusting my camera as lighting changes, birds get more active, or groups start moving.
Here is what works well for waterfowl photography in different scenarios:
Shutter Speed
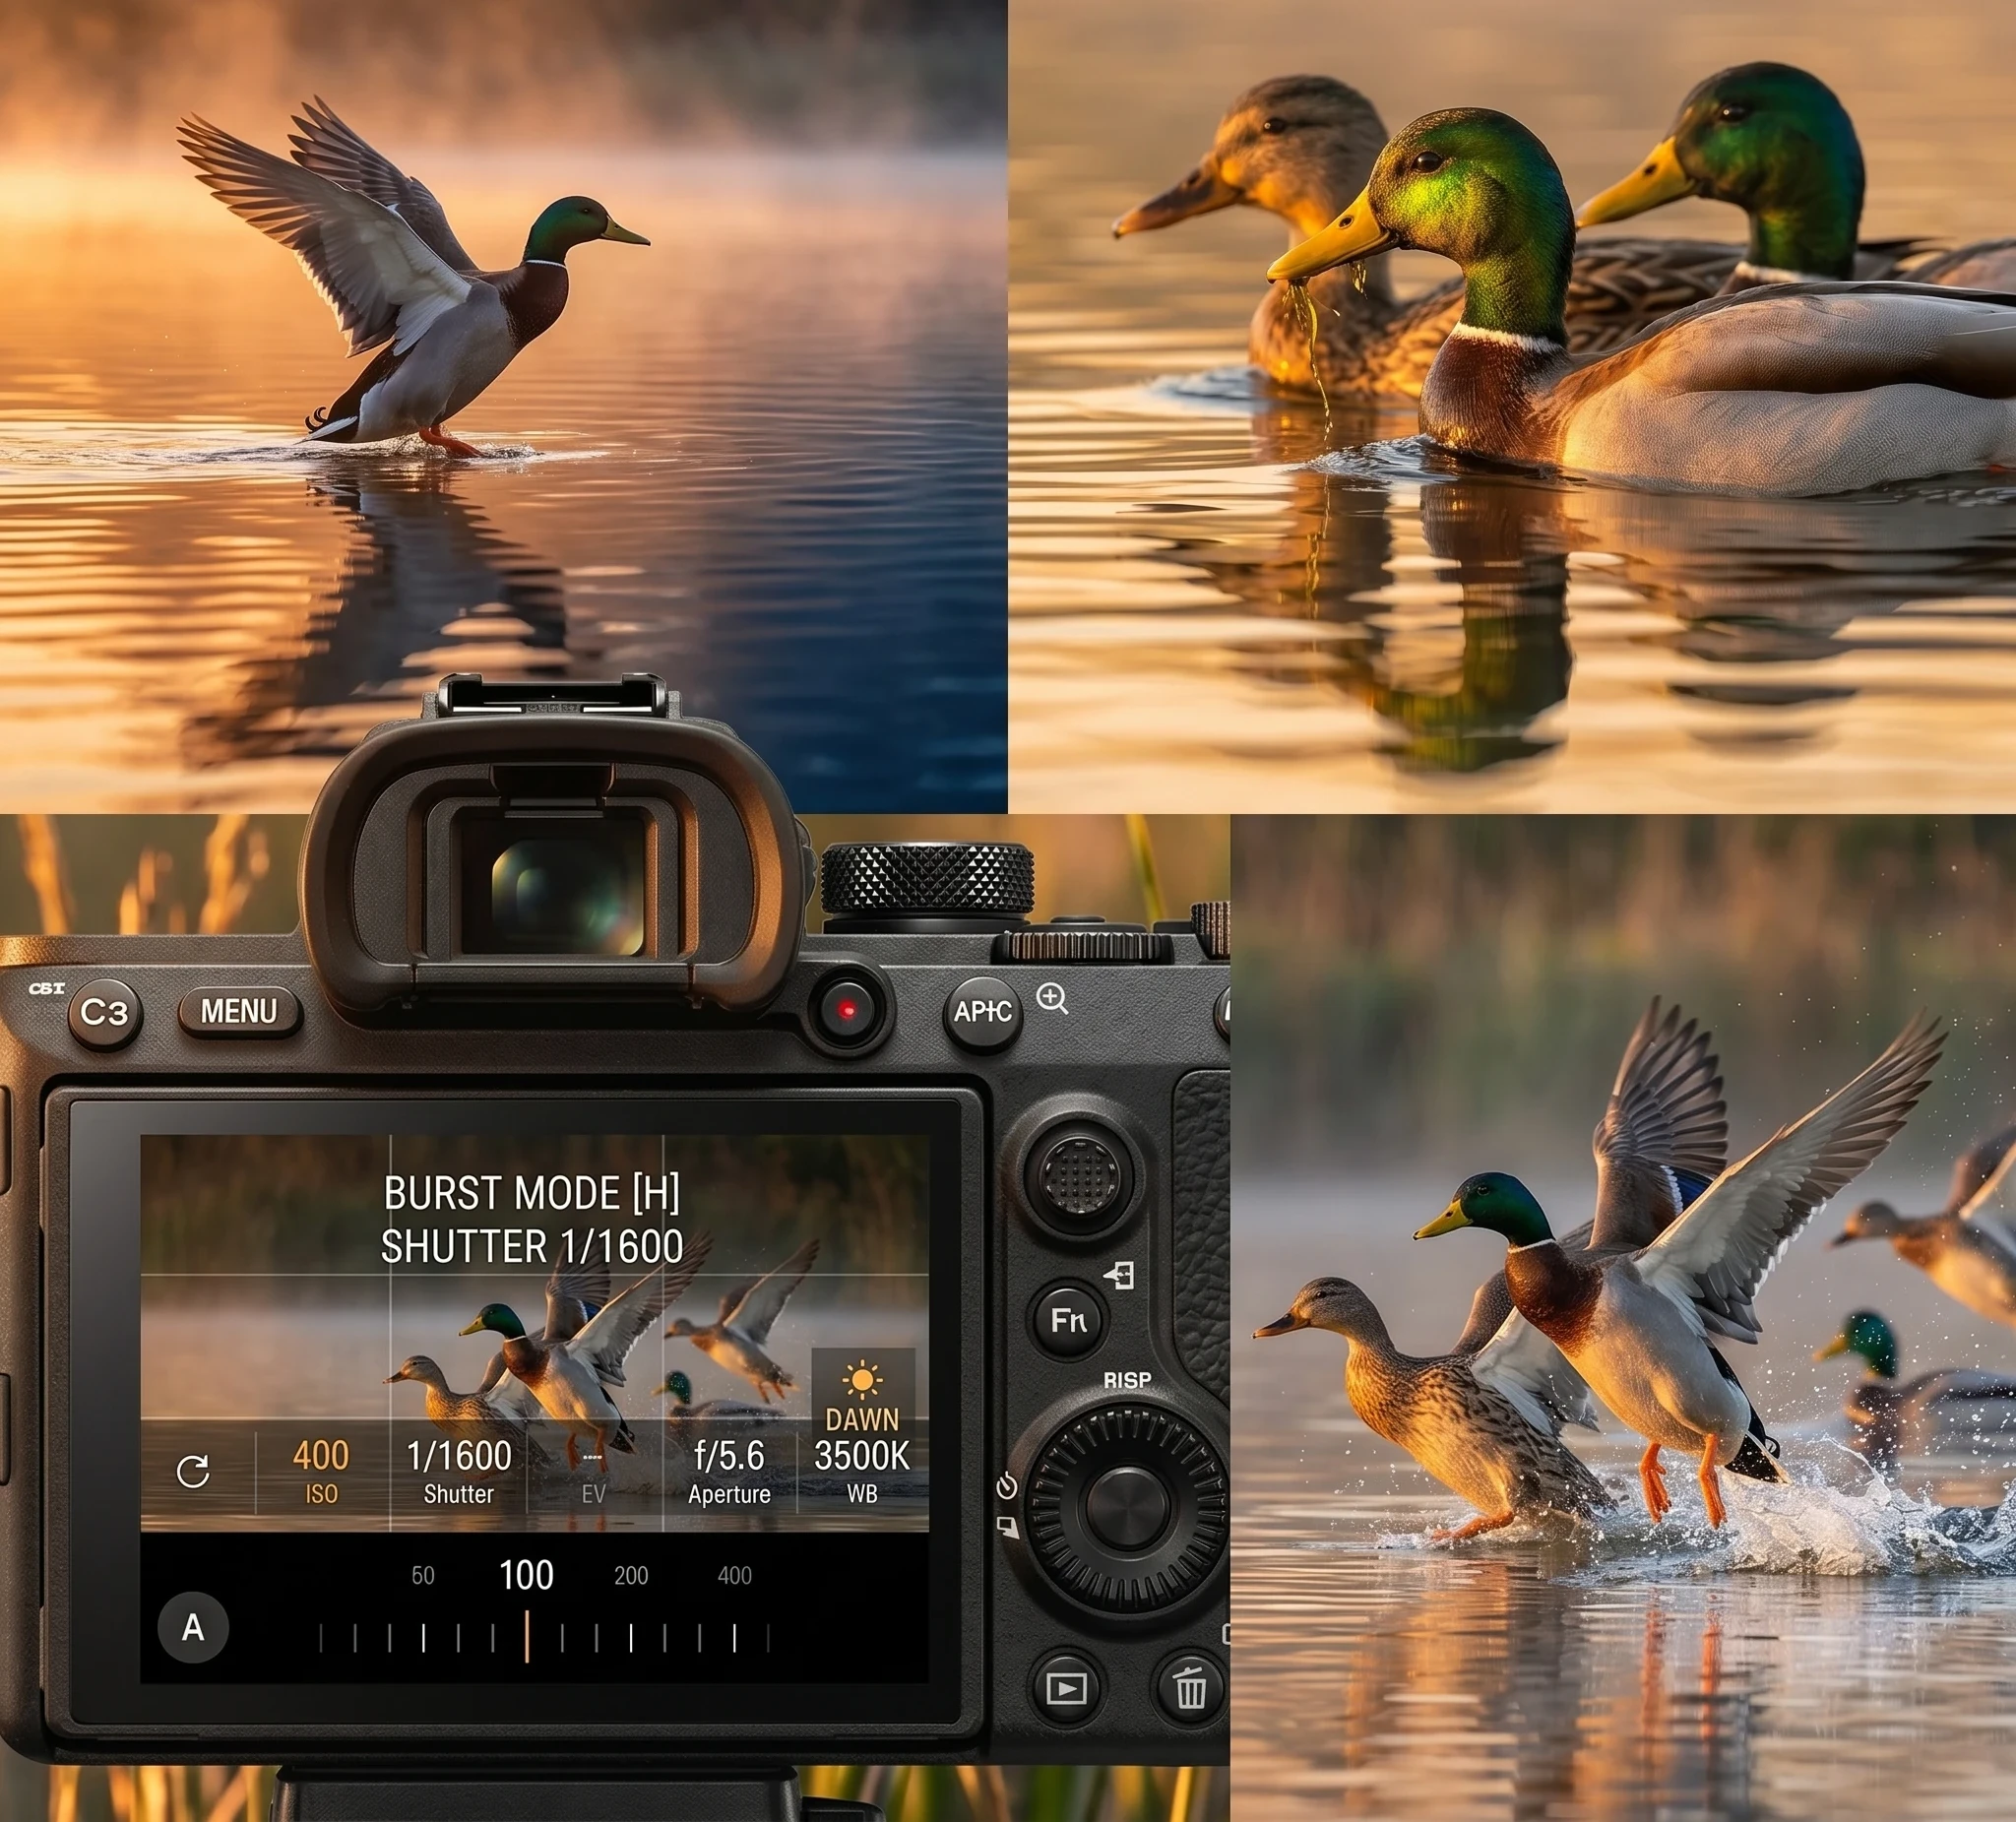
- Swimming or perched: 1/1000 to 1/1600 sec keeps little ripples or lifting wings sharp.
- In flight or takeoff: 1/2000 to 1/2500 sec or higher is needed for freezing wings and rapid movement. Brighter days let you speed things up even more for the sharpest flight shots.
Aperture
- f/4 to f/5.6: Great for single birds, keeps the background soft and non-distracting.
- f/6.3 to f/8: If you are photographing groups or birds at slightly different distances, stop down for a bit more depth so everyone’s sharp.
ISO
- Set ISO high enough to maintain fast shutter speeds, especially early or late in the day. Modern cameras handle ISO 800 to 3200 well, perfect for action shots without ugly noise creeping in. It is better to have a bit of grain than blurry photos.
Focus Settings
- Continuous autofocus (AF-C): Tracks moving birds. I try to keep the focus point right on the bird’s eye for maximum sharpness and engagement.
- Focus Area: Use a single point or a small group for precision. Some cameras offer bird-eye AF, which can be a game changer when birds are active.
Burst Mode
- Burst or highspeed shooting is your friend for flapping wings, splashing takeoffs, and interactions between ducks. You will get the best range of wing positions and moments this way. Later, you can pick the exact frame with the most energy and clarity.
Best Lenses and Gear for Waterfowl Photography
Top Lens Choices
- 300 to 400mm telephoto: Excellent for birds that come in fairly close, and works well in parks or small lakes where waterfowl are not shy.
- 500 to 600mm prime or zoom: Perfect for more distant birds or when you want detailed shots without getting too close. I really enjoy using a 150 to 600mm zoom for flexibility in tight spots or when birds move unpredictably.
Support Gear
- Sturdy tripod and gimbal head: Adds stability, helps with smooth tracking, and avoids fatigue during long sessions outside.
- Monopods: Provide support with more mobility, super useful if you are walking or need to react quickly to changing action.
Accessories Worth Checking Out
- Polarizing filters: Cuts glare off water and brings out feather colors and subtle textures. It is a simple way to add depth and punch to your images.
- ND filters: If you want to experiment with slow shutter speeds for silky water with birds on the move, ND filters help keep exposure balanced.
- Waterproof camera covers: Sudden rain, splashy ducks, or muddy banks would not be so stressful if your gear is protected. Keeping essentials dry helps you relax and stay out longer.
- Extra batteries and memory cards: Cool moments disappear fast, so running out of power or space is a pain. Always carry spares for unexpected action.
- Comfortable seating pad: Long waits are much nicer on a camp pad or foldable stool, especially if you are waiting for elusive shots at sunrise or sunset.
Photographing Ducks and Geese on Water
Angles Matter. Get Down Low
Lowering yourself to water level is almost a cheat code for more intimate, engaging waterfowl shots.
The background drops away, reflections get stronger, and you are suddenly on the bird’s level rather than looking down from above.
Using a ground pad or lying on the bank can help you stabilize the camera while getting those striking perspectives.
Playing With Reflections
Calm water is perfect for symmetry and double-image compositions.
Position yourself so the bird is perfectly mirrored below, or try wide shots that show multiple birds and interesting color reflections from the sky or foliage.
Early morning often brings the smoothest water, so plan to arrive a bit before sunrise when you can.
Managing Water Highlights
- Check your histogram and exposure. White feathers and water can easily get blown out, especially on bright days. Slight underexposure helps keep detail, while still preserving shadow color.
- Using a polarizer helps tame bright glare for deeper color and detail in both bird and water. Experiment with changing the angle to get the most out of the tool.
Capturing Flight and Take-off Shots
Anticipating Take-off
Start watching for pre-take-off signals: raised heads, twitchy wing stretches, or shifting groups.
Ducks especially will lean forward and “run” on the water just before they lift off.
Keeping an eye out for these moments means you’re ready to frame the action before it bursts open.
Panning With the Action
I track smoothly with the bird’s movement, keeping the focus on the head, not the far wing or tail.
Smooth panning is easier with a monopod or gimbal head and lots of practice.
Try to match your own movement to the bird’s speed for the cleanest backgrounds and sharpest focus on the subject.
Burst Mode for Action
Hold down the shutter for the entire takeoff sequence.
This way, you will catch every dramatic wing position, water splash, and body movement.
Later, pick the frame that tells the strongest story and shows off flight mechanics at their best.
Lighting Tips for Waterfowl Photography
Golden Hour
Softer golden light makes feathers glow and reflections come alive. Arrive early or stay late for the best results and calmer water.
Side Light
Light coming from the side brings out feather details and subtle textures.
You will notice a lot more dimension compared to shooting straight on, and the interplay of shadow and highlight makes details pop.
Backlighting
If you are feeling creative, try shooting into the light for glowing rim-lit feathers or bold silhouettes against a sunrise or sunset sky.
Careful exposure lets you keep the glow colors while still catching some feather detail.
Cloudy Days
Overcast light is great for shooting white or mottled birds without harsh shadows or blown highlights.
Colors look more natural, and you can focus on the action without wrestling with bright spots and deep shade.
Composition Tips for Killer Duck and Goose Photos
Always Focus on the Eye
The sharpest part of any wildlife photo should be the eye because it brings the image alive and draws in viewers.
Adjust your focus point and settings to keep this crucial detail tack sharp, even when birds are moving.
Use Simple Backgrounds
Position yourself to get water, clean vegetation, or distant shore as background.
Busy backdrops can distract from the bird and take away from your subject’s features.
Look for unobtrusive surroundings for a professional look.
Capture Natural Behaviors
Focus on preening, shaking, feeding, or family interactions.
These images tell a story and grab interest way more than just static bird portraits.
Be ready for action, and shoot in bursts to ensure you catch those fleeting behaviors.
Groups and Patterns
Geese in formation, clustered ducks, or families crossing water all add visual interest and movement to your shots.
Play with framing wide for storytelling or zooming in tight for emotion and detail. Observe patterns in swimming and flight for unique angles.
Common Mistakes and How to Avoid Them
- Standing up high: Photos from above flatten the scene. Always try to shoot from the bird’s eye level for intimacy and depth.
- Using slow shutter speeds: Motion blur can sneak in quickly, even when birds look still. Keep your speeds up for crisp detail.
- Ignoring reflections: A calm pond reflection doubles the drama. Make sure to include the mirrored image in your composition when possible.
- Over-exposing white feathers: Easy to do on sunny days. Use exposure compensation or check your screen to hold in highlights.
- Getting too close: Move slowly, use long lenses, and respect the bird’s space. Scaring them off means fewer photos and less trust for everyone in the future.
- Forgetting to clean your lens: Water droplets, dust, and fingerprints can all degrade clarity. Carry a micro fiber cloth and check your lens regularly when shooting near water.
Beginner Practice Plan
- Start with stationary ducks (resting or sleeping near the shoreline) to practice focus and exposure.
- Try to shoot from a lower angle. Crouch, sit, or go prone if you can for stronger photos.
- Move up to swimming birds, working on tracking and precise timing as they move around.
- Once you are comfortable, work on birds launching into flight. Expect a lot of trial and error, but the successes are spectacular and boost your confidence.
- Practice panning shots with flying birds, using burst mode to increase your odds of freezing the action. Review your shots afterward to see where you can improve.
Quick Settings And Gear Checklist
- Shutter: 1/2000 sec or faster for flight, 1/1000 to 1/1600 for swimming
- Aperture: f/4 to f/8 depending on background and group size
- Continuous autofocus (AF-C) with the focus on the eye for sharpness
- Burst mode enabled for action sequences
- Telephoto lens (300mm or more), with a polarizer to deal with glare
- Fully charged batteries, blank memory cards, and a lens cleaning cloth
Frequently Asked Questions
What’s the best lens for photographing ducks and geese?
For most situations, a 300 to 400mm telephoto lens works well, especially if you are in parks or spots where birds allow a closer approach.
For more distance, a 500 to 600mm lens gets tighter shots without disturbing wildlife.
Having a zoom lens can be handy if the birds are moving around a lot or groups suddenly take flight.
What shutter speed should I use for birds on water?
Stick to 1/1000 to 1/1600 sec for swimming or preening birds.
For bursty action like takeoff and flapping, bump up to 1/2000 sec or faster.
Check your results and increase the speed if you see any motion blur, especially in wings.
How do I photograph waterfowl reflections?
Try crouching low to the water and shoot parallel to the surface.
Use calm mornings for smooth reflections; a polarizer can help cut glare and deepen color.
Experiment with both centered and off-center reflections to add your own twist to the composition.
Where’s the best place to photograph waterfowl?
Parks with ponds or lakes are perfect if you are just starting out, since birds are used to people.
For more diversity and group behaviors, check migration hotspots or well-known wetlands.
Always research local regulations and respect posted signs to ensure both your safety and the birds’ well-being.
Why Practicing With Waterfowl Improves Your Bird Photography
I have learned more from photographing mallards at my neighborhood pond than from chasing after rare birds in a remote marsh.
Waterfowl give you predictable subjects, loads of variation in behavior, and year-round practice opportunities.
Focusing on good light, low angles, and patience will help you capture amazing photos without needing ultra-premium gear.
Stick with it and you will see steady improvement in your action, composition, and storytelling skills.
The more you shoot, the more you will notice subtle shifts in behavior, lighting, and scenes, helping you grow as a photographer.
If you want more inspiration or help with related skills, check out these guides:
- Importance of Light in Bird Photography
- Beginner Bird Photography Guide
- Capturing Bird Feathers in Detail
Did you find this article helpful?? If so, please leave a question or comment in the box below and I will be happy to get back to you!!!
Happy bird photographing!!!!!!
Raymond, as a photographer myself, I loved this post. Your behavior points are good, as are the locations that are best for waterfowl. One of my best shoots with my Camera club was at a private lake where paired swans would visit in winter. It was beautiful to catch them glide in together and hit the water. But it was pretty cold that early on a February morning in Arkansas. You are so right that their splashing in the water makes awesome photos, catching the water splash and drops glistening in the air. Thanks for including those camera settings, too. I wish I had one of those zoom lenses at the time – I only had a 200 zoom, but I did have a good tripod. Your list of common mistakes is very cool too. Can you share your Camera brand/model information? – Shirley
Hi Shirley,
Thank you so much — coming from a fellow photographer, that means a lot!That private lake swan shoot sounds incredible.
Winter pairs gliding in together at dawn… I can picture it perfectly.
And you are so right about February in Arkansas — cold fingers are the price we pay for those glassy water landings and splashing shots.
The water drops catching the light are magic.
Honestly, do not sell that 200mm short. With a good tripod like you had, 200mm on ducks/geese is totally workable if you can get close or catch them flying toward you.
I started with a 70-300mm and got some of my favorite shots before I upgraded.
Technique + patience beat focal length most days.
To your question: I am currently shooting with a Canon R5 paired with the RF 100-500mm f/4.5-7.1 L, and sometimes the RF 800mm f/11 for skittish birds.
For waterfowl, the 100-500 lives on my body 90% of the time. The R5’s animal eye-AF is a game changer for splash shots.
Glad the settings and “common mistakes” section helped.
That swan story would make an amazing shot — hope you get another crack at them with a longer lens someday.
Thank you so much again for sharing your experience,
Raymond.