
Bald eagle photography really brings together a mix of patience, observation, and technical know-how.
Scoring an iconic eagle shot is less about chasing the latest gear and more about paying attention to light, timing, and where you position yourself.
I created this practical guide to cover everything that matters—from eagle hangouts to camera settings and techniques that actually work in the field.
Whether you are dreaming of sharp images of eagles in flight or want to catch their intense gaze, the tips ahead should give you a solid game plan.
If you are new to the world of wildlife photography or have years of experience, you will find actionable advice here to level up your results.
How Understanding Bald Eagle Behavior Helps Photographers
Getting in sync with bald eagle behavior is a game changer for wildlife photography.
Bald eagles tend to perch up high for a good view, so look out for large, dead trees near water.
These birds love to soar using thermals, making their patterns of circling and gliding predictable once you spend a little time watching them.
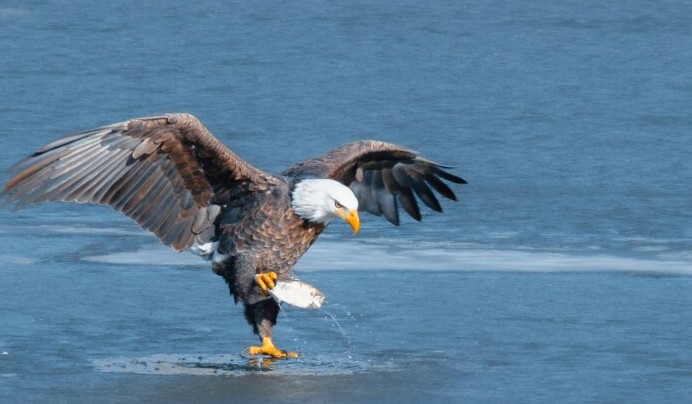
Knowing when they are likely to hunt—usually at dawn or dusk—ups your chances of catching dramatic moments, like a jump into the water for fish.
Eagles switch between lazy gliding, powered flight with strong wingbeats, and sudden bursts of energy when hunting.
Territorial displays, feeding, and nesting activities all have their own timing throughout the year, so following their rhythm boosts the odds of getting something unique.
This sort of field awareness often leads to sharper photos because you are ready for peak action, not surprised by it.
Where and When to Find Bald Eagles for Photos
Prime Bald Eagle Habitats
Bald eagles are all about water sources.
Some of the best spots I have found include large rivers, lakes, and coastal shorelines, especially areas with abundant fish.
Dams below reservoirs are classic hangouts since they often bring fish to the surface.
If you are up for chilly weather, winter roosting spots along northern rivers or lakes can gather dozens of eagles at once—a real jackpot for photographers.
Best Times for Action
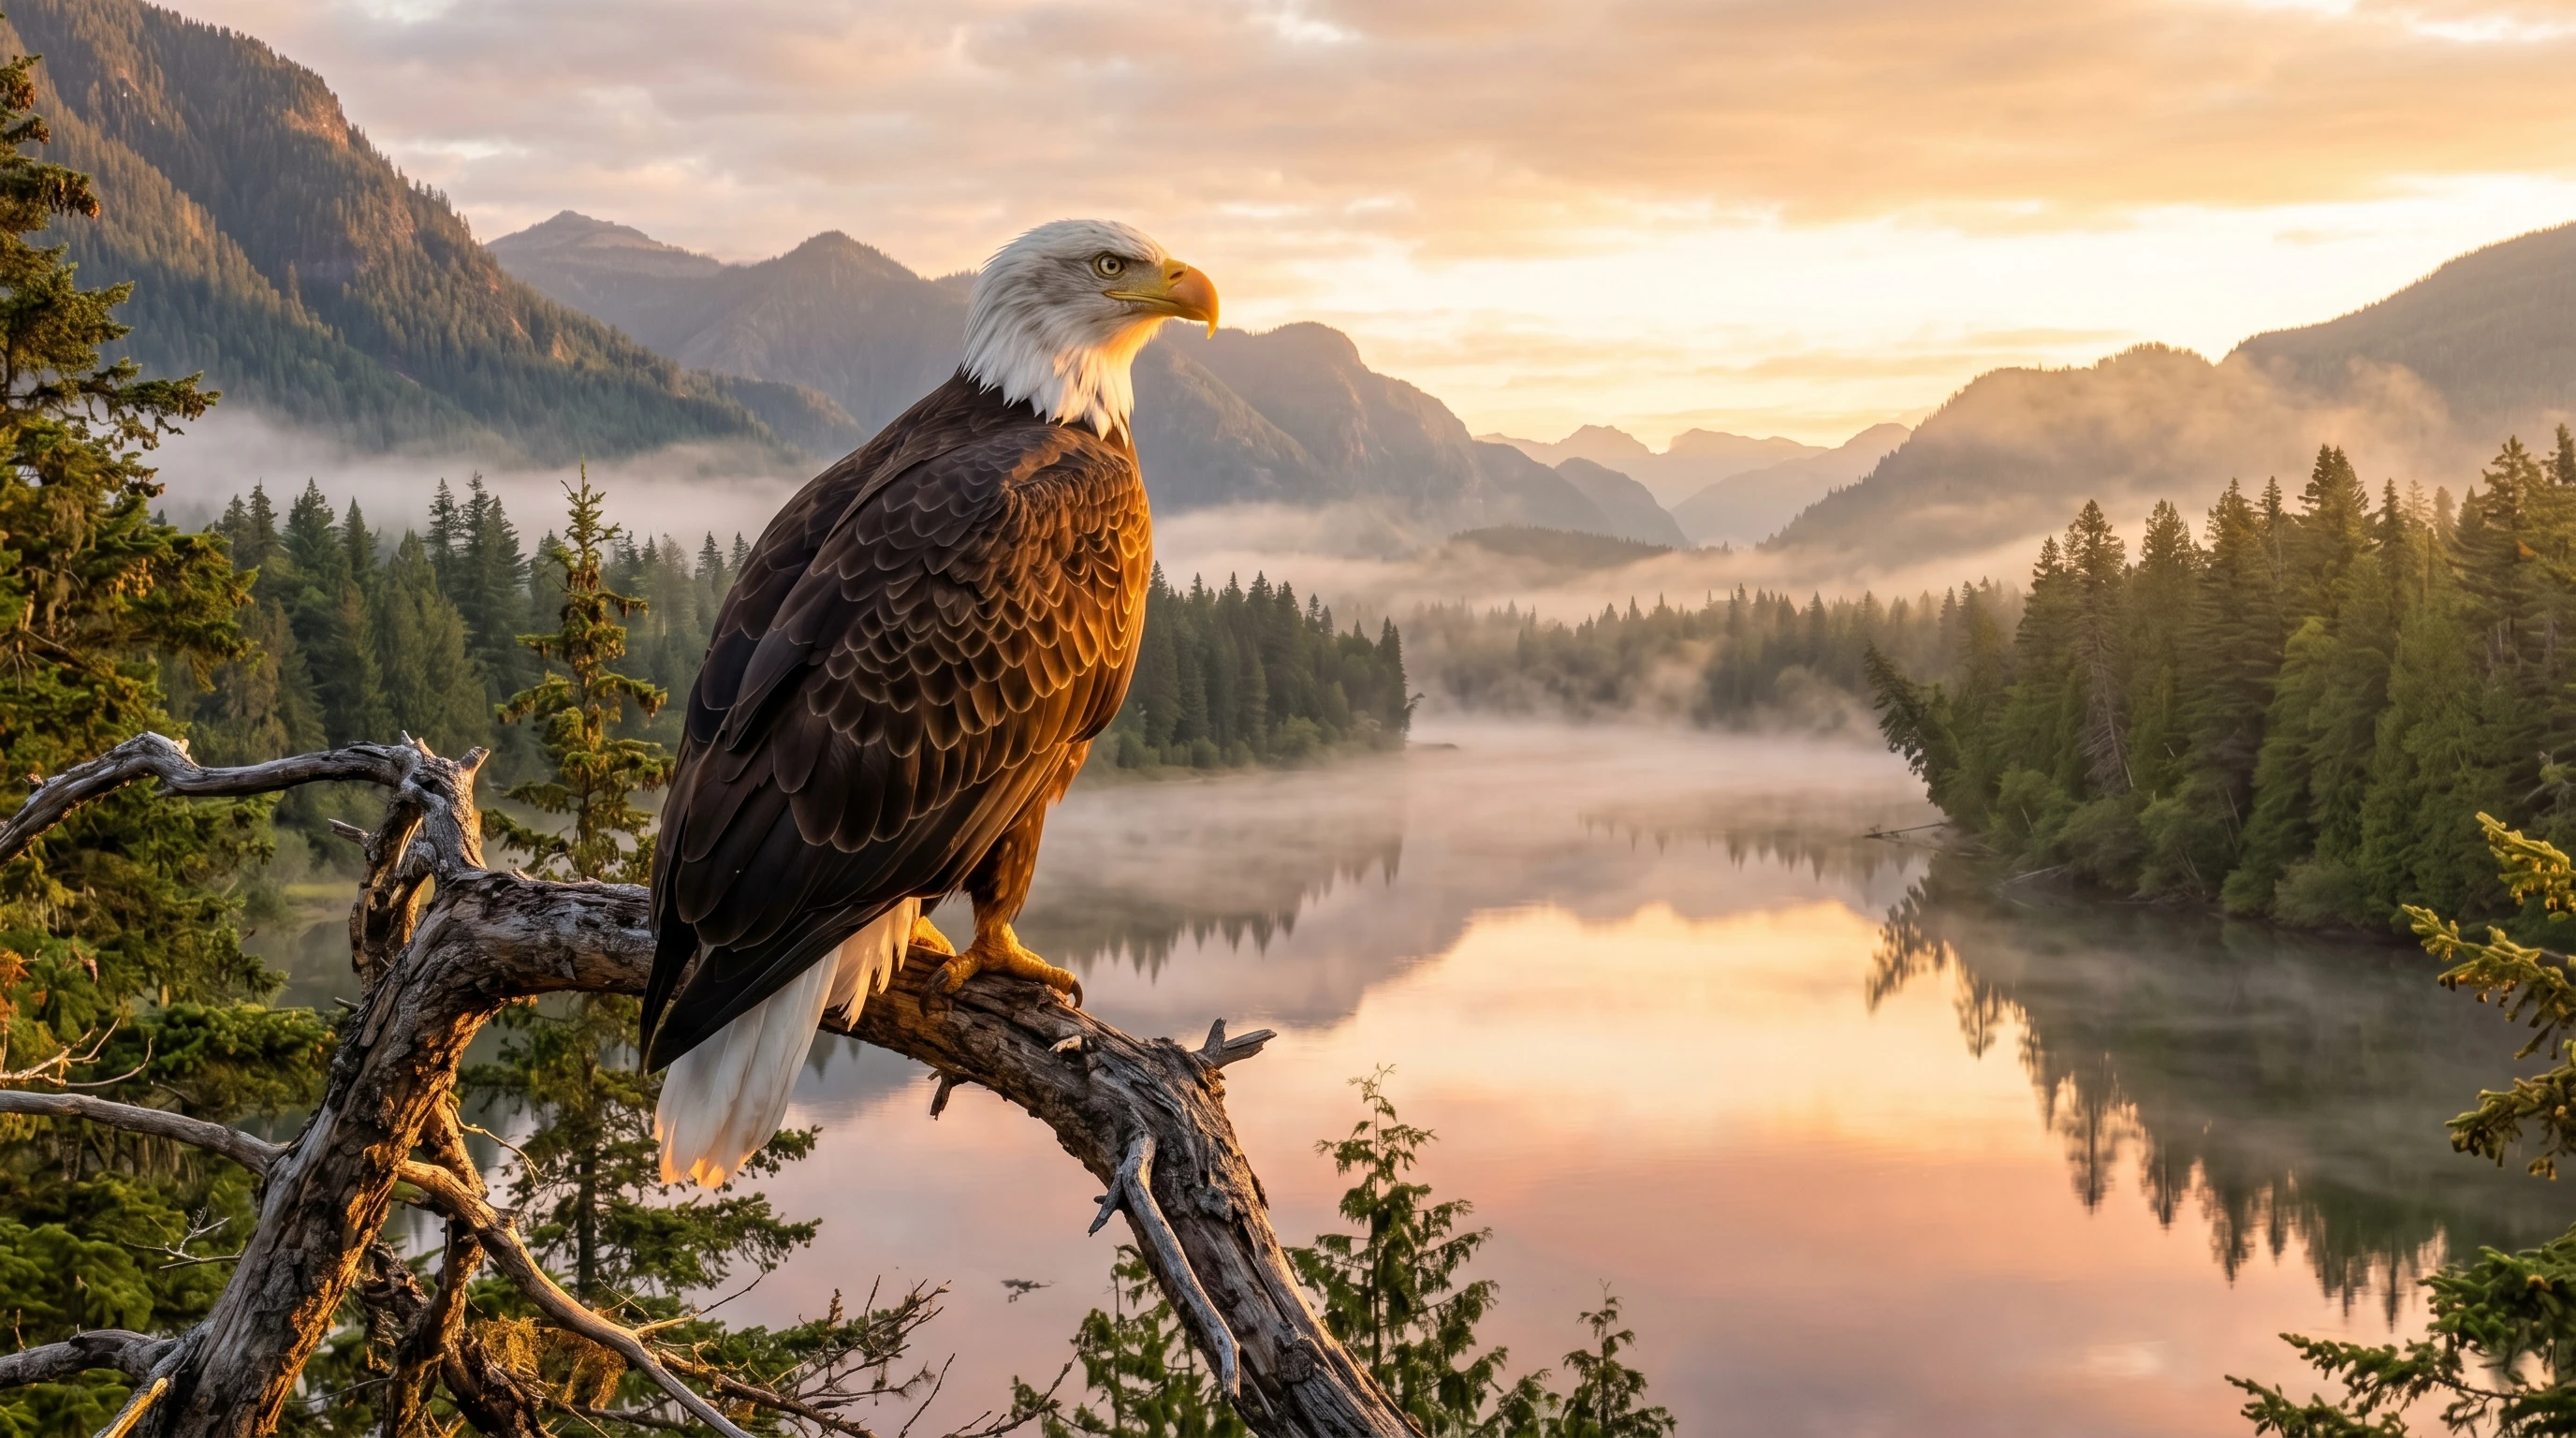
Natural light in early morning and late afternoon brings out the best feather details and colors.
Golden hour, when the sun is low and warm, balances the intense white head and tail with the dark body for eye-popping results.
While action can happen at any time, eagles tend to be most active at dawn and dusk.
Midday works if you are looking for flight shots and you know how to manage harsh shadows, but I usually aim for those softer times.
Seasonal Opportunities
In winter, food gets scarce, which drives bald eagles to group up at popular waterways—a scene that gives lots of social behavior and plenty of flight activity.
Spring is all about nesting.
If you want a glimpse of eaglets or adults bringing in nest material, use a long lens and stay well back.
Nesting birds can be surprisingly sensitive to human disturbance, so keeping your distance is super important.
In fall, look for migrating eagles building up there numbers at big bodies of water, which can reveal new locations and some rare interactions.
Camera Settings That Deliver Sharp Eagle Photos
Shutter Speed
Shutter speed is a big deal with eagles.
For perched portraits, 1/1000 to 1/1600 seconds freezes tiny head movements and the wind ruffling feathers.
When I’m going for inflight shots—grabs, banking turns, or landings—I like 1/2000 to 1/4000 seconds.
Fast shutter speeds freeze motion, keeping wings crisp even during rapid jumps into the water or sudden direction changes.
Experiment a little as you go; if feathers look soft, bump up your speed further.
Aperture
Wide apertures (f/4 to f/5.6) throw backgrounds out of focus, making the eagle stand out.
When more of the bird needs to be sharp, especially if wings are extended, I stop down a bit—f/6.3 or f/8 boosts depth of field and detail, especially with longer lenses.
Adjust aperture not only for sharpness, but for the style or mood you want to create.
Try shooting both wide open and stopped down at the same scene for distinct looks.
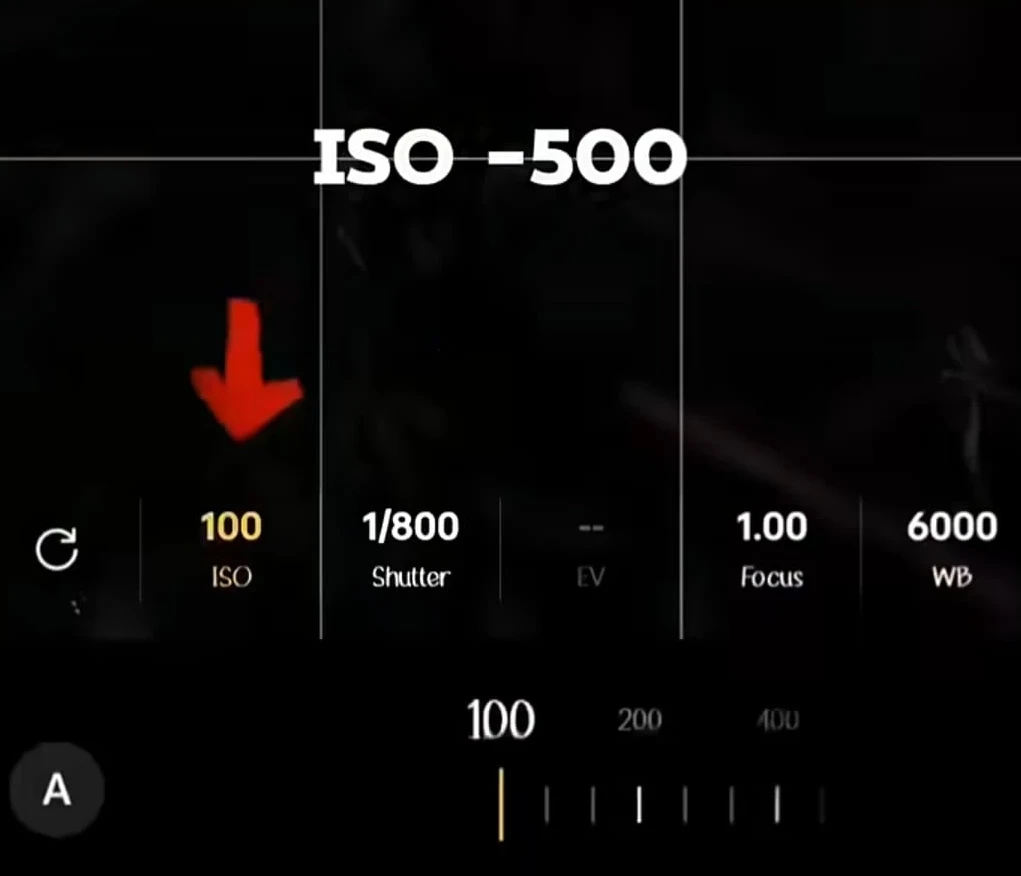
ISO
Do not stress about cranking up ISO if the light is low—sharpness matters more than grain.
I bump ISO as needed so I don’t lose shutter speed.
Most newer cameras handle moderate ISO (800–3200) with little trouble, keeping photos clean enough for big prints.
On dark, overcast days, you might even need to go higher, but noise reduction in post-processing can help smooth things out.
Focus and Drive Mode
Continuous autofocus (called AFC or AI Servo) locks onto moving birds and keeps them sharp.
I use a small focus area right on the eagle’s eye or head, which is the real attention grabber.
High-speed burst mode is pretty handy for catching action sequences, giving you a better shot at the perfect wing position or dramatic grab.
When the action heats up, keeping your buffer clear and using fast memory cards can be a lifesaver.
Recommended Lenses and Gear for Bald Eagle Photography
Bald eagles are not trusting, so long lenses let you keep your distance.
Most eagle photographers use 400–600mm lenses (or longer if you have got it).
Primes have great image quality, but I really appreciate a zoom for framing flexibility—especially when I am working from a set spot.
If you are spending hours outdoors, a sturdy tripod with a gimbal head or a solid monopod saves your arms, and fast memory cards keep up with bursts when the action heats up.
Do not overlook lens hoods for reducing glare or weather covers for rainy conditions.
Pack extra batteries and cards because cold weather drains power fast.
Shooting Eagles in Flight: Field Techniques That Work
Tracking Eagles in the Air
Smooth, steady panning is key.
I keep my elbows tucked in and move my whole upper body to track the eagle’s path.
Autofocus works best if you set focus points on the head or chest, then shoot bursts as the bird moves.
Keeping a bit of space in front of the eagle helps show where it is headed, making the photo feel more natural and dynamic.
Practice on gulls or crows to hone your skills before you try for the big shots with eagles.
Reading Eagle Body Language
Watching for pre-flight behaviors, like a bird crouching or spreading its wings, signals a launch is coming.
Spotting these cues means your camera is up and ready before the eagle even takes off.
Birds arriving at a regular perch will often use the same landing route, so pay attention to entrances and exits, anticipating the action before it happens.
Stay observant; sometimes even the slowest movement is a sign of upcoming flight or interaction.
Best Angles and Positioning
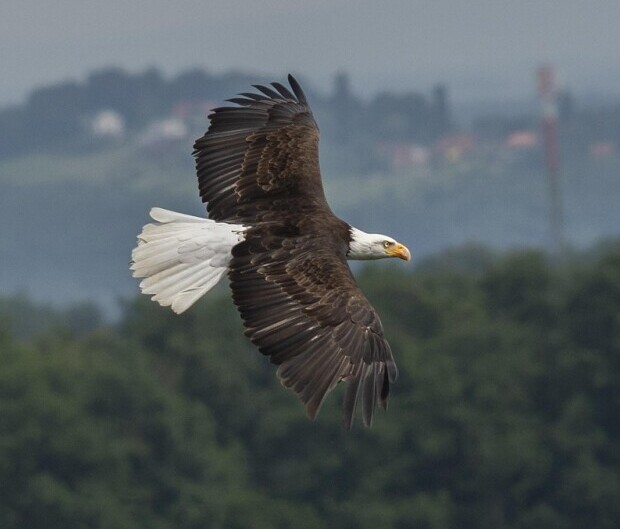
Side-on views showcase those impressive wings and feather detail best.
Shooting from slightly below but still aiming for the eagle’s eye level makes the bird look majestic and larger than life.
Head-on shots look dramatic but are tricky since autofocus can get fooled.
I reserve these for when I am feeling really confident with my tracking and camera setup.
If you find a raised platform, try different heights for unique looks.
Composition Tips for Striking Eagle Images
Eye- Level Connections
Photos taken at the same level as the eagle feel more intimate and powerful.
This means getting low along a river-bank or from a viewing platform so you are not always pointing up from ground level.
Clean and Simple Backgrounds
Busy backgrounds pull attention from the eagle quickly.
Water, sky, or open woods behind the bird make the subject stand out.
I try changing my position or waiting for the bird to move into cleaner surroundings when possible.
If you can not control the background, use a wide aperture to blur it enough to maintain focus on the eagle.
Negative Space and Behavior Shots
Leaving room around the eagle in your frame gives a sense of scale, especially for flight shots that show the bird against the sky.
Action moments, like catching fish, fighting over food, or calling, bring personality and drama to your images.
Adapt your framing based on the behavior you want to highlight—this makes the story in your photo clearer to viewers.
Lighting for Dramatic and Detailed Eagle Photos
Golden Hour Magic
Early and late sunlight flatters eagles, stepping up the gold and brown tones in their feathers while keeping those tricky white areas from blowing out.
If you line up with the sun at your back or to your side, feather layers and face details really stand out.
Mornings can bring fog or mist, adding atmosphere to your shots, so get an early start for special light conditions.
Side Light and Backlight
Side lighting highlights wing structure and texture, making plumage stand out.
Backlighting can give a boost too, like glowing wingtips or bold silhouettes.
If you nail exposure, backlit wings catch light in a way you would not see at midday.
Experiment with shooting directly into the light for creative effects, but be ready for tricky exposure adjustments.
Working with Overcast Skies
Cloudy days offer soft, even light that prevents harsh shadows on the face.
Colors look truer and you get more flexibility with your exposure.
Overcast light is great for shooting details without worrying about blown highlights, and you can often shoot much longer into the day.
Exposure Tips to Prevent Blowing Out the Eagle’s White Head
That trademark white head is super easy to overexpose.
I regularly check my camera’s histogram after a test shot and dial in negative exposure compensation (usually between -0.3 to -1 EV) to keep highlight detail.
Reviewing blinkies or highlight warnings is a fast way to catch trouble before you lose data in bright feathers.
Try shooting in RAW; it gives more room for recovering highlight detail later. If in doubt, under-expose a little to be safe.
Field Ethics and Responsible Eagle Photography
Wildlife photography means respecting the birds first.
I always keep a big buffer zone, especially near nests, using long lenses so eagles never feel threatened.
Baiting eagles is a bad call, since it changes their natural behavior and is not worth the shot.
If a bird acts unsettled, I move back or leave altogether.
Double-checking local regulations keeps me and the wildlife safe.
Watch for posted signs regarding nesting areas, and talk with local rangers or bird watchers if you are unsure; the welfare of the eagles comes before any single photo.
Frequent Mistakes and How to Avoid Them
- Using a slow shutter speed so wing tips blur in flight
- Blowing out highlights on the bright head; always monitor histograms
- Letting busy backgrounds ruin your composition
- Shooting only from one angle when changing perspective helps
- Chasing eagles from spot to spot instead of anticipating where they’ll go
- Neglecting to scout the location for the best backgrounds and light
- Standing so close that you disturb eagle behavior—always stay well back
A Practice Plan to Build Your Bald Eagle Skills
It pays to start with perched eagles—they are patient subjects and let you work out camera settings and focus techniques without rushing.
Once you are confident, move to gliders and then takeoff or landing visuals.
Visiting the same spot more than once helps with pattern recognition since eagles often repeat their routines.
That repetition boosts your timing, anticipation, and hit rate.
Over time, you will be able to confidently predict movements and get those splitsecond shots you dream about.
Join local birding groups or photography clubs to get tips on hotspots or recent eagle activity near you.
Quick Field Checklist for Bald Eagle Photography
- Shutter speed 1/2000–1/4000 seconds for flight
- Aperture f/4–f/8 depending on background and sharpness needs
- AFC plus burst mode always ready
- Shoot with the sun behind or slightly to the side
- Watch highlights on bright feathers
- Bring extra batteries and memory cards
- Have rain covers and dress for the weather
- Scout the location for the best perches or backgrounds
Frequently Asked Questions
What is the best lens for bald eagle photography?
Telephoto lenses in the 400–600mm range are great for keeping your distance and still filling the frame. A quality zoom gives flexibility if the bird surprises you with a close flyby.
What shutter speed should I use for eagles in flight?
I usually set my shutter speed at 1/2000 seconds or faster for sharp flight shots. For takeoff, landings, or fast jumps into the water, pushing to 1/3200–1/4000 seconds works even better.
Where can I find bald eagles to photograph?
Try rivers, lakes, coastal habitats, large marshes, or dams—especially spots known for abundant fish. In winter, check popular roosting sites in the northern USA or along migration corridors.
How do I avoid overexposing the white head?
Use negative exposure compensation and always check your histogram. The goal is to keep highlight detail in the bright head feathers, even if the overall image looks a bit darker in camera.
Why Light, Timing, and Position Matter More Than Gear
It is easy to get caught up in the hunt for longer lenses or newer camera bodies, but the biggest difference in eagle photography comes from studying light, learning bird habits, and picking your spot smartly.
You can get eye-catching results even with a modest setup if you are patient and time your shoots for the best light and bird activity.
Practicing these techniques over and over in the field really does more for your portfolio than another gear upgrade.

The patience and focus you invest will pay off with photos others could only guess how you captured.
Remember, sometimes the most next-level cool images come from waiting for the magical moment rather than chasing after the newest gadget.
Related Reading
- Importance of Light in Bird Photography
- Techniques for Black and White Bird Photos
- Photographing Rare and Elusive Birds
Did you find this article helpful?? If so please leave a question or comment in the box below and I will be happy to get back to you!!!
Happy bird photographing!!!!!!
This is an excellent and well-rounded guide that highlights what truly matters in wildlife photography understanding behavior, light, and timing over simply relying on gear. I particularly appreciate the emphasis on anticipating eagle movement, as that’s often the defining factor between a good shot and a great one. Your practical camera settings and field techniques provide clear, actionable value for photographers at any level. The inclusion of ethical considerations also reinforces a responsible approach, which is essential when working with wildlife.
Hi Kavitha,I really appreciate this — thank you for taking the time to share such detailed feedback.
So glad the focus on behavior, timing, and ethics resonated.
Anticipating movement is everything with eagles, and it means a lot that that came across clearly.Thanks again for reading and engaging so thoughtfully!
Best regards,
Ray