
Capturing sharp, intimate photos of shorebirds like Sandpipers, Sanderlings, or Plovers takes much more than just a long lens.
Shorebirds are constantly on the move, and their natural habitats—open beaches, tidal mudflats, and marshes—add extra challenges, including shifting light and shiny wet sand.
If you are wondering how to get those crisp, detailed shots of shorebirds without disturbing them or ending up with a camera full of blur, this guide is for you.
My tips come from plenty of trial and error on wild coastlines.
Let us get right into the details step by step.
Why Photographing Shorebirds Is Unpredictable (and Super Fun)
Shorebirds are some of the fastest and most active birds you will find along the coast.
They dart, jog, and swerve across wet sand, often chasing receding waves or probing sand for food.
Unlike backyard songbirds, these birds would not perch so you can take your time.
Beaches and wetlands can throw surprises at you, with glaring sun one minute and cloudy skies the next.
To succeed, you need to know the behavior of the birds, understand how light plays with their environment, and use field techniques that really work.
If you are only focused on your camera gear, you will miss out on the essentials that truly matter—timing, patience, and syncing your movements with the bird`s habits.
Up ahead, I will cover all the basics: where and when to shoot, which camera settings to use, smart strategies in the field, and gear suggestions worth checking out.
You will also find tips for composing your shots and handling tough lighting situations.
Getting Tuned Into Shorebird Behavior
If you want to get consistent results, understanding how shorebirds act is super important.
Walking onto a beach and snapping away rarely does the trick.
Take some time to watch the flock, and soon you will spot patterns that help you click the shutter at the perfect moment.
- Busy feeding: Most shorebirds are almost always on the go, poking the sand or chasing little critters.
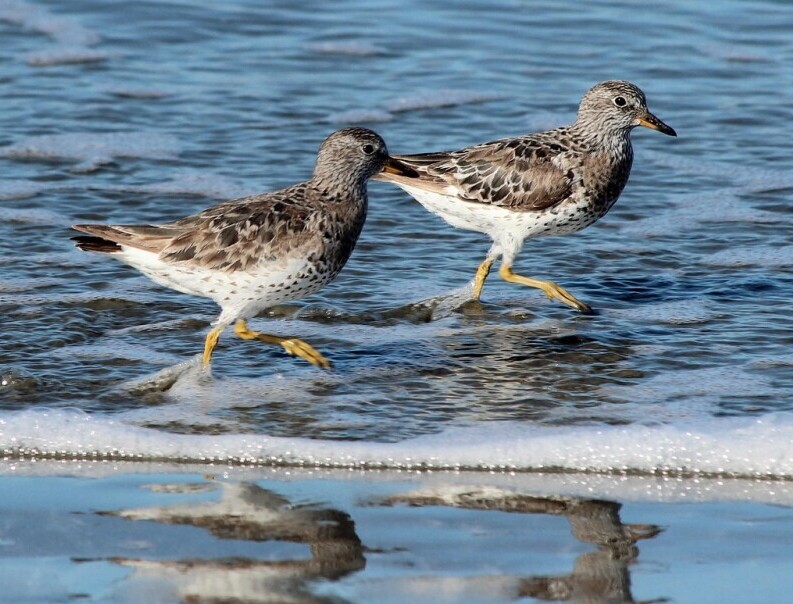
- Following tides and waves: Birds like Sanderlings chase waves, running in and out with each surge. Learn their rhythm, and you will know when they will pause just long enough.
- Flocking patterns: Some species feed in close groups; catching that group in the right composition can tell a fuller story.
- Different feeding styles: Watch for birds that poke, dig, or dart for prey. These behaviors shape the kind of photos you can get.
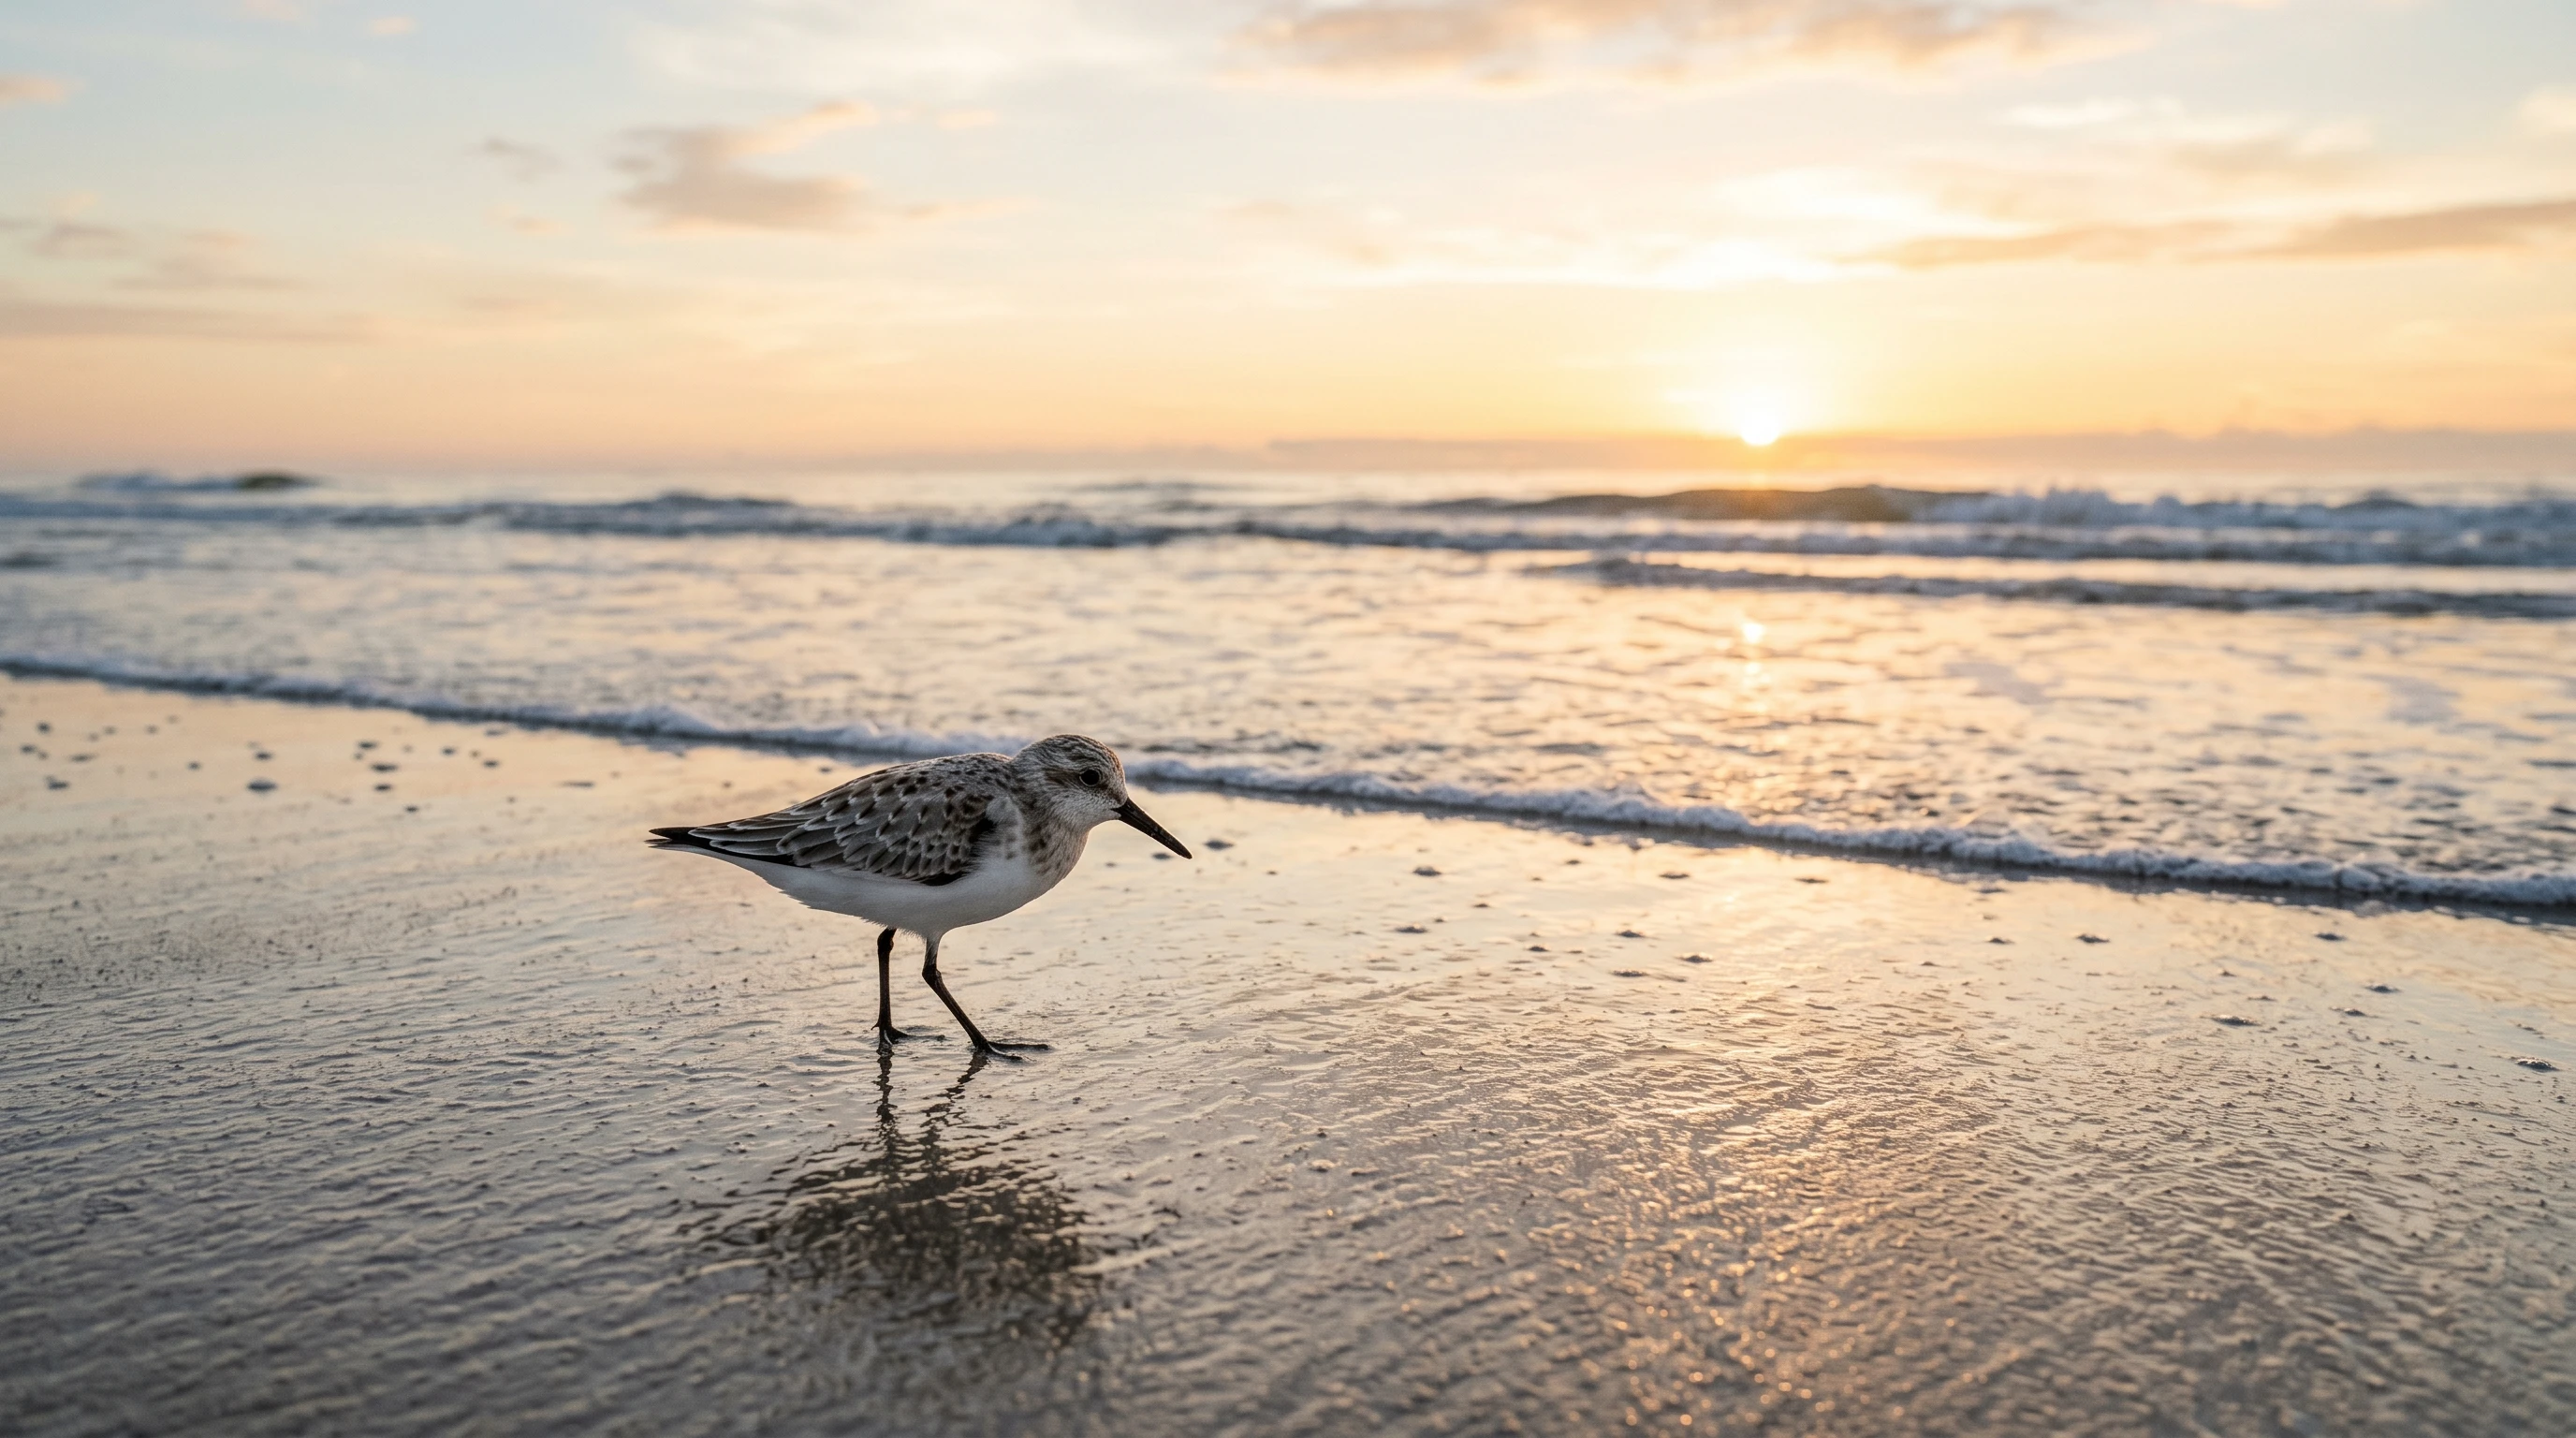
The more you understand these habits, the easier it is to anticipate cool moments—like a Sandpiper freezing while a wave glows in the background.
That anticipation is the real secret sauce in shorebird photography.
Best Places and Timing for Photographing Shorebirds
Picking the right spot is half the battle.
Here are some reliable locations for spotting shorebirds:
Top Shorebird Locations
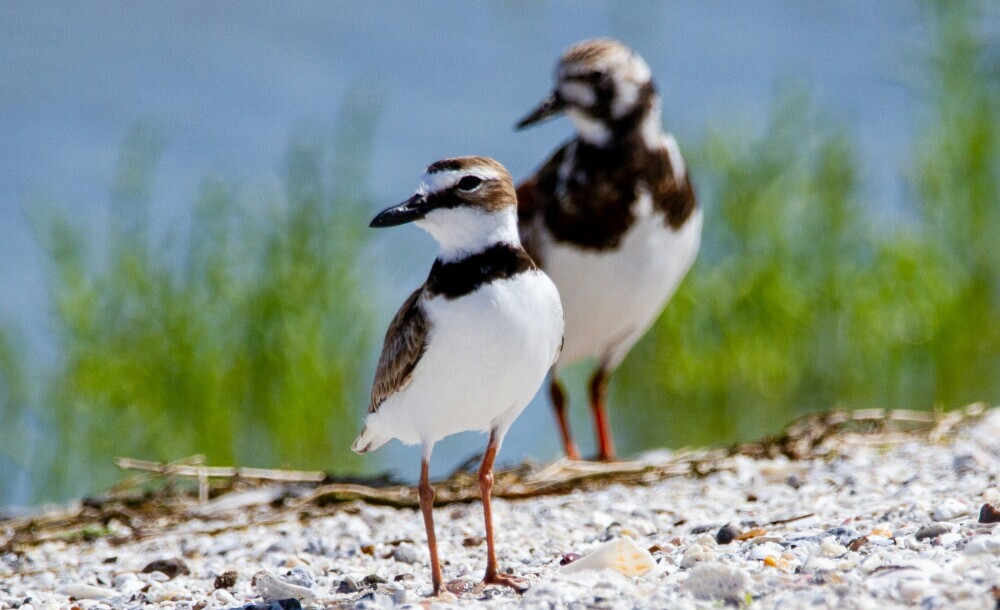
- Wide beaches and shorelines: Easy to observe and usually home to Sanderlings and Plovers.
- Mudflats and estuaries: Big flocks show up at low tide when food is plentiful and easy to reach.
- Coastal wetlands and salt marshes: Attract a wide variety, including dowitchers and godwits. Plus, the backgrounds can be really soft and nice for photos.
Best Time to Get Out There
- Golden hour: Just after sunrise or before sunset for soft light, lovely reflections, and birds at their most relaxed.
- Cloudy days: Diffused light tames harsh shadows, making exposure easier and feather detail pop.
Why Tides Matter So Much
- Low tide: Exposes the sand and mud packed with tasty snacks for birds.
- Incoming tide: Birds gather in tighter flocks as feeding space shrinks, so you can get closer without scaring them off.
Careful timing with both tides and light gives you a much higher shot at lively, well-lit images with less effort.
Camera Settings for Shorebird Photography
The right camera settings are a game changer, especially with swift shorebirds. Here’s what I always run through before snapping a shot:
Shutter Speed
- For walking or running birds: 1/1000 to 1/1600 sec usually keeps feet and heads sharp.
- For flight or crazy feeding scenes: 1/2000 to 1/2500 sec is even better to freeze motion and splashes.
Aperture Picks
- f/4 or f/5.6 for single birds—this keeps backgrounds soft and dreamy.
- f/6.3 to f/8 for group shots to make sure more birds are in focus.
ISO Tips
- Bright sunlight: ISO 400–800, which keeps images clean and maintains fast shutter speeds.
- Cloudy or dim conditions: Do not be afraid to bump ISO to 1600 or even 3200—modern cameras handle it surprisingly well.
Focus Modes
- Always go for continuous autofocus (AF-C) to track moving birds. Use the smallest focus point right on the bird’s head or eye.
- Burst mode helps freeze those perfect wing or pose moments. Snap a quick series and pick the sharpest.
Getting used to these settings takes a little practice, but once it clicks, you will consistently catch much sharper images.
Favorite Lenses and Gear for Shorebirds
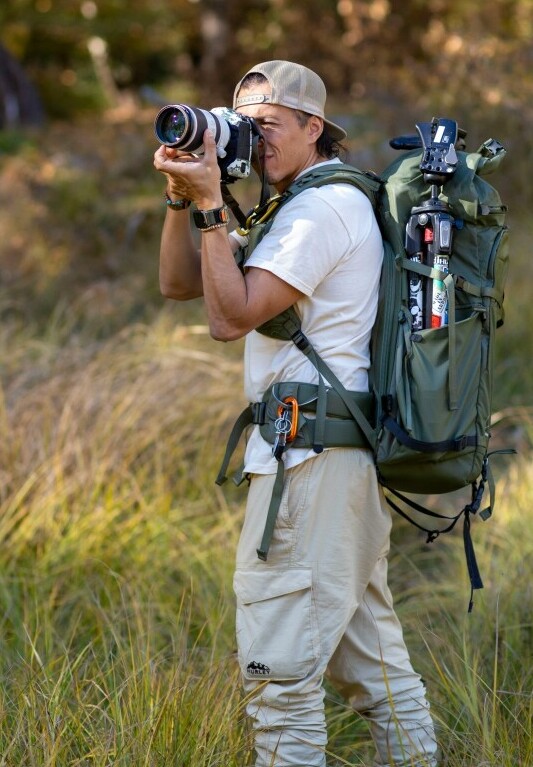
You do not have to use the biggest lens out there, but the right gear can take your results up a notch, especially on long beach mornings.
Top Lens Choices
- 300–400mm: Great if birds are not overly shy, like in busier urban beaches.
- 500–600mm: Lets you stay far back, perfect for skittish birds or wild, remote spots.
Field Gear to Consider
- Tripod with a gimbal: Eases tracking speedy movements, especially for flight shots.
- Ground pod or beanbag: Fantastic for low angles and much lighter to haul than a full tripod when you are moving around.
Essential Accessories
- Polarizing filter to cut down glare on water or wet sand, letting feather color show through.
- Weather cover to protect gear against wind, spray, and salt air.
- Knee pads or a mat—your knees will seriously thank you the day after a muddy beach crawl.
- Spare batteries and fast memory cards. Cold, salty coastal air drains batteries, and you’ll shoot a ton of images in burst mode.
For extra gear suggestions, check my recommended list at the end of this article.
Shooting From a Low Angle (Why It Works and How to Do It)
The difference between average bird photos and genuinely eye-catching ones often comes down to your shooting angle.
Getting eye-level with shorebirds brings out their details and personality.
Why Low Angles Matter
- Soft, clean, out-of-focus backgrounds—think blue water or warm sky, not clutter.
- Intimate, pro-level images. You see things from the bird’s world instead of towering above them.
Ways to Shoot Low
- Lie down on a towel, yoga mat, or in the sand. Simple, cheap, and really effective.
- A beanbag or ground pod offers steady support just above the sand—a favorite for beach shooters.
- If mud is not your thing, try sitting with the camera right in your lap, close to the ground.
It may get dirty, but these angles make your shots stand out. The results are worth a little sand.
Reading Tides and Bird Movement
Syncing your approach with the tides and how birds react to them improves your chances of getting closer.
You will also stress the birds less and capture more candid images.
Be Patient and Let Birds Come Close
- Move in slow, straight lines, and do not change directions quickly. If birds drift away, pause and wait rather than chasing them.
- Pick a likely feeding spot and stay put as the tide rolls in—birds often approach naturally.
Patience pays off as birds adjust to your presence. You get more chances for natural feeding and preening shots without intrusion.
Use Wave Patterns for Action
- Photograph birds as they play, dodge, or move with incoming waves for action-packed results.
- Try backlighting your shot so the spray glows with morning or sunset rays.
Handling Light and Exposure
Lighting on the beach can go from stunning to tricky in seconds.
Here are my go-to tips for managing different conditions:
- Early and late in the day offer soft, warm tones and neat reflections on wet sand.
- Sidelight reveals feather texture. Shoot alongside the sun for extra detail.
- Clouds make exposures easier and boost feather detail—though you may need to bump ISO for clarity.
- Backlit scenes bring drama and rim-lighting. Just keep an eye on highlights and shadows to protect detail.
If glare is an issue, a polarizer works wonders, and shooting slightly off direct angles often reduces reflections.
Composing Your Shorebird Images
Reflections Add Interest
- Look for smooth, wet sand to get perfect mirror-like reflections. Wait for the water to settle for best effect.
- Even tiny changes in your shooting position can totally change the quality of a reflection. Stay flexible and quick.
Simplify the Background
- Get sky or sea in the background for a clean, distraction-free look.
- Keep your aperture low and wide to blur out extra detail that would pull focus from your subject.
Show Movement and Flock Dynamics
- Single birds running or flying can bring a lively energy to your photos.
- Group shots are great for storytelling—try to capture flocks feeding, flying, or interacting with water and waves.
Always leave a bit of room for the birds to “move into” the frame. It gives your photos a much more natural flow than a tight crop.
Mistakes to Avoid While Photographing Shorebirds
- Do not stay standing: Shooting from above flattens the whole scene and loses intimacy.
- Do not rush: Sudden movement scares birds and ruins photo chances for everyone.
- Do not ignore the light: Sun angle shifts feather detail and mood in your pictures.
- Do not use slow shutter speeds: That is the quickest way to get muddy, blurry images, especially with quick-moving birds.
- Do not push too close: Getting too near spooks flocks and removes opportunities for yourself and other birders. Respect comes first.
Beginner Practice Game Plan
- Start out with birds that are still or moving slowly in small groups. This helps build skills in focus and exposure without extra pressure.
- Challenge yourself to always shoot from a low position—it is messy, but it is a huge upgrade for your photos.
- Level up to shooting running or in-flight birds as you become more confident and familiar with your camera controls.
Quick Shorebird Settings And Gear Checklist
- Shutter speed: 1/2000 seconds or faster for active shots
- Aperture: f/4–f/8—adjust for groups vs single birds
- ISO: Turn it up on cloudy days, and don’t stress a bit of noise
- Continuous AF and burst shooting on
- Long lens: 300mm minimum
- Polarizer to tame glare, weather protection for your camera
Frequently Asked Questions
What’s the best lens for shorebird photography?
Anything from 300mm to 600mm is a solid choice. Longer glass lets you keep your distance so you don’t spook the birds, but even a 300mm can get you lots of great action shots.
What time of day works best for photographing shorebirds?
Early morning or late afternoon are prime, thanks to soft light and active birds. Overcast weather is also great for exposing the fine feather detail.
How do I photograph shorebirds at the beach without scaring them?
Get low, move slowly, and let the birds approach you. Chasing them never works as well. Make yourself look smaller and less of a threat, and they’ll often ignore you.
Skill Beats Gear Every Time
Shorebird photography really comes down to patience, getting in sync with bird behavior, and positioning for the right light—not owning the latest lens.
With regular practice and a little observation, lining up those sharp, natural images feels less like luck and more like skill.
If you enjoyed this guide and want to keep building your bird photography chops, you might also want to check out my tips on:
–the importance of light in bird photography, and tips for
Wish you the best out there, and do not worry about getting a little muddy—that is all part of the fun in wildlife photography!
Leave a question or comment in the box below and I will be happy to get back to you!!!
Happy bird photographing!!!!!!
You are right, taking a walk along the beach and trying to snap a quick photo does not yield good results. You need to have time an patience to get good shots of these interesting birds. I think it has be be like a serious hobby, not something that just happens.
I love your tips about trying at sunrise or sunset, or in cloudy conditions for better shots. I also love the idea of taking the shots during low tides, as there will definitely be more birds running along the shore line looking for food.
Hi Michel,
“Like a serious hobby, not something that just happens” — exactly.
Shorebirds reward patience, not passing by.
Glad the sunrise/cloudy/low tide tips clicked. Harsh sun blows out white feathers. Wet sand at first light is a giant reflector for gorgeous underwing glow.
Pro tip for low tide: Go 1-2hrs after the high. Set up low where the flats just expose.
That’s the buffet line. Birds are hungry + concentrated, and they will walk to you if you sit still.
Watch the tideline edge — that is where the food is.“Lucky” shots come from showing up 4 days in a row at 6am. You are thinking like a fieldcrafter already.
What species are on your beach?
Tell me and I’ll share the #1 cue they are about to feed or fly.
Best regards
Raymond