
If your bird photos are already sharp and correctly exposed, the next improvement comes from choosing the light before you raise the camera.
A bird on a sunny perch at noon and the same bird in low backlight are two different pictures, even at the same focal length and the same distance.
This article is a field method for artistic bird photography lighting: which light produces which mood, where to stand, and how to meter so the feathers record what you saw.
Our piece on why light matters in bird photography covers the fundamentals.
Here the question is practical: given the mood you want, which light do you look for, and what do you set on the camera?
Decide the mood first
Light direction decides most of what a bird photo feels like.
Choose the direction before the bird arrives and you can position yourself for it. Choose it afterward and you take whatever the bird gives you.
Each type of light tends to produce a particular result:
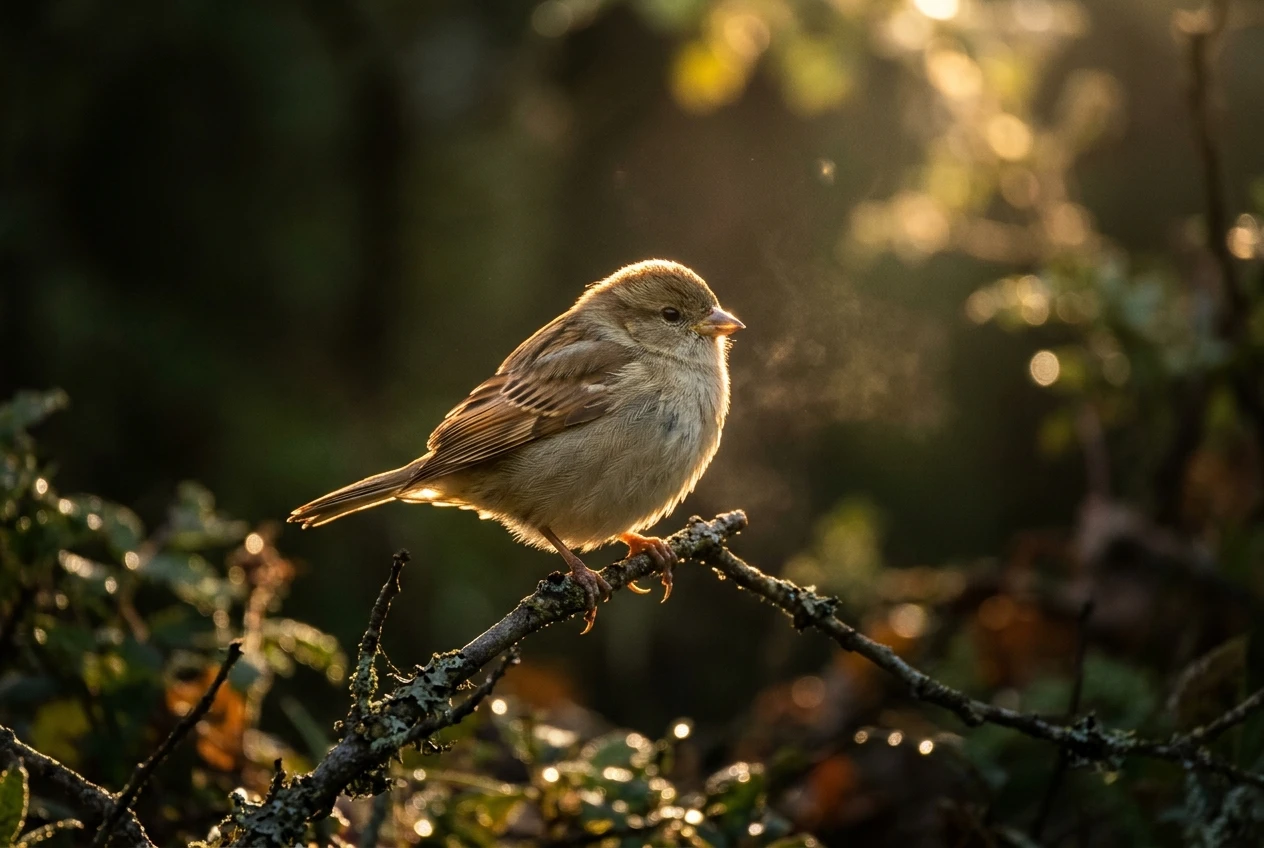
- Backlight and rim light: a glowing edge around the bird, translucent wings and tail, and a luminous, warm, sometimes ethereal feel.
- Low side light: strong form and texture in the plumage, with one side lit and the other falling into shadow. The result is sculptural and dimensional.
- Fog, mist and overcast: low contrast, a muted palette, and a quiet, soft mood.
- Dappled or spotlit light: a lit bird against a dark background, which gives a dramatic, low-key portrait.
Before a session, write down one mood and one species or perch to try it on.
A short list works better than trying every look at once, because each look needs a different position and a different exposure.
Sun height matters as well: all of these except fog and overcast work best when the sun is low, in the first and last hours of the day.
Backlight and rim light
Positioning
Rim light appears when the sun sits behind the bird, slightly off to one side, and low enough to graze the edges of the feathers.
Walk around the bird’s perch until you see a bright line tracing the head, back and wing edges.
Sun directly behind the bird tends to produce a full glow with no definition. Moving a few steps so the sun is behind the bird and a little to one side usually gives a cleaner outline.
The background matters as much as the angle. A rim-lit bird against a shaded background, such as dark trees or deep shadow, shows the glowing edge clearly.
A bright sky behind the bird turns it into a silhouette. Both are valid, but they require different exposures, so decide which you want before you shoot.
Metering for translucent feathers
Wing edges, tail feathers and fine down on the head and breast let light pass through, and they glow when lit from behind.
The camera does not read this well. In evaluative or matrix metering, a bright background pushes the meter toward underexposure, and the bird comes out darker than you intended.
You have two main choices:
- Rim-light look with a dark body: use spot metering on the brightest lit edge, or dial in negative exposure compensation, so the highlights hold their detail. The body falls into shadow and the glowing edge carries the picture.
- Glowing, airy look: keep evaluative metering and add positive compensation, commonly somewhere between +1 and +2 stops as a starting point, until the body shows detail and the rim is bright but not clipped.
Check the result on the rear screen and use the highlight alert.
Rim light clips quickly, and recovering clipped feather edges in the edit is not possible.
Shoot raw so the shadow side of the bird has room to lift if you want some detail there.
Controlling flare
Low sun pointing toward the lens causes veiling flare, which lowers contrast across the frame, and ghost shapes. Some of this is usable, but you should decide that deliberately.
- Use the lens hood, and extend any built-in hood fully.
- Shade the front of the lens with your hand or a hat, out of frame, to see how much the flare changes.
- Place the sun behind the bird’s body or behind a branch, so the bird blocks the brightest point.
- Remove any protective filter on the front of the lens, since flat glass in front of the lens can add internal reflections.
- Clean the front element before the session. Dust and smears show up under direct light.
Autofocus can hunt in backlight.
Use a small AF zone and place it on a high-contrast part of the bird, such as the edge of the head or the eye if it is visible.
Back-button focus lets you hold focus while you adjust framing.
Low side light
Side light comes from about ninety degrees to your lens axis.
It rakes across the plumage, which shows the barbs, the layering of the feathers and the curve of the body.
A bird that looks flat in front light looks three-dimensional in side light, because the shadows define the shape.
The practical decision is which side of the bird faces the camera. If the lit side faces you, the eye is lit and a catchlight appears.
If the shadow side faces you, the picture becomes more dramatic and the eye can disappear. Wait for the bird to turn its head into the light, or move your position to put the lit side toward you.
A bird that faces the sun gives the most readable eye. A bird that looks away from the sun gives a more mysterious portrait but risks losing detail in the face.
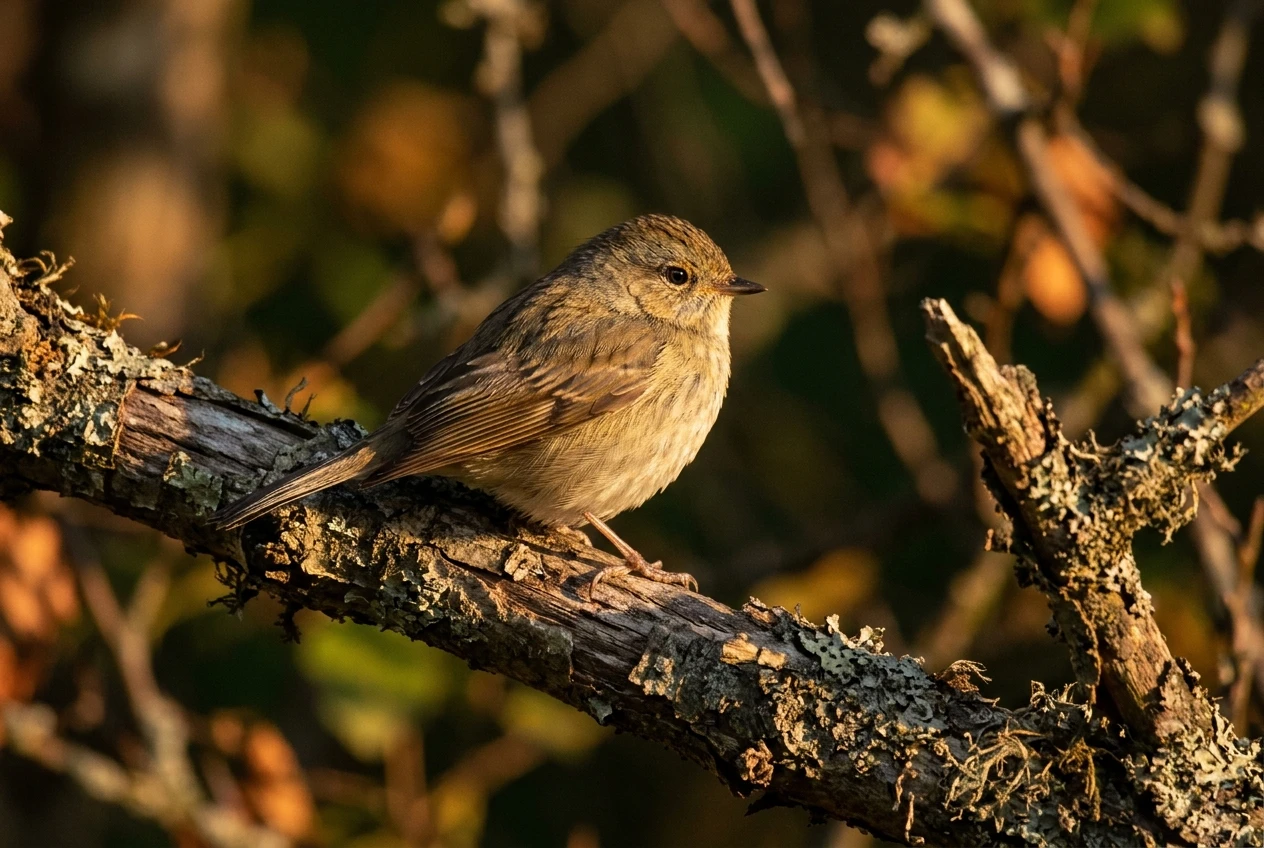
For exposure, protect the highlights on the lit side and let the shadow side fall where it falls.
Meter on the lit plumage, using spot metering or a negative compensation of around one stop, and check the highlight alert.
If the shadow side is too dark to read, a light surface nearby, such as pale sand, snow or a light-colored rock, can bounce some light back.
Do not expect to flatten the contrast; the contrast is the look.
Low sun is also warm.
If your camera’s auto white balance neutralizes that warmth, the mood weakens.
Set a fixed white balance such as daylight, or correct it in the raw file, so the golden tone stays.
Fog, mist and overcast
Soft light changes the whole approach.
Contrast is low, shadows are weak and colors look muted. The picture depends on tone and atmosphere rather than on light and shadow.
The main exposure problem is that the meter treats a bright foggy scene as mid-grey and darkens it. White fog then renders as dull grey.
Add positive exposure compensation, often +1 to +2 stops, until the fog looks as bright as it did in person, and keep the histogram toward the right without touching the edge.
The same rule applies to snow and to bright white overcast skies.
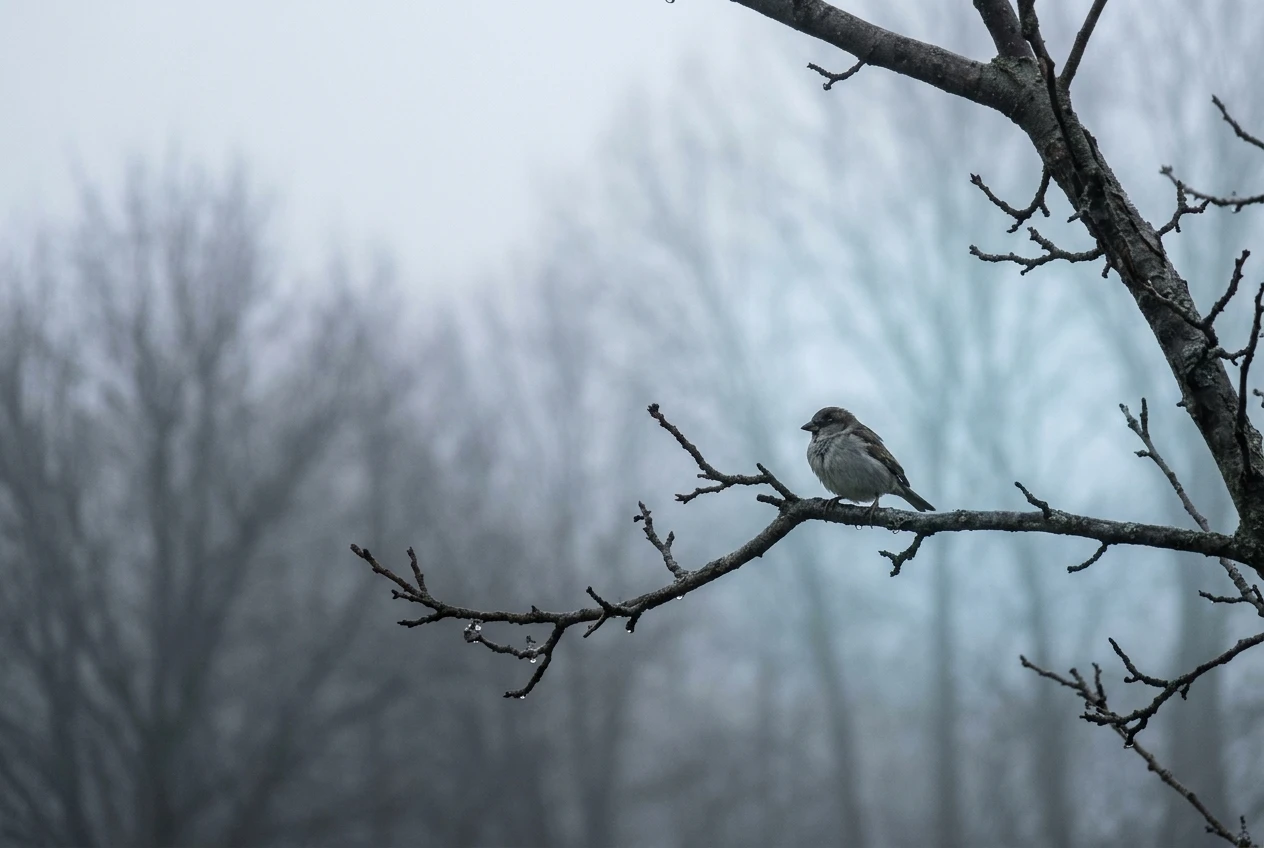
Fog adds separation by distance.
A bird on a perch with trees receding behind it shows those trees in progressively lighter tones, which creates depth without any contrast from the light itself.
Look for a perch with some distance behind it, since a bird close to a wall of fog shows nothing behind it.
Keeping the eye bright is the harder part.
Overcast light comes from the whole sky, so the catchlight is weak or missing, and the eye can look dull. A few things help:
- Shoot when the bird lifts or turns its head slightly toward the open sky, which brings a catchlight into the eye.
- Spot meter on the head, so the face is correctly exposed even if the surroundings are bright.
- In the edit, brighten the eye with a small local adjustment. Keep it subtle.
Overcast days are dim, so you will use higher ISO to hold shutter speed.
A noisy sharp image reads better than a clean blurred one, and noise in soft, low-contrast light is often easy to reduce.
Fog also leaves droplets on the lens, so carry a microfiber cloth and wipe the front element between series.
If the autofocus struggles against low-contrast backgrounds, choose a point on the eye or on the edge of the bird, where there is the most tonal difference.
For ideas on where to place the bird in a soft, empty frame, see our guide to bird portrait composition, which covers eye placement and empty space.
Dappled and spotlit perches
A bird in a patch of light with a dark background is the basis of the low-key bird portrait.
You find it in woodland, under dense canopy, or at the edge of a shaded area where a gap lets a beam of sun through.
The bird looks lit from within the scene, and the background disappears.
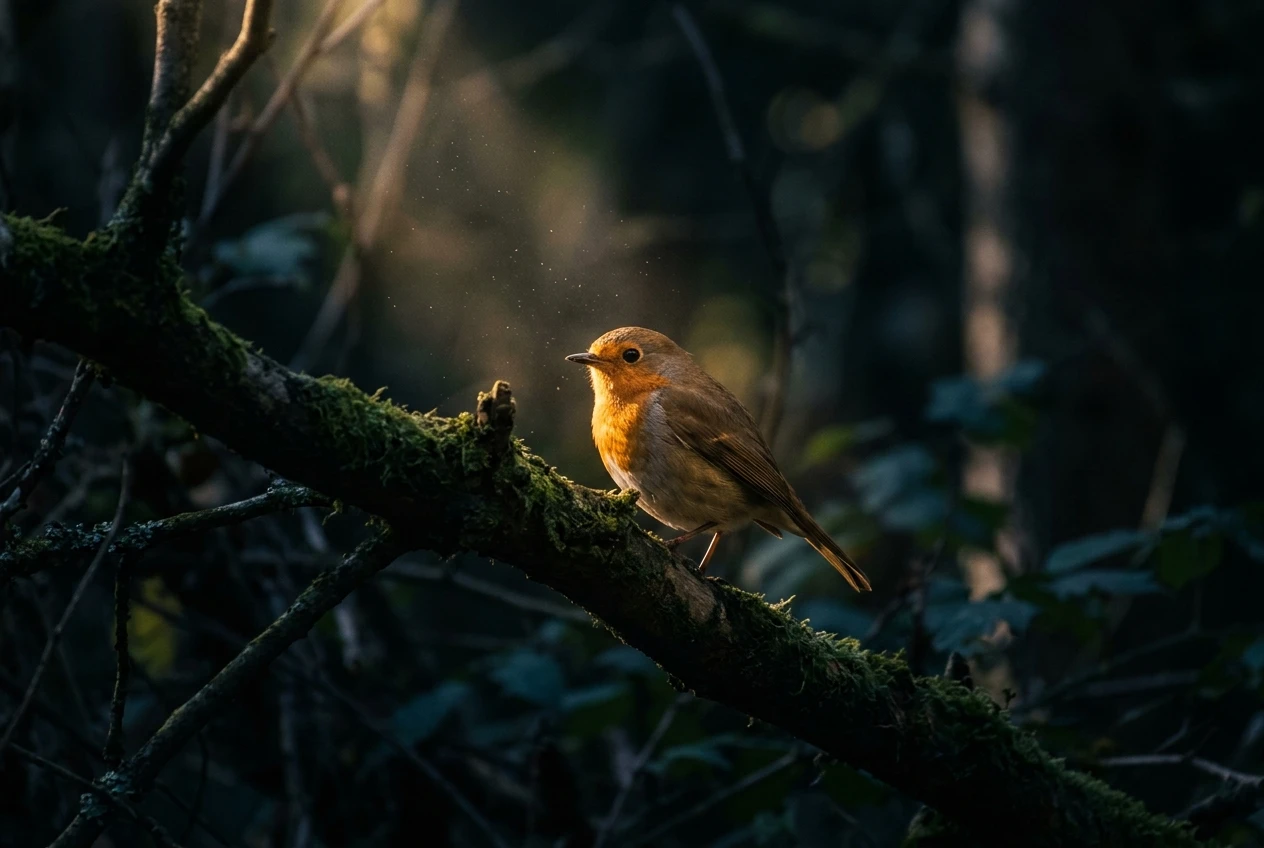
Positioning decides most of this.
Stand so that the background behind the bird is in shade, and so the patch of light falls on the bird’s face and chest.
A long focal length helps, because a narrow angle of view lets you aim at a dark area behind the bird and exclude brighter ground or sky.
Distance between the bird and the background keeps the background dark and out of focus.
The exposure needs manual control. In an automatic mode, the camera sees a mostly dark frame and brightens it, which overexposes the lit bird.
Two reliable ways to handle this:
- Full manual: set the shutter speed and aperture you need, then adjust ISO until the lit part of the bird is correctly exposed. The dark background will go black without any intervention from the camera.
- Manual with auto ISO: this lets the camera adjust ISO as the light changes, and you apply negative exposure compensation to keep the lit areas from clipping. Check that your camera allows compensation in this mode.
Light patches move as the sun moves, so choose one patch and wait for the bird to enter it.
A perch that sits inside a bright spot for several minutes is rare, so be prepared to take many frames and keep few.
Dappled light also puts hot spots on the bird in unflattering places, such as a bright blotch across the beak while the eye stays in shadow.
Keep the shots where the eye is lit and the highlights land on the form of the bird rather than cutting across it.
Metering and exposure compensation for each look
Each look in this article rewards a different metering decision.
The compensation values below are starting points.
Your camera, the bird’s plumage and the brightness of the scene change them, so confirm each with the histogram and highlight alert.
Look Metering Compensation starting point Rim light, dark body Spot on the lit edge Negative, based on the highlight alert Glowing backlight Evaluative About +1 to +2 stops Low side light Spot on the lit plumage About 0 to -1 stop Fog and overcast Evaluative, or spot on the head About +1 to +2 stops Low-key spotlit bird Spot on the lit part, or manual Negative, or fixed manual exposure
Spot metering reads a small area, so it gives the most control when the bird has an unusual tone relative to its surroundings.
Evaluative metering reads the whole frame and is more consistent when the light is even. A spot reading of a mid-toned feather renders it as mid-grey.
A bright white breast needs positive compensation to look white, and a dark bird needs negative compensation to stay dark.
Some cameras link the spot meter to the active AF point, and some keep it at the center, so check which your camera does.
Protect highlights first. A highlight that clips has no recoverable detail, but shadows in a raw file usually lift with more tolerance.
This is why most of these looks lean toward slight underexposure of the bright areas.
When you read the histogram, remember that it is drawn from the camera’s processed preview and not from the raw data, so a raw file generally has a little more headroom than it shows.
Each look has a different expected shape:
- Low key: the histogram sits heavily to the left, with the lit bird forming a smaller group toward the right that stops short of the edge.
- Fog and high key: the histogram sits toward the right with nothing pressed against the edge.
- Rim and side light: a wide spread with a gap in the middle is normal, since the picture is built on contrast.
If your camera has an electronic viewfinder that previews exposure, you can see the effect of compensation before you press the shutter.
Use it and make the adjustment while you are watching the bird.
Scouting light before the bird arrives
Moody light is predictable, and that allows you to scout for it.
The bird’s behavior is less predictable than the sun’s, so plan the position first and wait for the bird to use it.
- Check the sun’s path. A sun-position app or a map with sunrise and sunset bearings shows where the sun will be at a given hour. At higher latitudes in winter the sun stays low for much of the day, which gives you a longer window for side light and rim light than in summer.
- Visit the perch at the same time of day. Look at how the light falls on the perch and on the background at the hour you plan to shoot. A perch that glows at 8 am can sit in flat shade at noon.
- Choose perches for their backgrounds. A perch with deep shade behind it suits rim light and low-key work. A perch with distant trees suits fog.
- Pick your position along the arc. Moving about ninety degrees around a perch changes backlight into side light. Decide which look you want before you settle.
Plan your position around the bird’s established habits and keep your distance.
Do not move closer or change the bird’s behavior to get a better angle. A bird that stays comfortable on its perch also gives you more frames in the light you chose.
Finishing the mood in the edit
The edit should keep the mood you captured.
Lifting the shadows on a low-key portrait removes the darkness you worked for, and brightening a foggy frame too far removes the softness.
Make the edit follow the exposure decision.
For rim-lit and side-lit images, a local adjustment that increases contrast on the bird and darkens the surroundings strengthens the effect.
Our guide on how to edit bird photos for high contrast shows how to do this without crushing the feather detail.
If a frame has strong form but a distracting color, it may suit monochrome. The guide to black and white bird portraits explains which plumage and light combinations hold up when color is removed.
Try one setup three times
Pick one of these light setups and return to the same perch for three sessions at the same time of day.
Keep the position, focal length and metering approach the same, and compare how the mood changes as the weather, the sun’s height and the bird’s behavior vary.
Seeing the same scene under different conditions teaches you more about light than shooting a different location each time.
If your lens limits you in low light, whether through a slow maximum aperture or soft performance at the edges, read our lens guide for bird photography next.