
A sharp, correctly exposed bird is a record of what was there.
A portrait is a set of decisions about where the eye sits, how much space surrounds the bird, what the background does and what gets cut.
These bird photography composition tips cover those decisions one at a time, along with the focal length, aperture, distance, camera height and crop that make each one possible.
Most weak portraits from technically capable shooters share the same faults: a centred subject, a clipped tail, a bird looking out of the frame and a perch that cuts through the head.
All of them can be prevented before the shutter fires.
Why a sharp bird still makes a weak portrait
Autofocus systems with subject tracking put a box on the eye and keep it there.
Because the camera handles that, many frames end up with the bird dead centre, filling a default amount of the frame, with whatever lies behind it left to chance.
Every element is in focus or sensibly exposed, and nothing has been arranged.
Composition is the arrangement of those elements. The viewer’s eye goes first to the brightest, sharpest and highest-contrast area, which in a bird portrait should be the eye and head.
Then it follows lines, gaze direction and edges to the rest of the frame. If an edge cuts the tail or a bright twig crosses the beak, the eye goes there instead.
The classical principles (thirds, the golden ratio, lead room, negative space) are ways of controlling that path.
Each one translates into a shooting choice, and the sections below take them in the order you would apply them in the field.
Put the eye first: placing the catchlight on a third
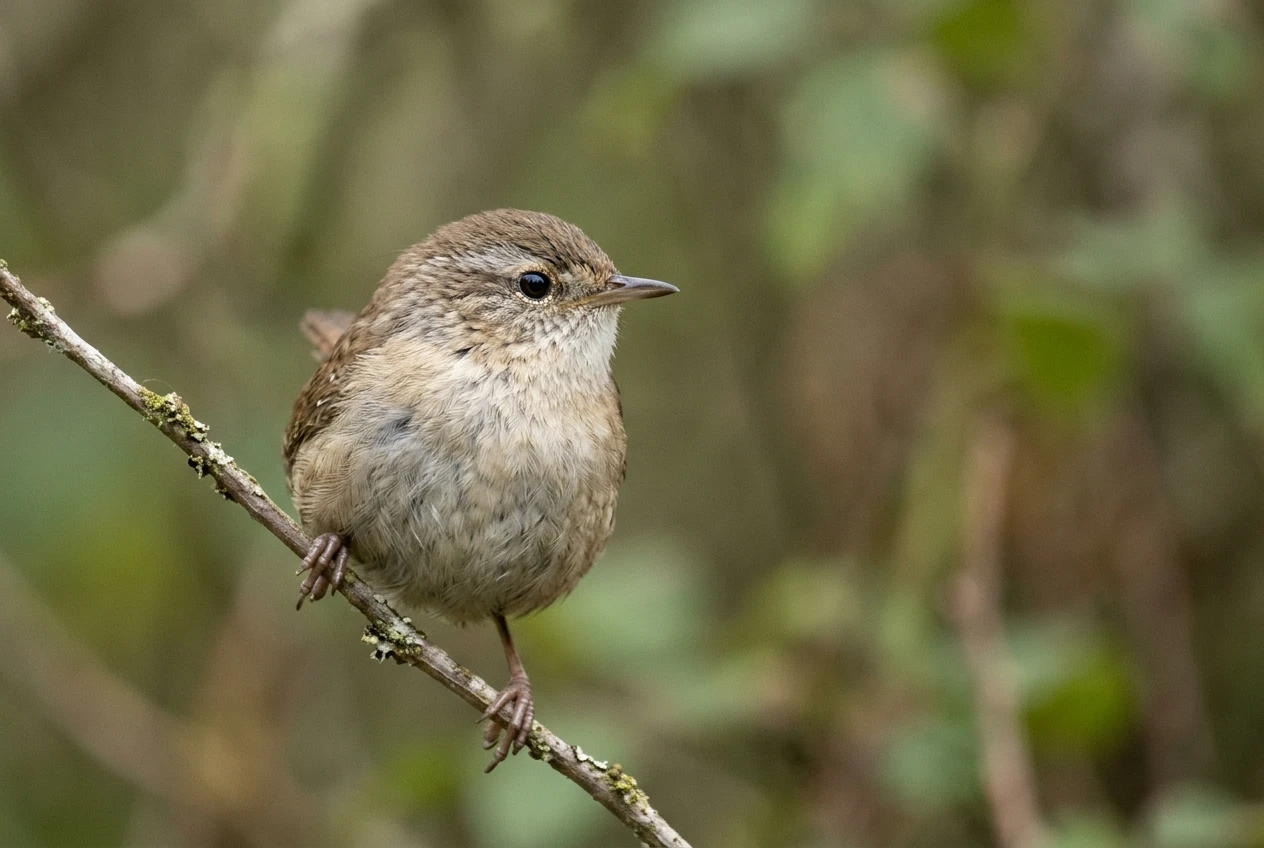
Divide the frame into thirds with two vertical and two horizontal lines. The four intersections are the strongest positions for the eye.
For a bird in profile, put the eye on one of the upper intersections, which usually places the body in the lower two thirds and gives the head room to dominate.
The golden ratio gives a similar result.
A phi grid puts its lines at roughly 38 and 62 percent of the frame width and height, slightly closer to centre than thirds.
The difference is small, so use either as a guide and do not measure to the pixel. What matters is that the eye is clearly off centre and sits where a grid line crosses.
The catchlight, the small reflection of the light source in the eye, is what makes the eye look alive.
If it is missing because the head is turned away from the light or the eye is in shadow, the portrait loses its focal point.
Move your position or wait for a head turn rather than trying to fix it afterwards.
Focus placement matters as much as framing.
At 600mm and f/6.3 on a full-frame body, with the bird about 10 metres away, the depth of field is roughly 10 centimetres.
That is enough for the eye and the beak only if the head is square to the sensor.
When the bird faces you at an angle, the near side of the beak and the far eye sit in different planes, and one of them goes soft.
To keep both sharp:
- Wait for the head to turn parallel to the sensor plane, or move so that it is.
- Stop down a stop or two when the bird is close and the beak is long.
- Always put the focus point on the eye nearest the camera.
Lead room and gaze direction: space in front of the beak
A bird looking out of the frame creates tension that has nothing to resolve.
A bird with space in front of it looks as though it has somewhere to look.
This is lead room, and it is the most commonly skipped step among hobbyists, because the subject tracking box follows the bird and the framing follows the box.
For a bird in profile, put the bird on the third line farthest from the direction it faces.
A bird looking right goes on the left third line, leaving about two thirds of the frame in front of its beak and one third behind.
These proportions are a starting point rather than a law.
A bird with a long bill, such as a heron or curlew, may need more space ahead, and a short-billed finch can work with less.
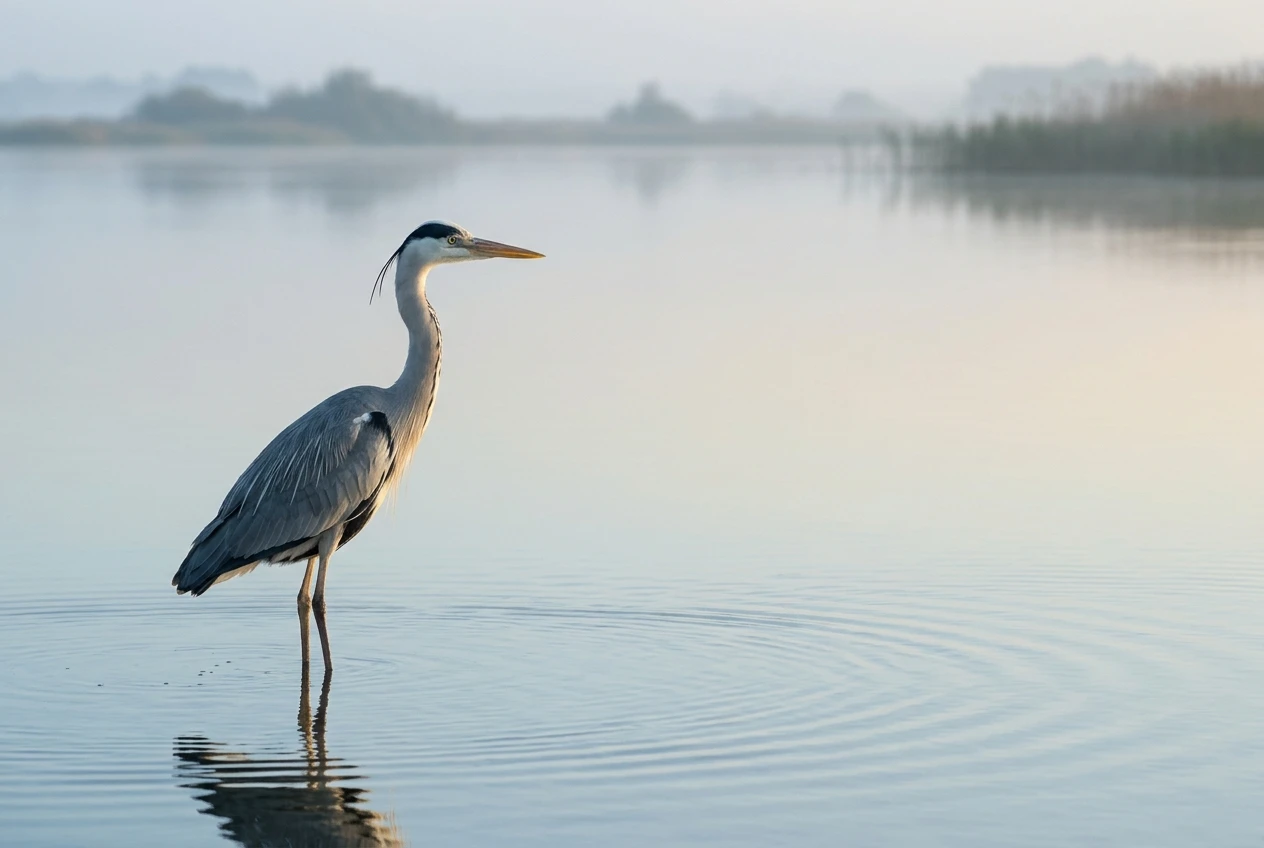
Gaze direction can override body direction.
A perched bird whose body points left but whose head is turned right should be given room on the right, because the viewer follows the eye.
Check where the beak points, then check where the eye is looking.
When the bird faces the camera, lead room does not apply, and a centred composition can work because the shape is symmetrical.
Even then, a slight offset or a head tilt usually reads better than dead centre.
Leave space behind the tail as well.
A clipped tail tip is the second most common error, and it looks like a mistake whether it is cut by a few pixels or a few centimetres.
Either include the whole tail with a visible margin, or crop clearly through the body, so that the cut reads as a decision.
Negative space and the tight crop: environmental portrait or head and shoulders
Negative space is the empty area around the subject. In a bird portrait it can be out-of-focus water, sky or a smooth background, and it is what makes the bird stand out.
There are two workable approaches, and mixing them tends to produce a frame that is neither.
Environmental portrait. The bird occupies perhaps a quarter to a third of the frame, with habitat visible around it.
This works when the surroundings add information: a wader on a wet mudflat, a perched raptor against a dead snag, a bird small on a large bare branch.
The empty space becomes part of the subject, so it needs to be clean. Keep it free of bright patches and competing shapes.
Head and shoulders. The head, neck and upper chest fill most of the frame, and the eye sits on a third with close to no habitat visible.
This calls for a longer focal length or a closer approach, and it works best with plain backgrounds.
Detail in the feathers carries the image, so the focus on the eye must be exact.
Decide which one you are making before you press the shutter. The choice determines the lens, the distance and the background you wait for.
A 600mm lens at 8 metres produces a head and shoulders portrait of a mid-sized bird. A 400mm lens at the same distance, shot with room to spare, gives you the option of either.
Camera height and angle: shoot at eye level
The height of the camera relative to the bird changes both the perspective and the background.
Shooting down on a bird shows the top of its head and back, makes the perch look steep and puts the ground or foliage behind it.
Shooting at the bird’s eye level makes the head and eye the nearest and largest parts of the frame, turns the perch into a line across the frame and puts a distant, smooth background behind the bird.
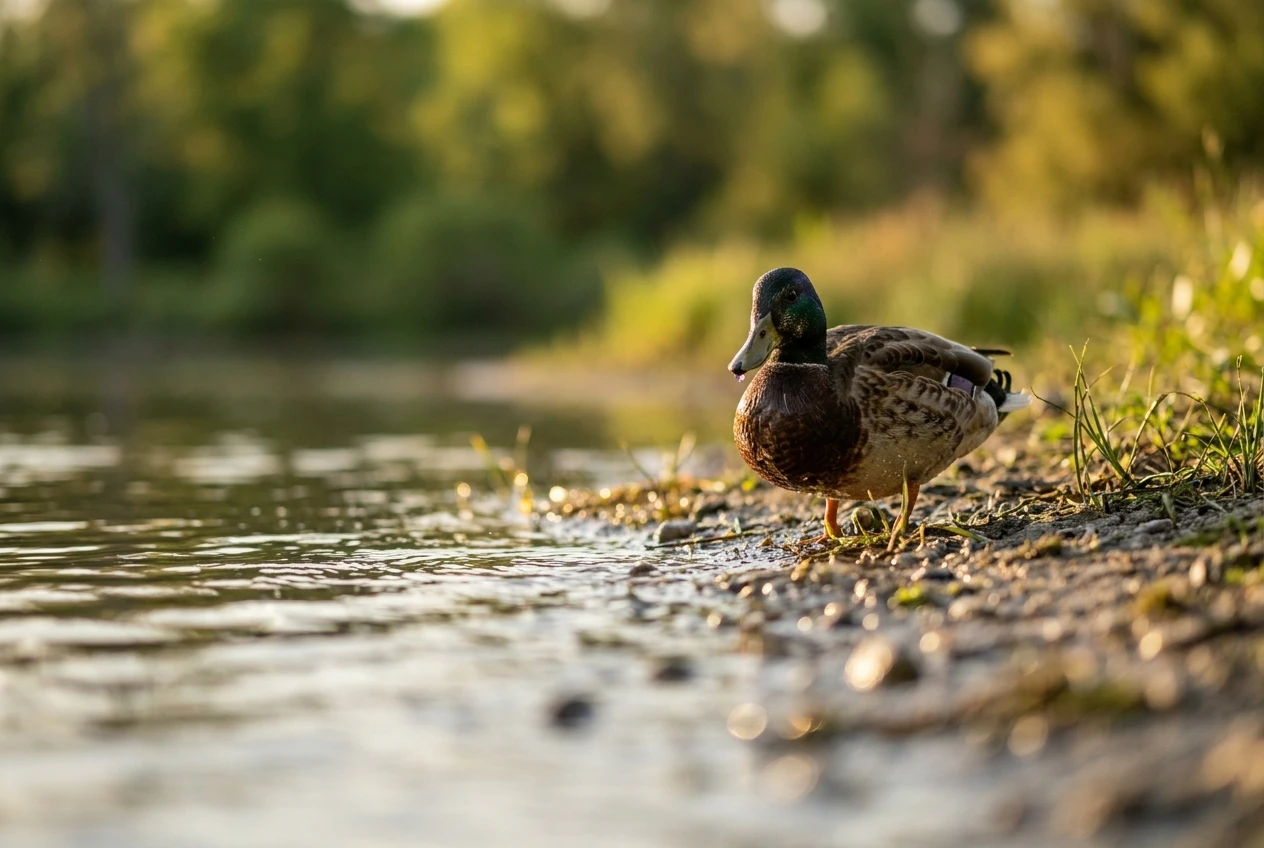
For ground-level birds, this means getting low.
Ducks on a pond, waders on a shoreline and birds feeding on grass all look better when the lens is a few centimetres above the surface.
A low tripod head, a beanbag on the ground or a ground pod makes this practical.
Lying down is often the only way to get to that height.
For birds in trees, eye level may not be possible. In that case, use the highest angle you can reach and wait for the bird to look downward, which brings the eye toward the lens.
Avoid shooting steeply upward, which shows the underside of the chin and the tail and rarely flatters the bird.
A level camera also helps with the background. When the lens points slightly down, the background is nearer ground, which tends to be cluttered.
When it is level, the background is farther away and its detail is more likely to blur out.
Background separation: distance, aperture and focal length
Background blur depends on three things: how far you are from the bird, how far the background is behind the bird, and the focal length and aperture.
Each one can be changed independently.
- Subject distance. Move closer to the bird, which makes the background blur stronger at the same aperture.
- Background distance. Move yourself, or wait for the bird to move, so that the background is as far behind the bird as possible. A background several times farther away than the bird is from you will usually blur completely. A bush a metre behind a perch will stay recognisable at any aperture.
- Focal length. A longer lens magnifies the background, so it appears more blurred, and its narrower angle of view includes less clutter. A 600mm lens sees a much smaller patch of background than a 200mm lens from the same position.
- Aperture. A wider aperture gives shallower depth of field. For a small bird at a distance, wide open is usually safe. For a large bird at close range, stop down a little so the whole head stays sharp.
Watch for bright patches in the background as well as shapes.
A small patch of sky between leaves becomes a large pale blob when blurred, and it pulls attention away from the eye.
Shift a step to either side to take it out of line with the bird’s head.
Framing devices and perch geometry
Natural frames and line direction can guide the eye to the bird without any editing. Both depend on where you stand and how you angle the lens.
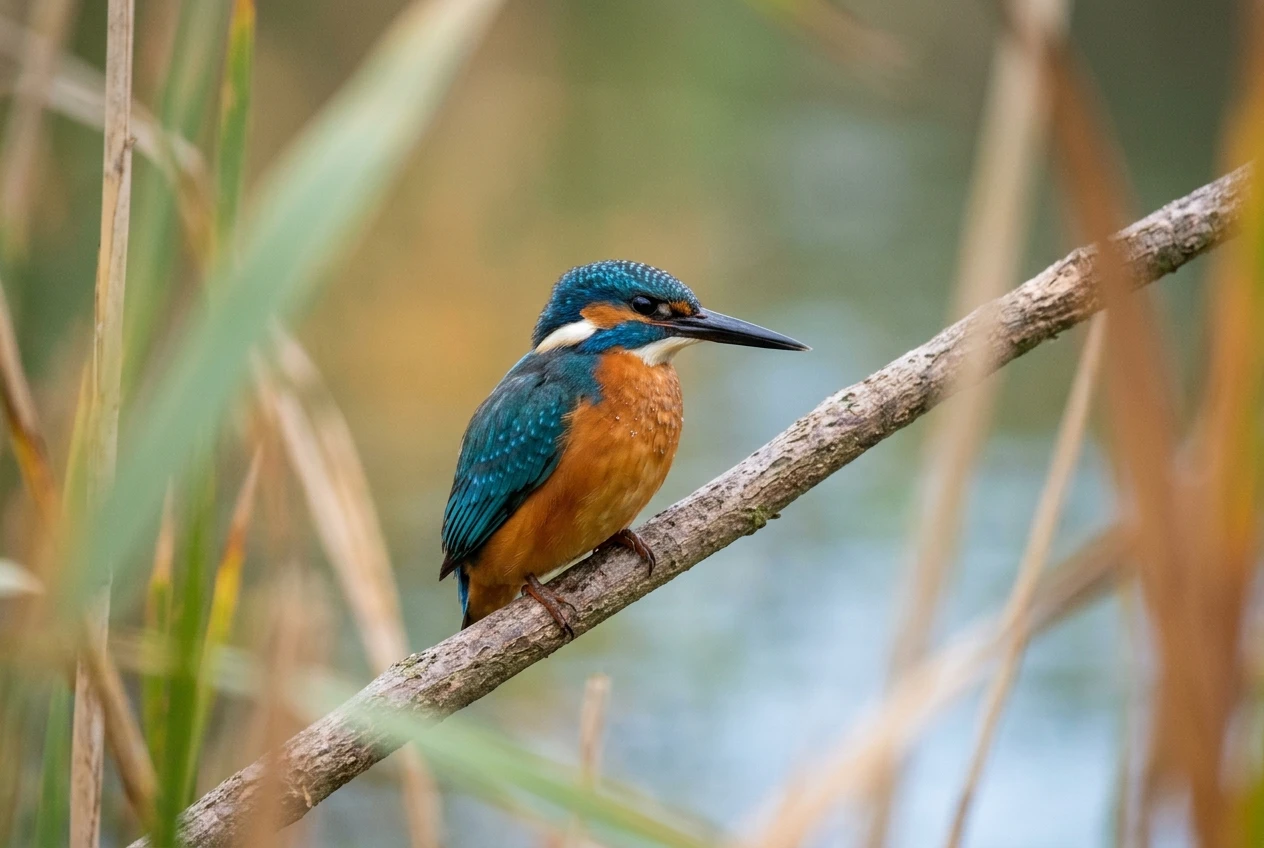
Framing devices
Out-of-focus foreground elements such as reeds, grass stems or leaves at the edges of the frame can enclose the bird and add depth.
Shoot through them with a long lens at a wide aperture so they dissolve into a soft wash of colour.
Keep the eye and the beak clear of the foreground, because any sharp object in front of the face is distracting.
Perch geometry
The perch is part of the composition, and a poor one can undermine a well-exposed shot.
Check these before you shoot:
- Diagonals. A branch running at an angle across the frame creates a line that leads toward the bird and adds energy. A perfectly horizontal branch cuts the frame in two and reads as static.
- Tangents. Watch for twigs touching the beak, the crown or the tail tip. A twig that just touches an outline merges with the bird and confuses its shape. Either let it overlap clearly or move so that it clears.
- Lines through the head. A branch or reed that appears to grow from the bird’s head is a frequent problem. A small shift in position usually separates them.
- Perch weight. A thick, heavy perch under a small bird dominates the frame, while a thin perch suits a delicate subject.
Take a moment before the bird settles to look at the whole frame edge to edge.
Corners and edges collect distractions, and they are easier to deal with in the field than in the editing software.
Cropping in post without wrecking the composition
Cropping is a second chance to apply the same principles, and shooting slightly looser than you intend makes it easier.
A frame with margin on all sides lets you choose the final proportions afterwards.
Several points apply when you crop:
- Recheck the grid. After cropping, the eye should still sit near a third or phi line. Cropping tightly on one side moves everything else.
- Preserve lead room. Cropping the space in front of the beak is a common way to turn a good frame into a cramped one. Crop from the back or the bottom first.
- Choose a ratio deliberately. A 4:5 crop suits vertical perched birds and close portraits, 3:2 is the native format of most cameras and 16:9 suits birds on long horizontal perches or wide environmental scenes.
- Keep the resolution for the output. A 6000 by 4000 pixel file prints at 20 by 13.3 inches at 300 pixels per inch. A crop that leaves 4240 by 2830 pixels still prints at about 14 by 9.4 inches at the same density. Check the remaining pixels before committing to a large print.
- Straighten first. Level the horizon or the water line before cropping, because rotating afterwards removes more of the frame.
Once the crop is set, tone and contrast adjustments come next, and the guide on how to edit bird photos for high contrast covers that stage without losing feather detail.
Choosing the gear that makes these compositions easier
Longer focal lengths and bodies with reliable eye tracking make most of the choices above simpler, because they let you control distance, background and framing without disturbing the bird.
The Hub’s guides to the best lenses for bird photography and the best cameras for bird photography set out the options by budget and experience level, so you can pick the focal length and body that suit the portraits you want to make.
Prints of the portraits shown on this site are available in the shop.