
Learning how to weatherproof camera gear for bird photography starts with an admission: nothing you own is waterproof, and “weather sealed” describes resistance, not immunity.
A long lens on a body spends hours outdoors, often at dawn, often near water, often in the conditions birds are most active.
The gear survives that for years only when the sealing is backed by protection in the field and a consistent routine afterwards.
This guide covers what sealing does and does not do, how to protect a rig during a shoot in rain, salt and cold, and the cleaning, drying and storage sequence that keeps moisture and grit from accumulating.
What weather sealing actually covers on a body and a long lens
Weather sealing is a set of gaskets, o-rings and tight tolerances placed at the points where water and dust would otherwise enter: the body seams, the battery and card doors, the mount, the control dials and buttons, and on a lens, the focus and zoom rings, the switches and the mount.
Camera makers generally describe this as dust and moisture resistance and often give no formal ingress protection rating.
Read your manual and the manufacturer’s product page for what is actually claimed for your model, and treat anything beyond that as unprotected.
Sealing is strongest when the gaskets are intact and the doors are closed. It is weakest in these places:
- Open doors and ports. The card slot, battery compartment, USB and HDMI covers, and the hot shoe all let water in once opened.
- Moving parts of a lens. Extending zoom barrels and rotating focus rings can pull moist air in and out as they move, which is a well-known route for dust and humidity to reach the inside of a lens.
- Tripod collars and lens feet. These are mechanical parts, not sealed ones, and they collect grit that wears the surfaces.
- Anything with a gap. Older gear, gear that has been dropped, and gear whose gaskets have aged or been disturbed no longer matches its original sealing.
Sealing also does not cover salt.
Salt water is corrosive and conductive, and it dries into crystals that wick into seams.
A body that shrugs off an hour of drizzle can still be damaged by a single spray of salt water that was left to dry on it.
Condensation is a separate problem.
It forms on the inside, from air that was already in the camera, so gaskets do nothing against it. The cold-to-warm section below covers it.
Rain on a long lens: rain covers, lens hoods and what to do when a shower starts mid-burst
A long telephoto lens is a good rain tool in one respect: the hood is long and extends well beyond the front element.
Keep the hood fitted and pointed slightly downward when you are not shooting, so rain falls on the hood rather than the glass.
Drops on the front element are the usual cause of lost shots in light rain, more than any risk to the gear.
For anything beyond drizzle, use a rain cover made for long lenses.
Several types exist, from fitted covers for specific lens sizes to universal sleeves with a rear opening for the camera. Whichever you use, check these points before you leave:
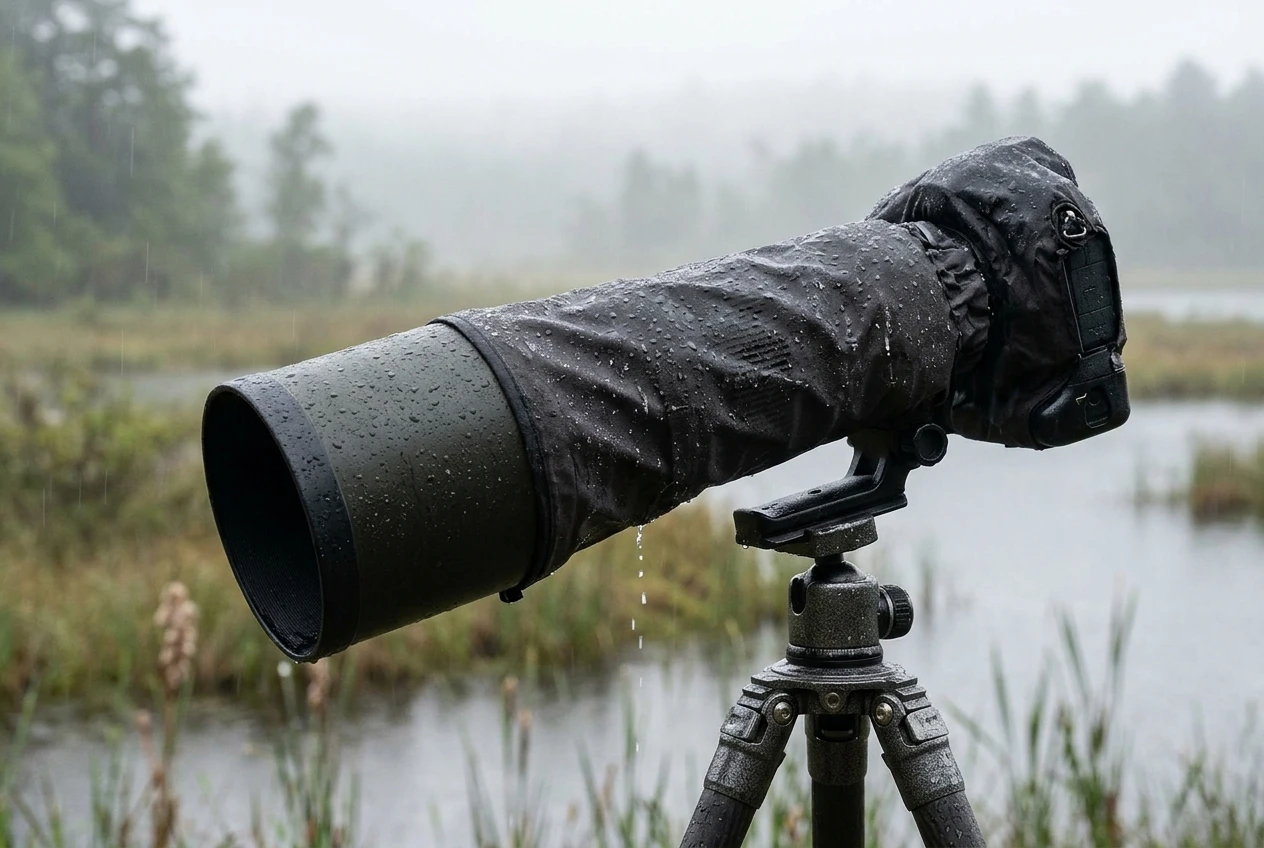
- The sleeve fits over the hood or front of the lens without pressing against the focus ring or zoom ring.
- The eyepiece or rear screen can be reached without lifting the cover and letting rain in.
- The cover is closed around the tripod collar or lens foot if you are using one.
- The cover is dry inside. A damp cover trapped over a warm camera becomes a humid pocket.
A cover is a temporary shelter and not a reason to leave the rig out for hours of hard rain. Battery and card doors stay shut for the entire shoot.
When a shower starts mid-burst. Stop shooting if you can, point the lens downward, and get the cover on before you wipe anything. Wiping a wet body with the cover still off pushes water into dial gaps.
If you have no cover, tuck the camera under your jacket with the lens hood angled down, or shelter under a tree or hide.
When you can pause, take the front element drops off with a clean microfiber cloth using a light dab, not a rub, since grit trapped in the cloth will scratch coatings.
A few habits reduce risk in wet weather:
- Do not change lenses in rain. The mount is open to the sensor, and a single drop on the sensor chamber is far harder to deal with than a delayed shot.
- Keep the body’s camera strap and the lens strap out of puddles. Wet straps drip onto the mount and dials when you lift the camera.
- Carry a small towel or a dry cloth in a zipped pocket for drying your hands before you touch the camera.
Salt spray and sand at the shoreline: protecting the rig and the tripod collar and legs
Shore line shooting is where gear gets damaged most slowly and most completely.
Wind carries a fine salt mist that you may not feel on your skin, and it settles on every exposed surface.
Sand blows into seams and crunches inside rings and locks.
In the field:
- Keep the lens hood on and the lens cap on between sequences. The front element is the surface most likely to pick up a salt film.
- Put the rig on a stable support and keep it above the ground. Do not set a camera down on sand, wet or dry. Hang the bag on the tripod or keep it on a flat rock or a mat.
- Stay out of the splash zone. Waves and spray travel further than they look, especially with a big swell. If you are shooting sandpipers or other waders at the tideline, position the tripod where a wave will not reach the legs. The sandpiper guide on this site covers the fieldcraft for approaching them, and this guide covers what happens to the gear.
- Avoid lens changes entirely on windy beach days. Sand in the mount scratches the lens and sensor surfaces.
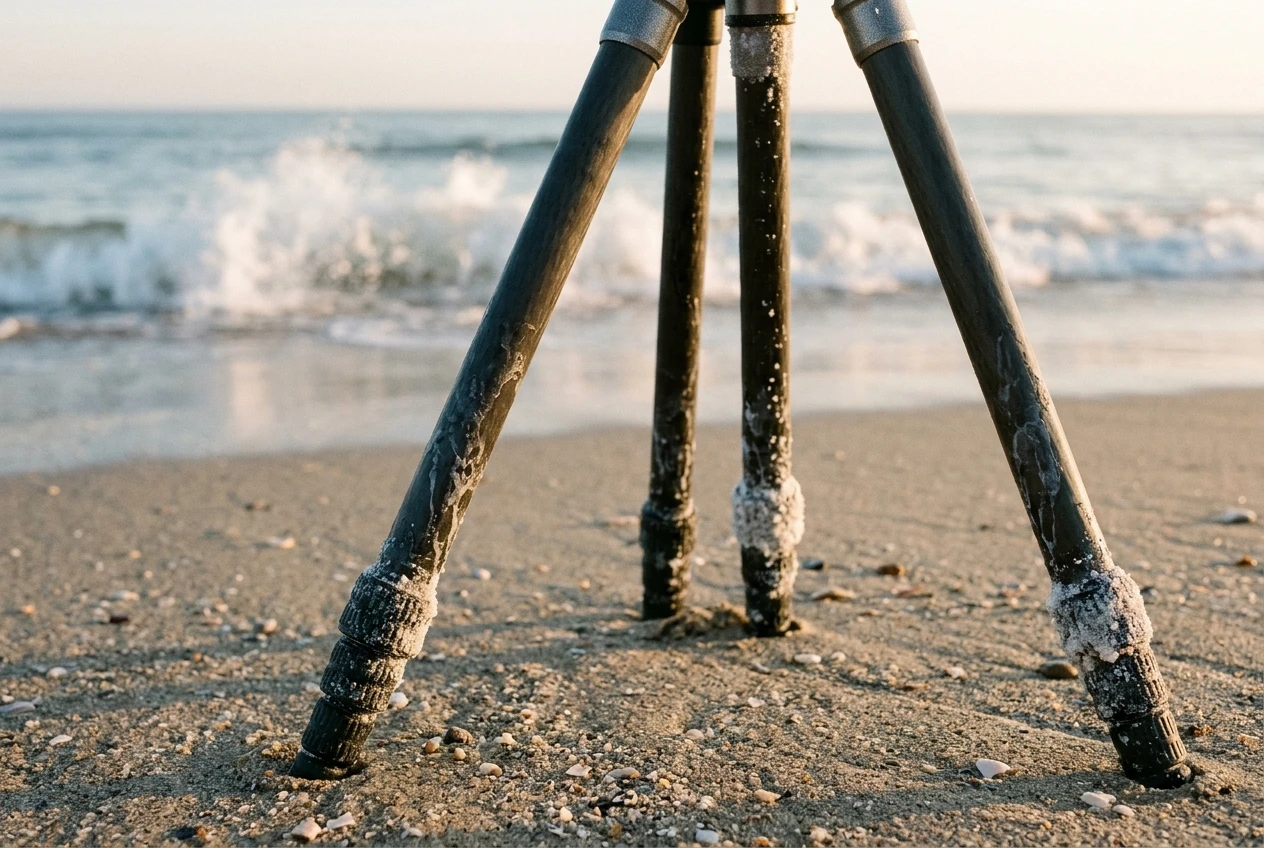
The tripod and the legs are where salt does the quietest harm.
Salt crystals build up in the leg locks and the collar, and they make twist locks gritty and stiff over time.
If your support has been in salt water or spray, rinse the legs with fresh water after the shoot.
Extend each leg section fully, wipe it, and let it dry in the open with the sections extended. Check the manufacturer’s guidance before you disassemble the locks, as some designs are meant to be opened for cleaning and some are not.
Wipe the lens collar and foot with a cloth dampened with fresh water, then a dry cloth.
If you are choosing between supports for coastal work, the monopod versus tripod comparison on this site covers the handling side, and the cleaning side is the same for both: fresh water, then dry, every time.
For the camera and lens, never rinse them under a tap.
Use a clean cloth dampened with fresh water and wrung out until it is barely damp, wipe the exterior surfaces to remove salt, then dry with a second cloth.
Work around the dials, the lens barrel joints and the hood mount.
Salt left on a surface will pull moisture out of the air and keep the area damp long after it feels dry.
Cold mornings and condensation: acclimatising gear before it moves from cold air into a warm car or house
Cold air carries little moisture.
Warm indoor air carries more, and when it meets a cold camera, the water condenses on the surface, in the lens barrel and, if the camera is open, on the sensor and the mirror box or shutter area.
Condensation can sit inside a lens for hours. That is what makes it a risk to optics and electronics.
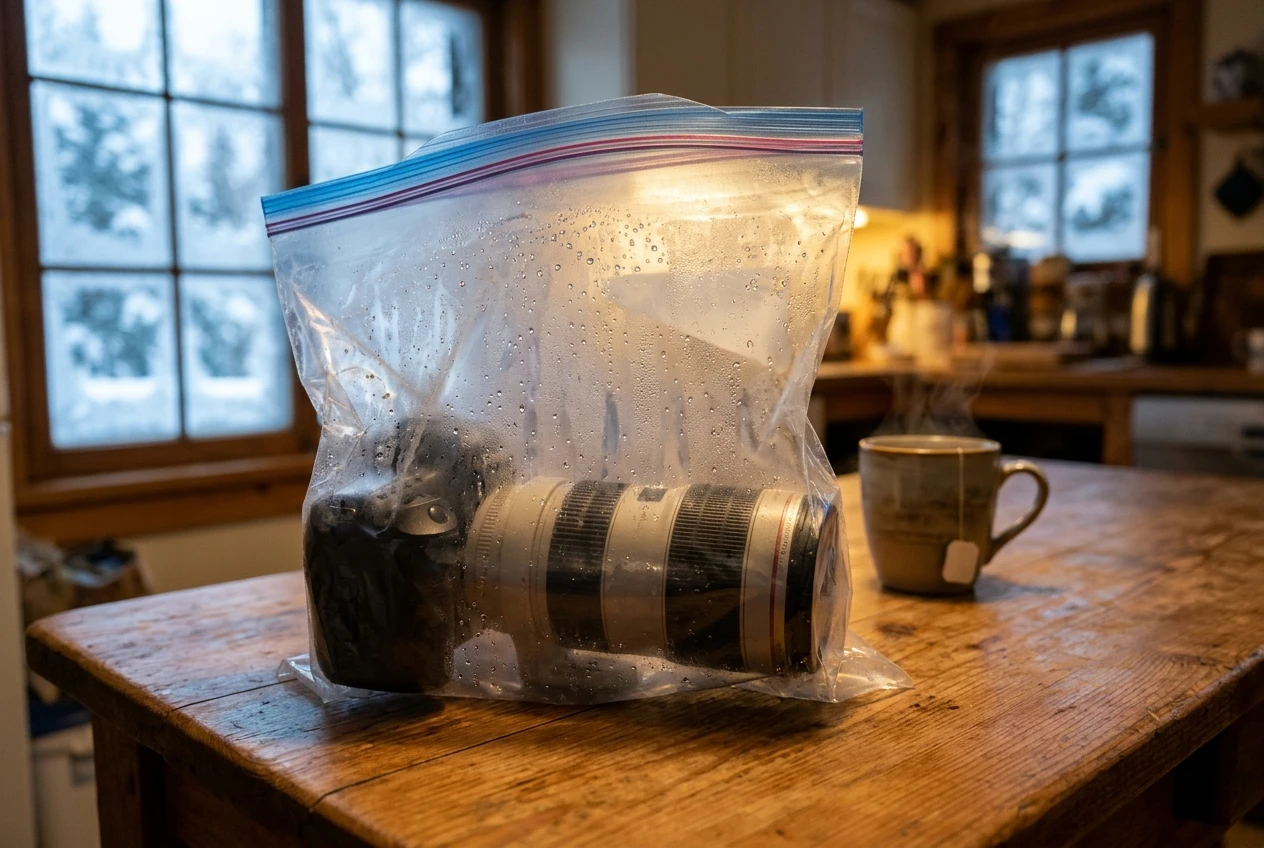
The solution is a slow temperature change with the camera sealed from humid air:
- Before you go indoors, turn the camera off and remove the lens cap. Cap off lets any moisture escape the front of the lens, but only while you remain outside or in a cold space. Put the cap back on before you enter a warm room.
- Put the camera and lens in a sealed bag. A zip-top plastic bag or a dry bag works. Squeeze out the air. Warm indoor air stays outside the bag, and condensation forms on the outside of the bag instead of on the gear.
- Leave the bag sealed until the gear reaches room temperature. This can take an hour or more for a large telephoto lens, because the glass and metal hold the cold. Do not open the bag early to check.
- Open and wipe the outside only after the gear has warmed up.
The same applies when you get back to your car. A heated cabin is warm and humid from your breath.
Keep the camera in its bag or in a sealed bag with the lens cap on until the interior of the car has stabilised, or leave the gear in the boot of the car while you warm up.
Cold also affects batteries.
They deliver less power in low temperatures and recover when warmed, so keep spares in an inside pocket close to your body.
Swap a cold battery for a warm one when the camera reports low charge, instead of assuming the battery is flat.
Keep the used battery warm and it may recover some capacity.
The after-shoot routine: wiping down, drying, checking seals, mounts and contacts, and when not to open anything
Do this routine every time the gear has been in rain, spray, dust or cold, not only after obvious damage. Work in a clean, dry room away from open windows.
- Power off and let the gear acclimatise. If it was cold or wet, follow the sealed-bag step above first.
- Take off the rain cover and shake it out. Hang it to dry fully before it goes back in the bag.
- Wipe the body and lens exterior with a clean, dry microfiber cloth. If there is salt or heavy dirt, use a cloth dampened with fresh water first, then dry. Pay attention to the strap lugs, the dial gaps and the zoom and focus rings.
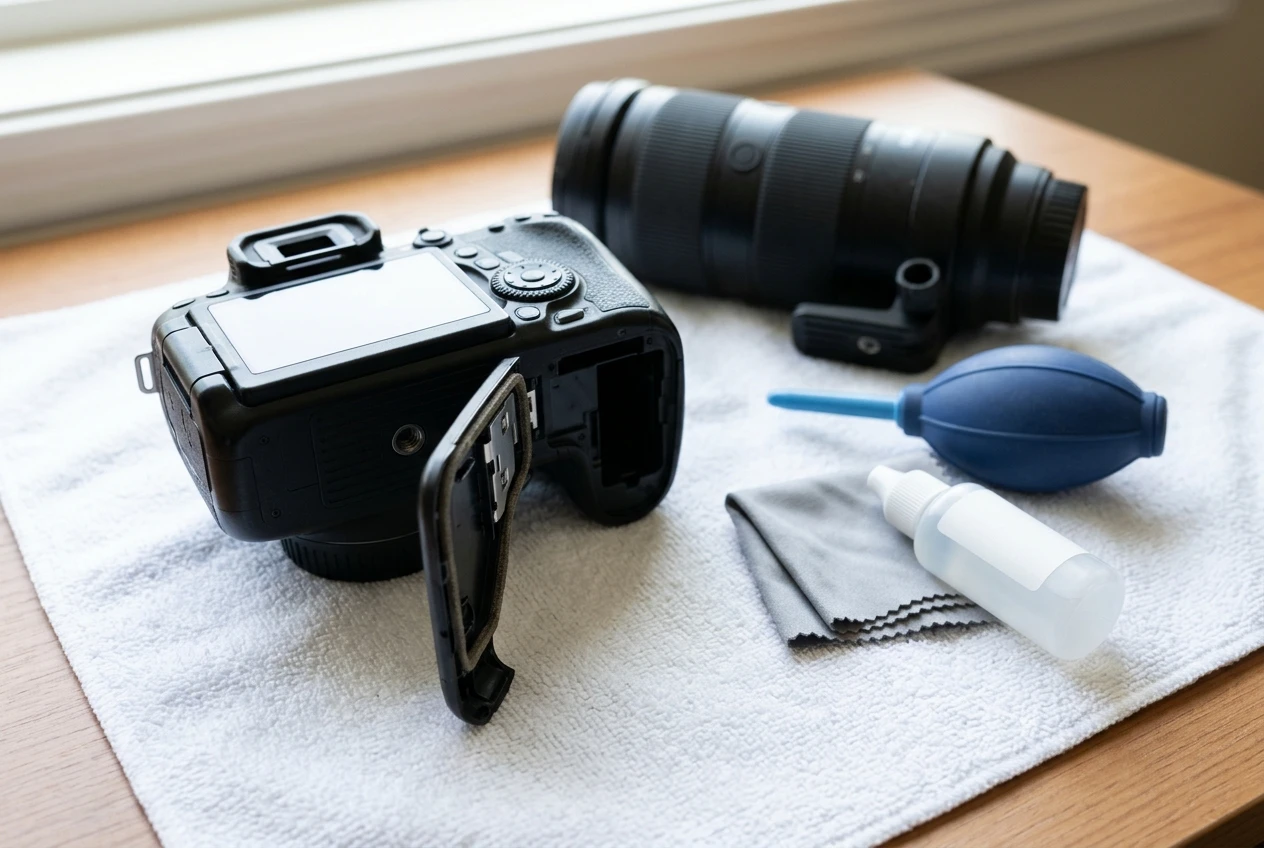
- Clean the front element with a blower first to lift grit, then a lens cloth or a lens tissue with a drop of lens cleaning fluid applied to the cloth, not the glass. Wipe in a gentle spiral from the center outward.
- Check the lens hood and its mount. Dirt and sand collect at the bayonet and under the hood’s locking ring.
- Dry the tripod collar, lens foot and tripod head with a cloth, and check that the collar still turns smoothly.
- Leave everything open to the room air for a few hours. Remove the lens cap and the body cap if the lens is off the camera, and put the rig somewhere with ordinary air circulation. Do not use a hair dryer, a radiator or direct sunlight to speed things up. Heat can warp seals and push moisture into places it did not reach.
- Check the seals and contacts. Look at the battery door gasket, the card door gasket and the port covers for grit or tears. Look at the lens mount contacts and the camera mount contacts for dirt or green or white deposits, a sign of corrosion. Wipe contacts only if they are visibly dirty, and use a dry, lint-free cloth.
When not to open anything. If the camera or lens is wet inside, or has been dunked or exposed to salt water, do not open the card door or battery door, do not remove the lens, and do not power it on.
Opening it lets in more air and moisture and gives water a path to the electronics.
Turn it off, remove the battery and card only if the doors are dry and the exterior has been wiped, and take it to a service centre.
The same applies if you see fogging inside the lens: leave it sealed in a dry, warm place and let it clear, and if it does not, have it looked at.
Do not unscrew lens parts, and do not attempt to clean inside the camera body beyond the steps in the next section.
Sensor, rear element and filter care: dust, blower, brush and when to send it for professional service
Dust on the sensor shows up as dark spots in your images, most visibly in clear sky and at small apertures.
The rear element of the lens sits close to the sensor and can carry dust into the camera as you change lenses.
Take care in this order, and stop when the problem is solved:
- Use the camera’s built-in sensor cleaning function if it has one. It vibrates the sensor filter to shake off loose dust.
- Use a hand blower. Hold the camera with the opening facing down, so that dislodged dust falls out and not back in. Do not use canned compressed air, as the propellant can spray liquid onto the sensor, and do not use your mouth.
- Use a sensor brush only if you are comfortable with it, with the camera set to its sensor-cleaning mode, if it has one, so the shutter stays open. Keep the brush clean and dry.
- Wet cleaning with swabs and fluid removes oily smears and stuck dust. It carries a risk of scratching the filter in front of the sensor, so many owners prefer to leave it to a technician.
Send the camera for professional service when dust or marks persist after a blower and a careful brush, when you see an oily smear you cannot clear, or when you suspect moisture inside the camera or lens.
The same applies if a switch, dial or focus ring feels gritty, as grit inside the lens barrel causes wear.
For the rear element, use a blower and, if needed, a clean lens cloth with minimal pressure. Keep the rear lens cap on whenever the lens is off the camera.
On front filters, a clear protective filter is a choice, not a necessity.
It protects the front element from salt and grit and is easier to clean or replace than the lens’s own glass, but it adds another surface that can flare or reflect light.
If you use one, clean it with the same method you use for the front element and replace it if it is scratched.
Storing gear between trips: humidity control, battery and card care, and a monthly check schedule
Humid storage is the long-term threat.
Lenses kept in a damp environment can grow fungus on the internal elements, and fungus is difficult and expensive to remove.
A relative humidity of around 40 to 50 percent is commonly recommended for storing camera gear.
A small hygrometer in the cabinet or bag tells you where you are.
For storage:
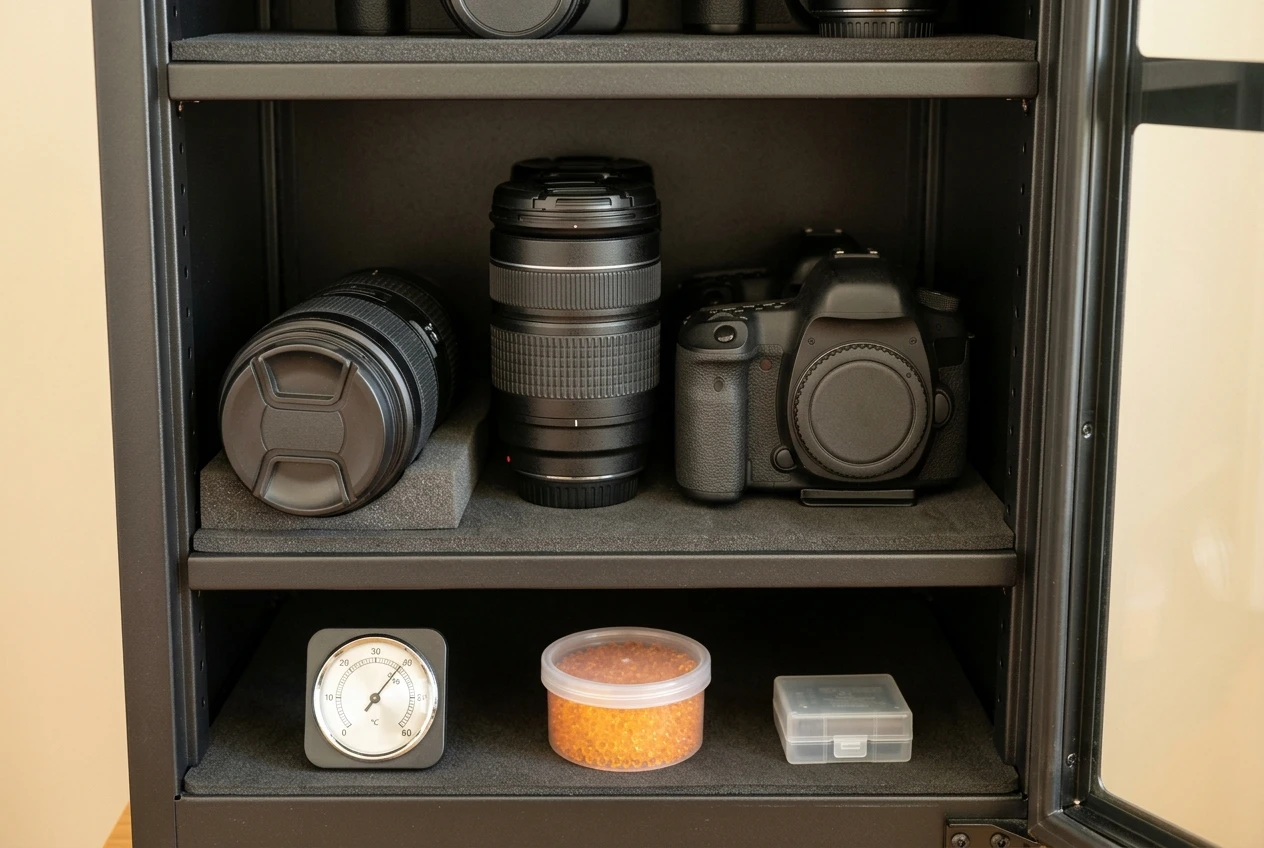
- Use a dry cabinet or a sealed box with silica gel. Silica gel absorbs moisture until saturated, so recharge or replace it according to its instructions.
- Store lenses with both caps on, in a cool, ventilated room and away from exterior walls, garages and basements, where temperature and humidity swing.
- Do not store gear in a sealed bag without a desiccant unless it is fully dry. A sealed bag traps whatever moisture is already inside.
- Avoid leather and foam that stay damp. Let camera bags dry fully before storing gear in them. The bag article on this site, what to pack in your camera bag for a long lens birding day, covers what goes in the bag, and the same bag should be dry and empty of grit before it holds your gear again.
Batteries. Lithium-ion batteries age fastest when stored fully charged or fully depleted.
For storage of more than a few weeks, keep them at a partial charge, roughly half, in a cool, dry place and out of the camera. Take the battery out of the body for long storage.
Cards. Copy images off the card, check them, then format the card in the camera before the next shoot. Keep cards in their cases, not loose in a pocket, to protect the contacts from dust and moisture.
A monthly check schedule. Once a month, take the gear out of storage and:
- Check the humidity reading and the state of the silica gel.
- Inspect each lens through the front and rear elements with a torch for haze, spots or fungus.
- Turn the focus and zoom rings through their full range, and extend and retract any zooming barrel, to keep lubricants distributed.
- Fit the lens to the body, power on, and fire the shutter several times. Check for error messages.
- Top up or discharge batteries to the storage level, and check the battery contacts.
- Look for firmware updates for the body and lenses.
- Inspect the tripod, head and collar for corrosion, loose screws and grit.
Make the routine part of every shoot
The routine takes about fifteen minutes after each outing.
Run through the after-shoot routine on your own kit this weekend, then check the Best Lenses For Bird Photography guide if a lens upgrade is on your list and weather resistance matters to you.