
Yes.
Beginners can absolutely snap striking black and white bird photographs by following some simple but powerful techniques.
My favorites are shooting in RAW for more flexibility, picking fast shutter speeds (usually between 1/1000 and 1/2500), and always exposing for the highlights.
Black and white is actually easier for newcomers because it takes color distractions out of the mix, letting you really get into the play of light and the fine details of feathers.
Focusing sharply on the bird’s eye and choosing plain, uncluttered backgrounds are small tweaks that make a big difference.
If you keep these things in mind, your photos will have much more impact from the start.
Light direction gets much more important with monochrome bird shots because everything comes down to shadows, highlights, and texture.
I find that side lighting brings out feather detail, while a backlit bird can become a dramatic silhouette or have a neat rim light.
The best times for black and white are when color is not important or could be distracting, like overcast days, dramatic skies, or when working with birds that are mostly black, white, or gray.
Planning your image while you are shooting (rather than relying on converting color images later) almost always helps you come away with stronger monochrome photos.
If you skip this step, the images feel weak and a little forced in post-processing.
Why Black and White Bird Photography Is Great for Beginners
Black and white bird photography removes those color distractions that sometimes make learning photography a bit overwhelming for newbies.
Once you do not have to worry about color, you start paying attention to how the light lands, what backgrounds are busy or plain, and whether the shape of the bird stands out.
Feather textures suddenly become much more obvious.
You also start seeing ordinary backyard birds, like pigeons or doves, in a totally new way.
This focus on light and composition ends up building your overall photography instincts, so when you do want to shoot in color again, you will have sharper skills.
- Color distractions? Gone! Easier to see if your subject pops.
- Composition matters more. There’s no colorful bird plumage to lean on, just shapes and light.
- Feather detail stands out. Monochrome brings out fine lines and subtle shading.
- Light becomes your main tool. You’ll learn quickly how shadow and brightness affect the whole shot.
- Even common birds look dramatic. You don’t need rare species to make a strong photo.
Stepping into monochrome before color also trains your eye to track down what makes a moment worth capturing.
You might stumble upon hidden patterns in plumage, striking silhouettes against the sky, or subtle gradations of light that you just would not spot when color is front and center.
Plus, monochrome simplifies decision-making—less time worrying about colors matching and more time looking for the right pose, composition, and background tones.
As a bonus, this style often brings fresh appreciation for local birds you might otherwise overlook.
Beginner Camera Settings for Black and White Bird Photography
Getting your camera settings right up front makes your editing workflow much easier later.
Here’s how I set up my camera for black and white bird shots:
Shoot in RAW (Even If You Plan B and W)
- Maximum tonal flexibility: RAW keeps all the info you will need for subtle edits or dramatic blacks and whites.
- Better highlight recovery: If the light blows out some white feathers, RAW gives you a better chance to fix it.
Shutter Speed
- Birds in flight: Stick with 1/2000 to 1/2500 to freeze wings cleanly.
- Perched birds: I stay around 1/1000 or faster to avoid blur from movement.
Aperture
- f/4 to f/5.6: Great for isolating your subject and blurring the background if you want a dramatic look.
- f/8: Lets you include a bit more of the surroundings while keeping the bird sharp. Useful for habitat shots.
ISO
- Go as low as you can. I try to stay at ISO 400 or lower, but I will push it to 1600 if light drops, since some grain can add mood.
Exposure Tips
- Protect your highlights. I often shoot just a tad underexposed, especially with white or light birds, to avoid losing all the feathery detail.
- Watch your histogram. A nice spread across shadows, midtones, and highlights is your friend.
Developing a feel for these settings takes a bit of trial and error, but reviewing your shots for blown highlights or motion blur will help you quickly lock in reliable camera habits for monochrome bird photography.
Lighting Techniques for Eye-Catching Beginner Monochrome Shots
I love experimenting with different types of light, but these are the go-to styles that have always worked for me as a beginner:
Side Lighting
Side light brings out feather texture.
Think of it as the secret sauce for those super detailed shots.
It adds a lot of depth to the bird’s shape, making the monochrome look more three dimensional.
Backlighting
Shoot with the sun or brightest light behind the bird for either a bold silhouette or a glowing edge.
This trick looks amazing with herons, gulls, or any species with clear shapes.
Overcast Conditions
Cloudy days are actually super useful.
The soft, even light is perfect for showing subtle detail that would get lost on a sunny day.
Overcast mornings or evenings are really forgiving for beginners, letting you avoid harsh shadows.
Avoid Flat Light
Midday flat light, with the sun directly overhead, squashes all the interesting contrast out of your picture.
If you are shooting black and white, this kind of light makes everything look dull and lifeless.
Another lighting method worth trying is using dappled light created by leaves or branches.
It can make for some creative patterns on your bird subjects.
Just be careful, as sometimes patchy light can create bright spots that distract from your main subject.
Composition Techniques for Beginners
The basics of composition get even more important in black and white since you don’t have color to lean on.
Here’s what’s always worked for me:
Focus on the Eye
If the bird’s eye is sharp, your photo will connect better with viewers. I always set my focus point right on the eye, even if the body is a bit soft.
Look for Contrast
- Dark bird on a bright sky or water?
- Light bird against dark branches or foliage?
These pairings catch the eye instantly in black and white.
Use Negative Space
Don’t cram the frame full.
Leaving open sky or water next to your subject often boosts the impact.
It can make the bird feel smaller or more dramatic, depending on your angle.
Simplify the Frame
Cluttered backgrounds can ruin a black and white shot.
I always try to move, reframe, or wait until the bird is in front of a plain background before pressing the shutter.
A great habit is to scan the whole frame before shooting.
If you spot messy branches, foliage, or anything distracting, take a step to the side or wait for the bird to move.
These small changes often turn an average shot into something special.
Best Birds for Beginner Black and White Photography
Some species just seem made for monochrome. If you are just starting, these are super easy to find and shoot in black and white:
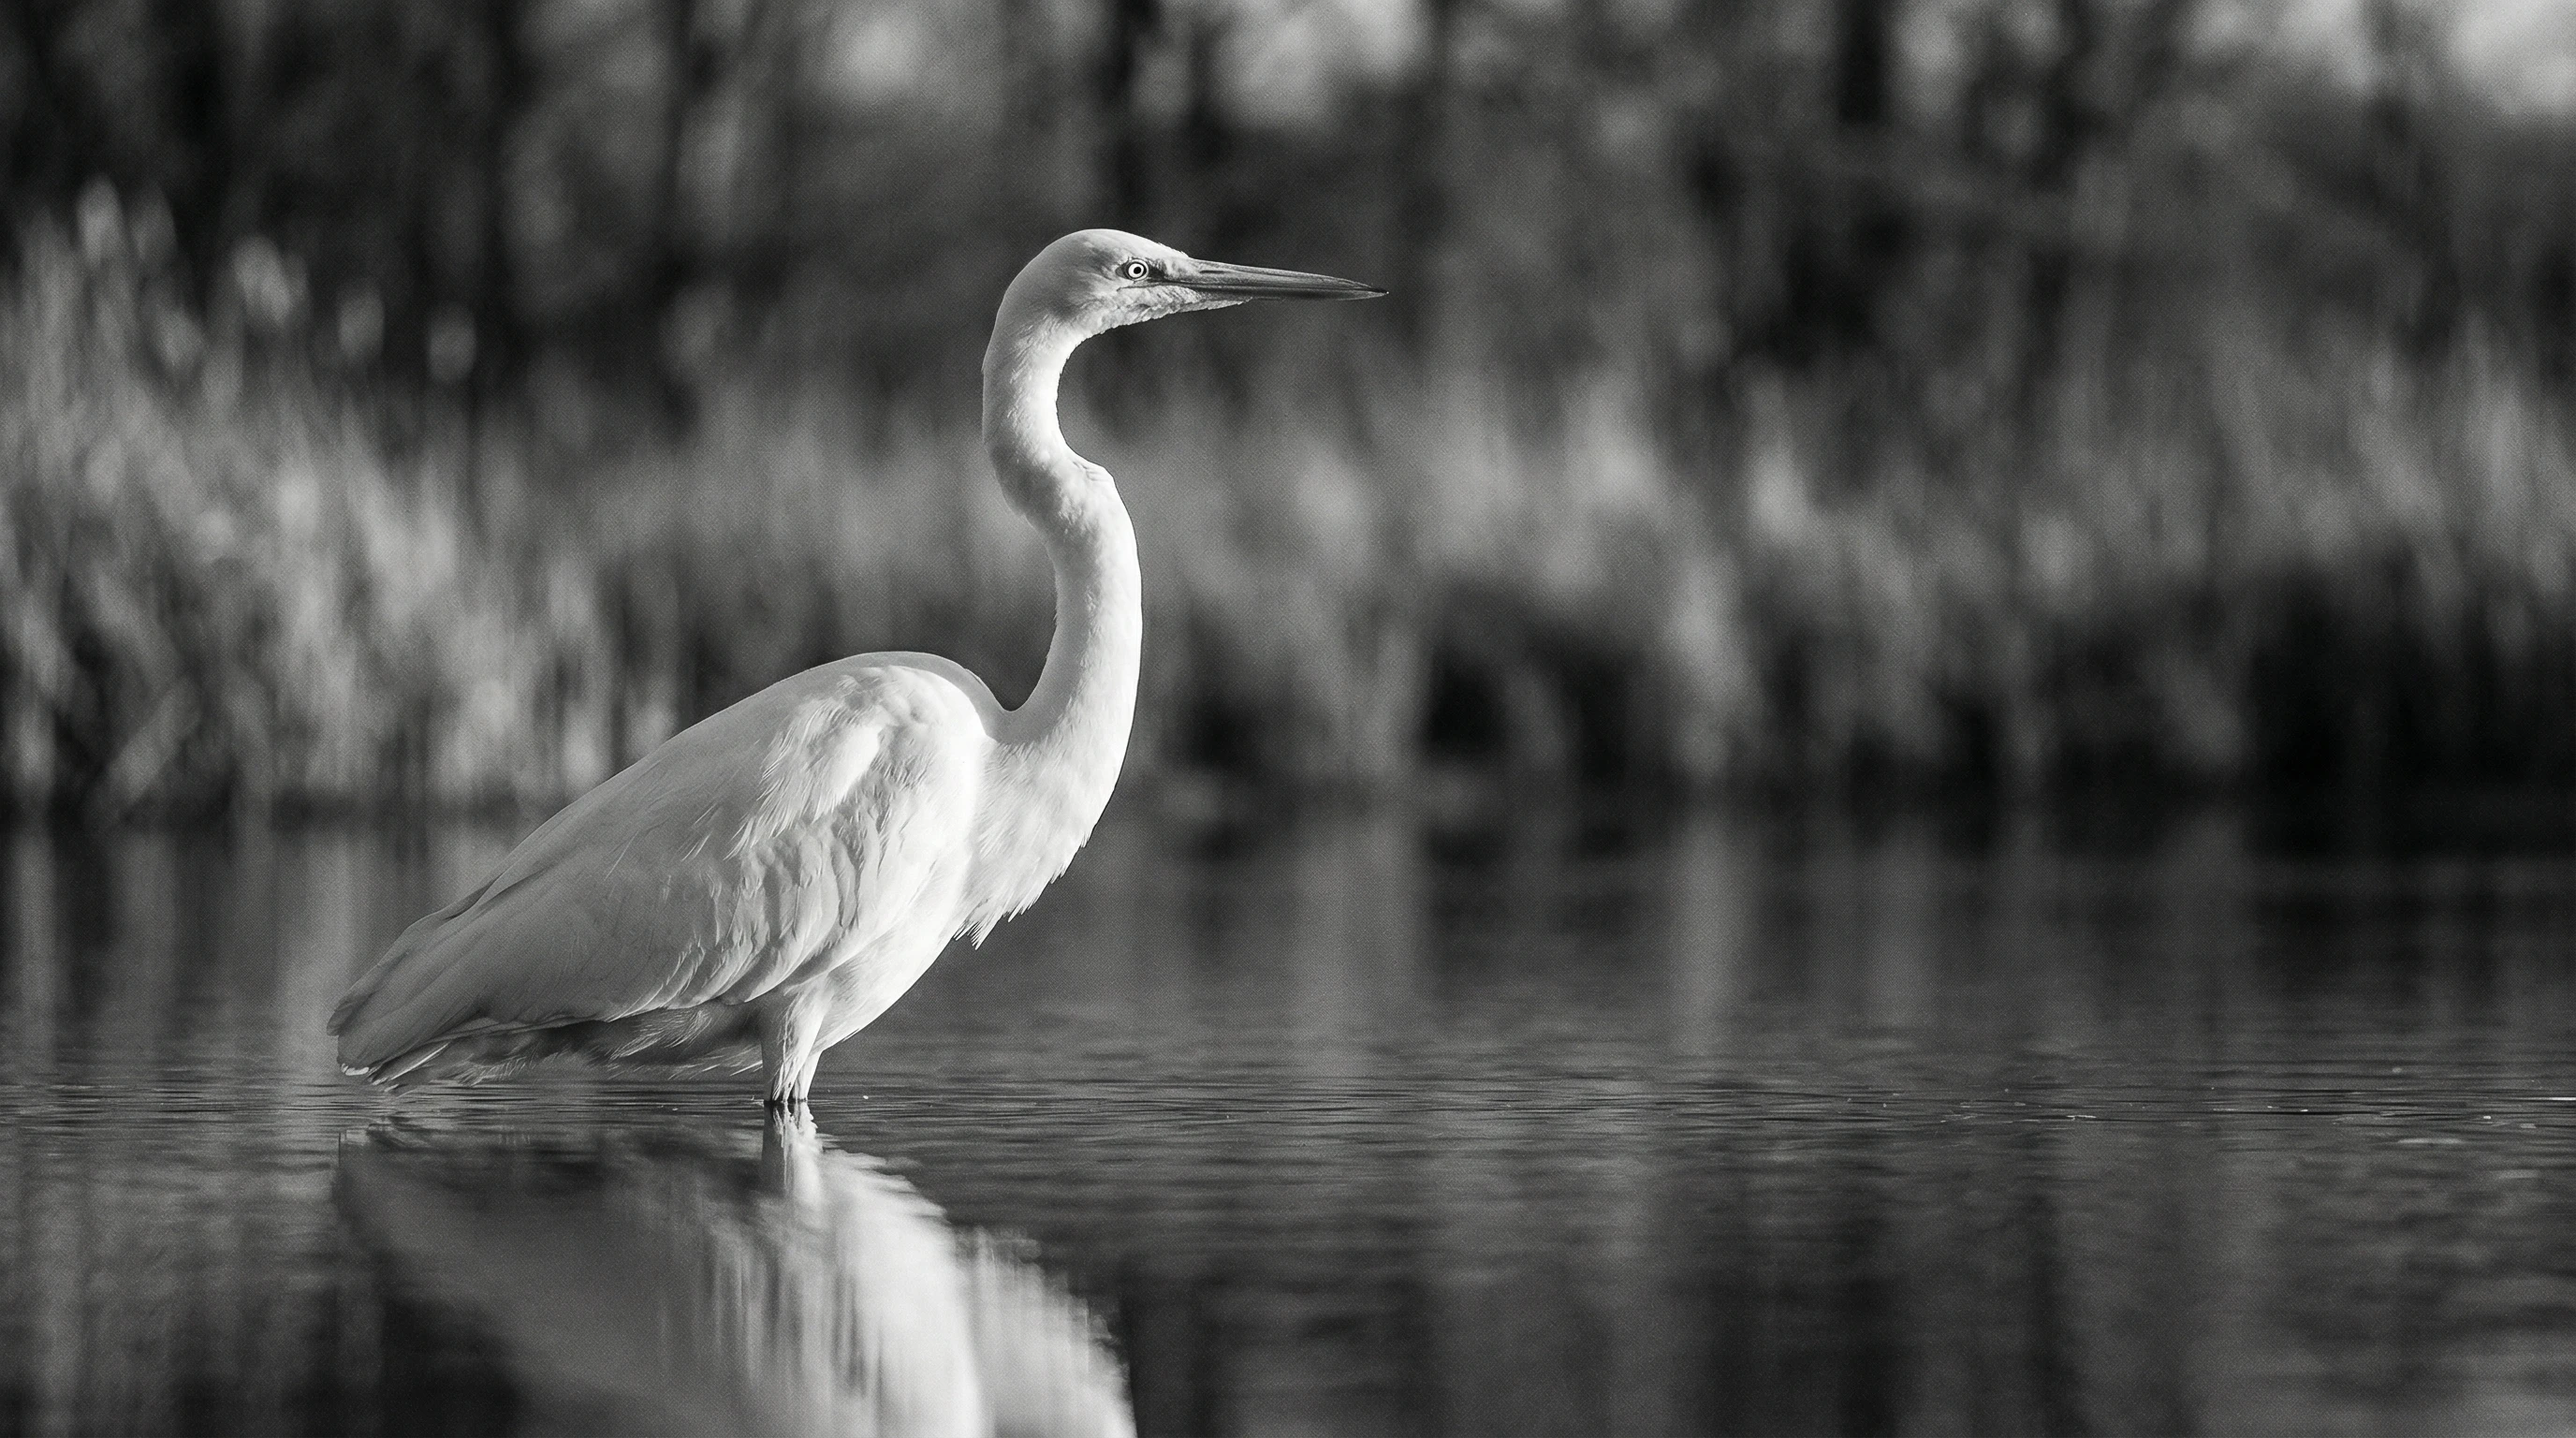
- Herons and Egrets: Tall and elegant, with pale plumage that looks great against dark backgrounds or reflections.
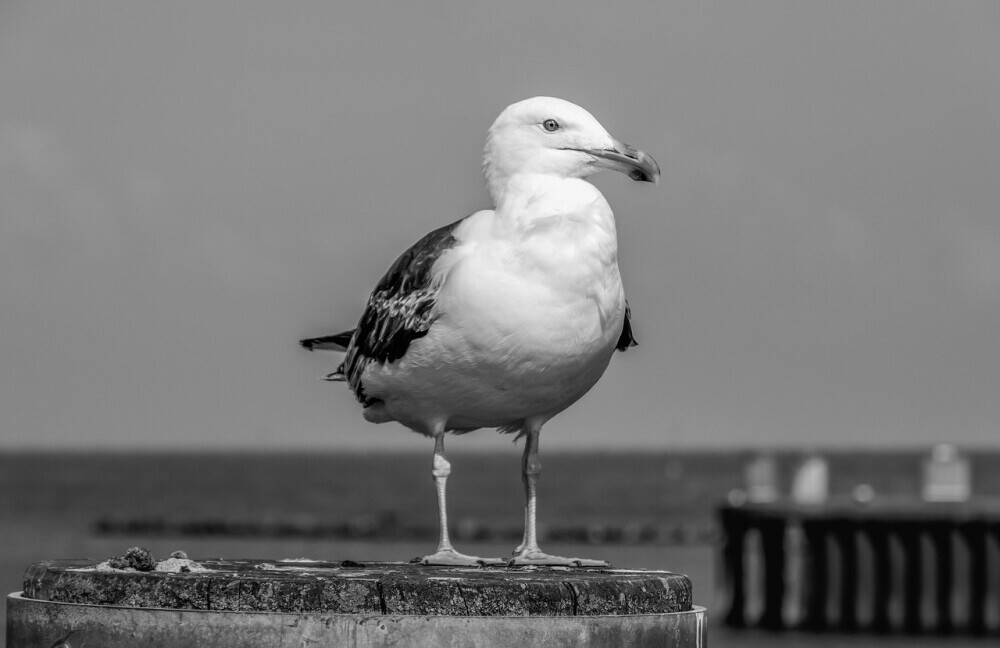
- Gulls: Common at beaches and lakes, these offer bright white bodies and dramatic wing patterns.
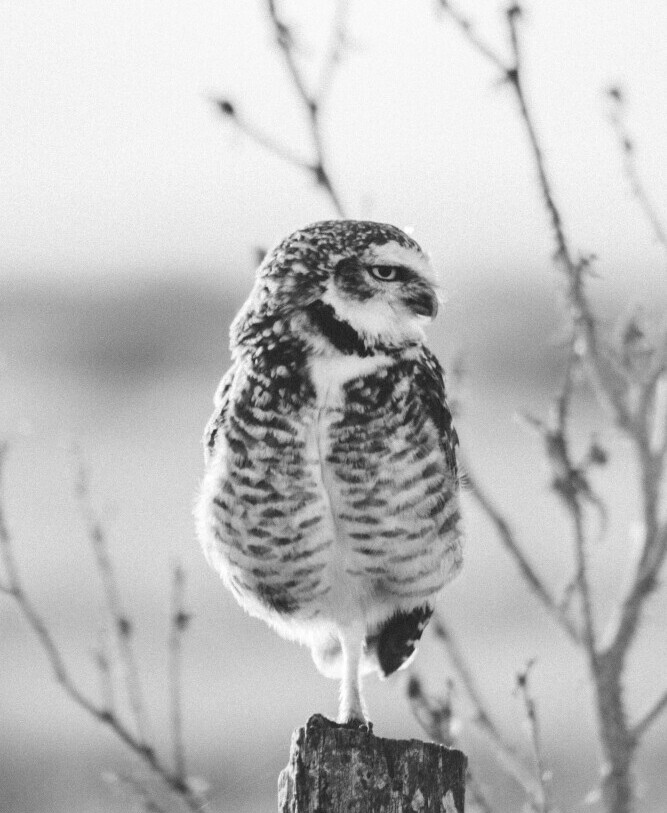
- Owls: Their feather texture pops in side light, and their eyes pull you right in.
- Raptors (like hawks and eagles): Dark and light patterning works especially well with contrast-focused compositions.
- Birds in fog or mist: Any species looks atmospheric when the surroundings fade to soft gray.
Doves, pigeons, and even crows (with their dark plumage) can look surprisingly dramatic in black and white, especially when paired with the right lighting and background.
Don’t overlook familiar city birds—sometimes the simplest subjects work best.
Simple Post-Processing Workflow for Beginners
Shooting with monochrome in mind lets you keep editing minimal but still make a huge difference:
Convert in Lightroom
- I use the Black & White sliders to tweak how each color translates to gray. You can bring out sky, feathers, or beak details by adjusting these individually.
Adjust Contrast Carefully
- It’s tempting to crank the contrast all the way up but try to keep some feather detail in the shadows and highlights. Overcooked files look flat and unnatural.
Dodge and Burn
- I add a bit of brightness to the bird’s eye, and I sometimes darken distracting background patches to keep the focus where I want it.
Clarity and Texture
- A touch of clarity or texture brings out the little lines in feathers. Just don’t overdo it or you’ll get a crunchy, weird result.
An easy step for a beginner is to compare your processed black and white photo with the original.
Ask yourself what stands out, and if the bird’s form and feather texture are clear.
If something feels off, dial back your adjustments or tweak the exposure.
Editing should step up the best qualities of your image instead of making it look overdone.
Common Beginner Mistakes in Black and White Bird Photography
- Just converting a weak photo to black and white doesn’t save it. You need strong light and good composition from the start.
- Overusing contrast, which can lose detail or make the image look fake.
- Not paying attention to background tones—distracting background lumps will still show up in monochrome.
- Forgetting about the angle and direction of light.
- Shooting only in harsh noon light, which flattens out feathers and shapes.
Another common pitfall is focusing only on rare or exotic species and missing out on practising with regular birds nearby.
Every bird, from sparrows to swans, is a chance to practise your skills and build confidence.
Quick Beginner Checklist
- Shoot in RAW
- Use a fast shutter speed for sharpness
- Protect highlights (especially on white birds)
- Seek out contrast
- Get a sharp focus on the eye
- Look for clean, uncomplicated backgrounds
Keep this checklist handy in your camera bag or on your phone.
Reviewing it before heading into the field will help you step up your results in no time.
Creative Ideas to Practice
- Find birds in fog or mist for moody frames
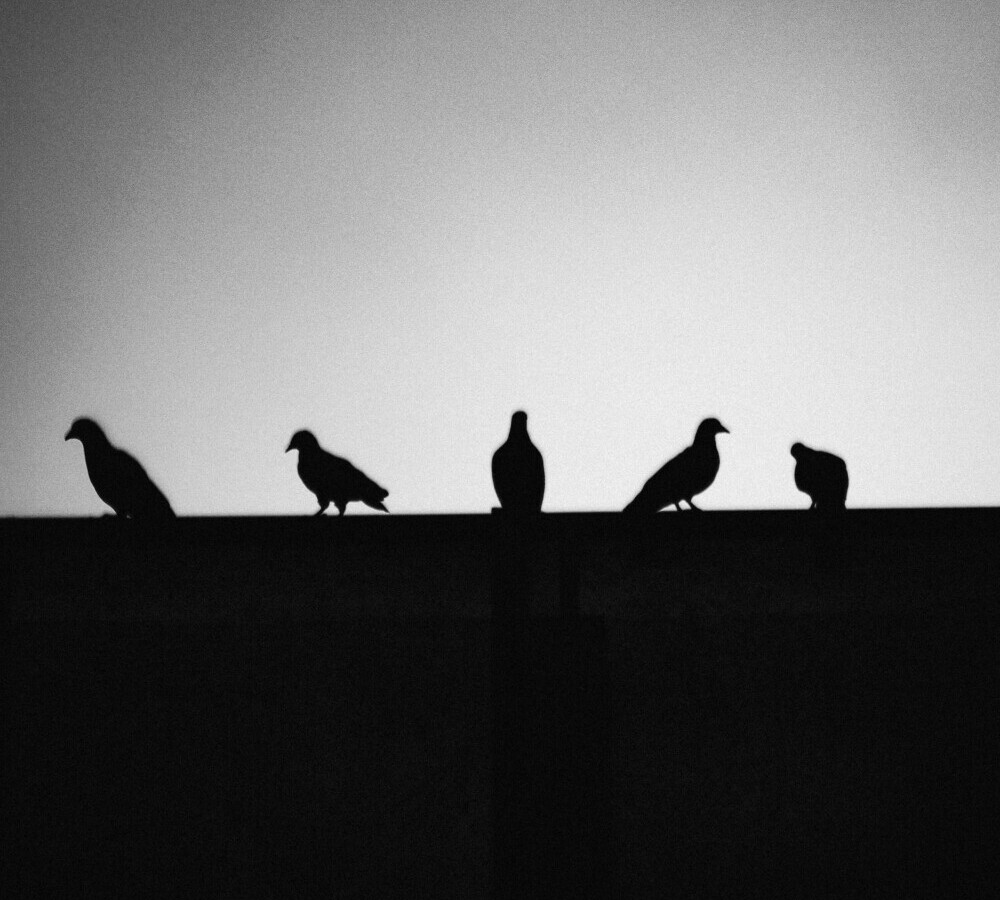
- Watch for silhouettes, especially at sunrise or sunset
- Try high-key shots with light birds on white backgrounds (snow, sky, mist)
- Zoom in on feather patterns for abstract looks
- Shoot birds perched in front of stormy or dramatic skies
Trying these ideas one by one not only builds your portfolio but also sharpens your eye for what creates impact in black and white.
Revisit the same spot at different times of day and see how lighting changes your results.
You’ll discover that practice and patience are as important as any gear.
Frequently Asked Questions
Should beginners shoot in black and white mode in-camera?
It’s usually better to shoot in color RAW, even if you want a black and white result.
Most cameras let you preview the scene in black and white on the LCD if you set the picture style, but you’ll keep all your editing flexibility by sticking with RAW.
What birds look best in black and white?
Bigger birds or those with clear shapes, like herons, egrets, gulls, owls, and raptors, are super beginner friendly.
Birds that have really light or dark plumage make the most dramatic shots.
Is black and white bird photography easier than color?
It can be, especially if you find color overwhelming. Black and white simplifies your scene and helps you focus on getting your light, shape, and focus right.
What settings are best for monochrome bird photography?
Go with RAW, use a fast shutter speed (at least 1/1000 sec), open up the aperture for isolation (f/4 to f/5.6), and keep ISO low but don’t fear a bit of noise.
Always check your histogram and nail focus on the eye.
Wrapping Up
The best part of black and white bird photography for beginners is that you’re building up your understanding of what makes a strong photo, fast.
Good results depend more on your ability to spot light and work a scene than owning fancy pro gear.

Every outing is a chance to experiment, try new lighting, or find everyday birds in a bold new style.
If you’re interested in taking things further, it’s worth checking my guides on creative use of depth of field in bird photos,
capturing bird feathers in detail, and more
black and white bird photography techniques.
Got any interesting from this article ?
Drop them in the comments below. And don’t forget to subscribe for regular tips, new and modern ways to get the best B and White bird pictures.
If you need some starter equipment, check out my gear recommendations too.
Happy photographing !!!!!!