
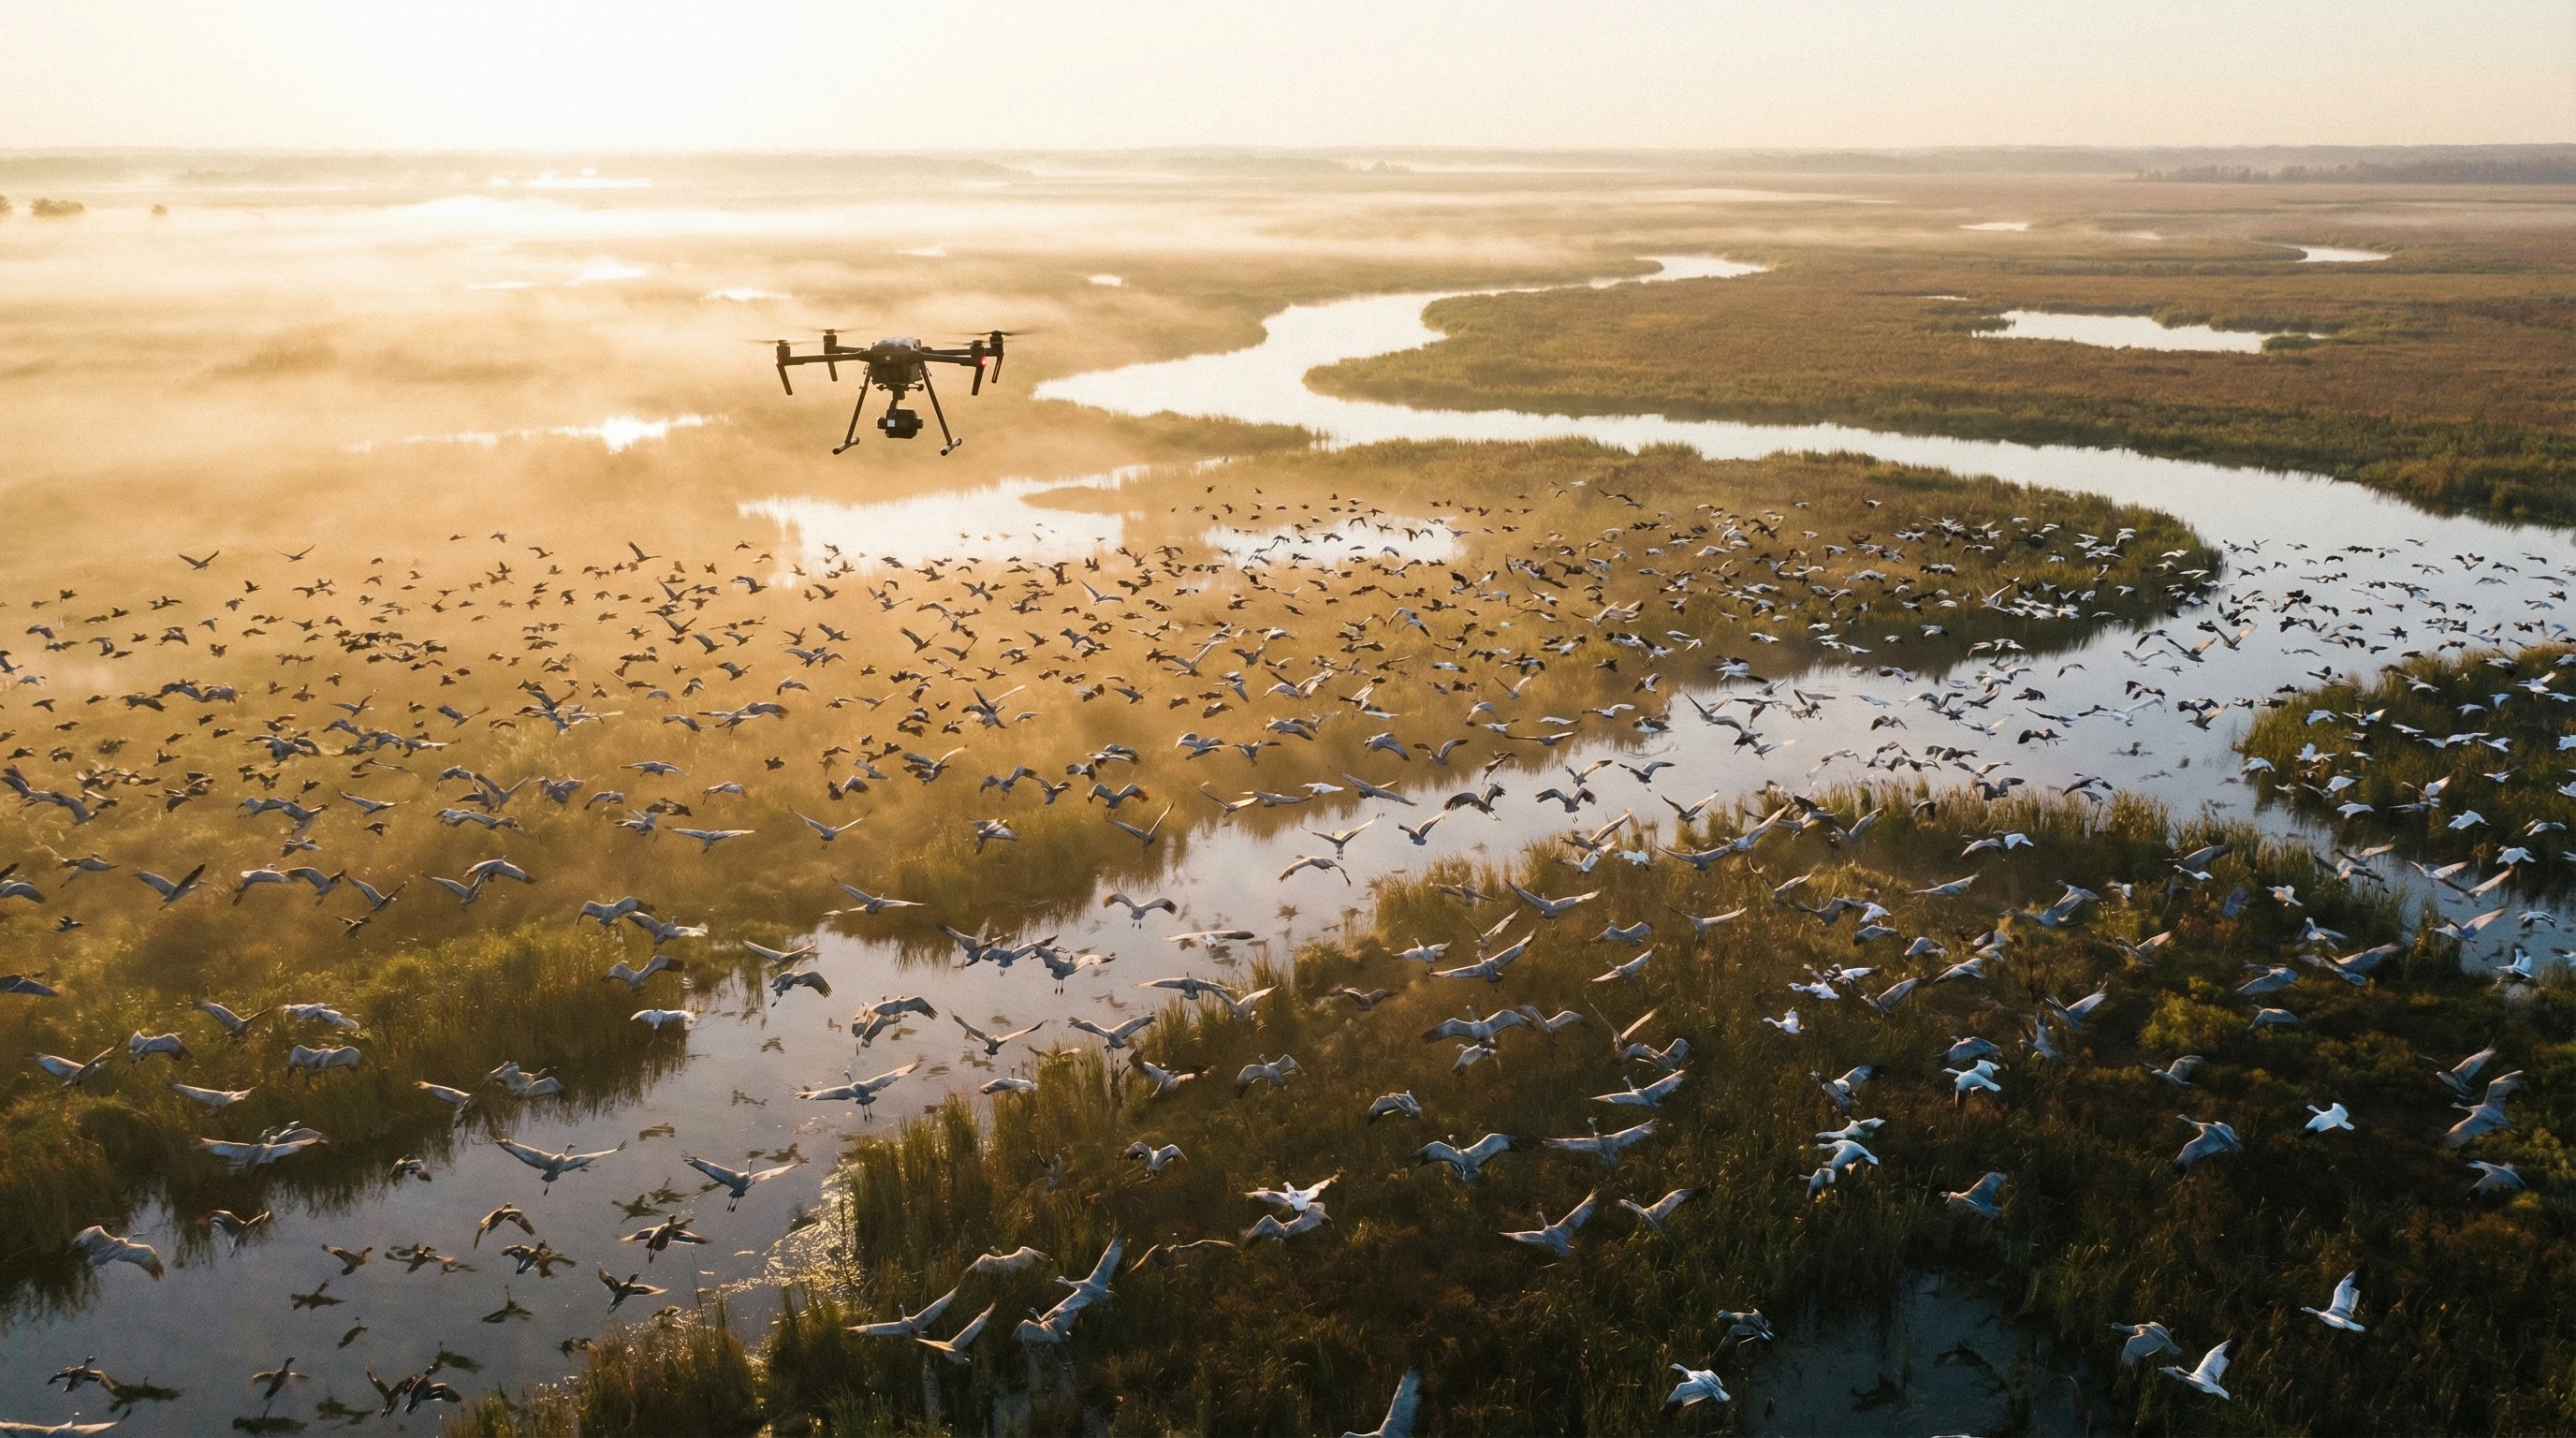
Drone bird photography is an eye-catching way to get photos of birds you’d never reach from the ground.
But getting a sharp shot from a moving drone isn’t always straightforward.
It’s pretty common to come home with blurry photos, even after lining everything up carefully. Most of the time, the culprit is one thing: shutter speed.
Why Shutter Speed Is Often the Hardest Part of Drone Bird Photography
Most first attempts at drone bird photography result in fuzzy or out-of-focus shots.
Birds often move in unpredictable ways, and even when they sit still, there is still a ton of motion to manage—from their slight movements to the constant drift and vibration of the drone.
So if you look through your gallery and spot lots of blur, you’re not alone.
Shutter speed stands out as the most important camera setting when you want to freeze birds, especially with a drone in motion.
If you don’t set it fast enough, motion blur can sneak in, even if you’ve nailed autofocus and have decent light.
Many beginners feel frustrated when sharpness doesn’t show up in their drone bird images, even though the flight felt steady and the scene looked bright.
Most of the time, the shutter speed is simply way too slow for the action.
This guide breaks down the key steps and tips you need, no matter how new you are to drones.
It’s about getting reliably sharp shots—without risky flying or endless setting tweaks.
What Shutter Speed Does in Drone Bird Photography
Shutter speed is the length of time your camera’s sensor is exposed to light for each photo.
Faster shutter speed means less time for motion, so you’ll literally “freeze” movement from both the subject and the drone.
Birds can be sneaky-fast, but with a drone, there’s another challenge—your camera isn’t ever truly still.
Even hovering causes minor adjustments and the rotors add a little vibration.
Shots that look sharp on the ground often turn blurry in the air with the same exact settings you might use for handheld photography.
Why Shutter Speed Beats ISO for Flying Birds
Worrying about noise and ISO is easy, but the real problem is often motion blur from a slow shutter speed.
You can’t clean up motion blur after the fact, but you can usually handle noise with editing tools.
Drone cameras nowadays do a good job in low light, especially if you get your exposure close to perfect.
I always pick a faster shutter, even if that means pushing ISO higher.
It’s easier to patch grainy photos in post than save a blurry shot. Getting sharp images is always priority number one—with practice, this becomes second nature when shooting birds with drones.
Recommended Shutter Speed Ranges for Drone Bird Photography
I use these quick guidelines, based on bird type and activity. If you’re unsure, pick a shutter speed faster than you think you need—better safe than sorry!
Stationary or Slow Moving Birds
- Perched, wading, or gliding birds: When birds aren’t moving much, 1/500s to 1/1000s usually gets the job done. It’s enough to counter tiny drone movements and occasional wing twitches.
Large Birds in Flight
- Eagles, herons, cranes, and similar birds: Despite slow-looking flight, large birds’ wing tips can move surprisingly fast. I like 1/1600s to 1/2500s for sharp action.
Small Fast Moving Birds
- Swallows, songbirds, hummingbirds: These birds are speedy, with wings that almost vanish if your settings aren’t up to scratch. Use 1/2500s to 1/4000s (or more, if your drone supports it) for clarity. It’s better to end up with noise than a blur when it comes to quick birds.
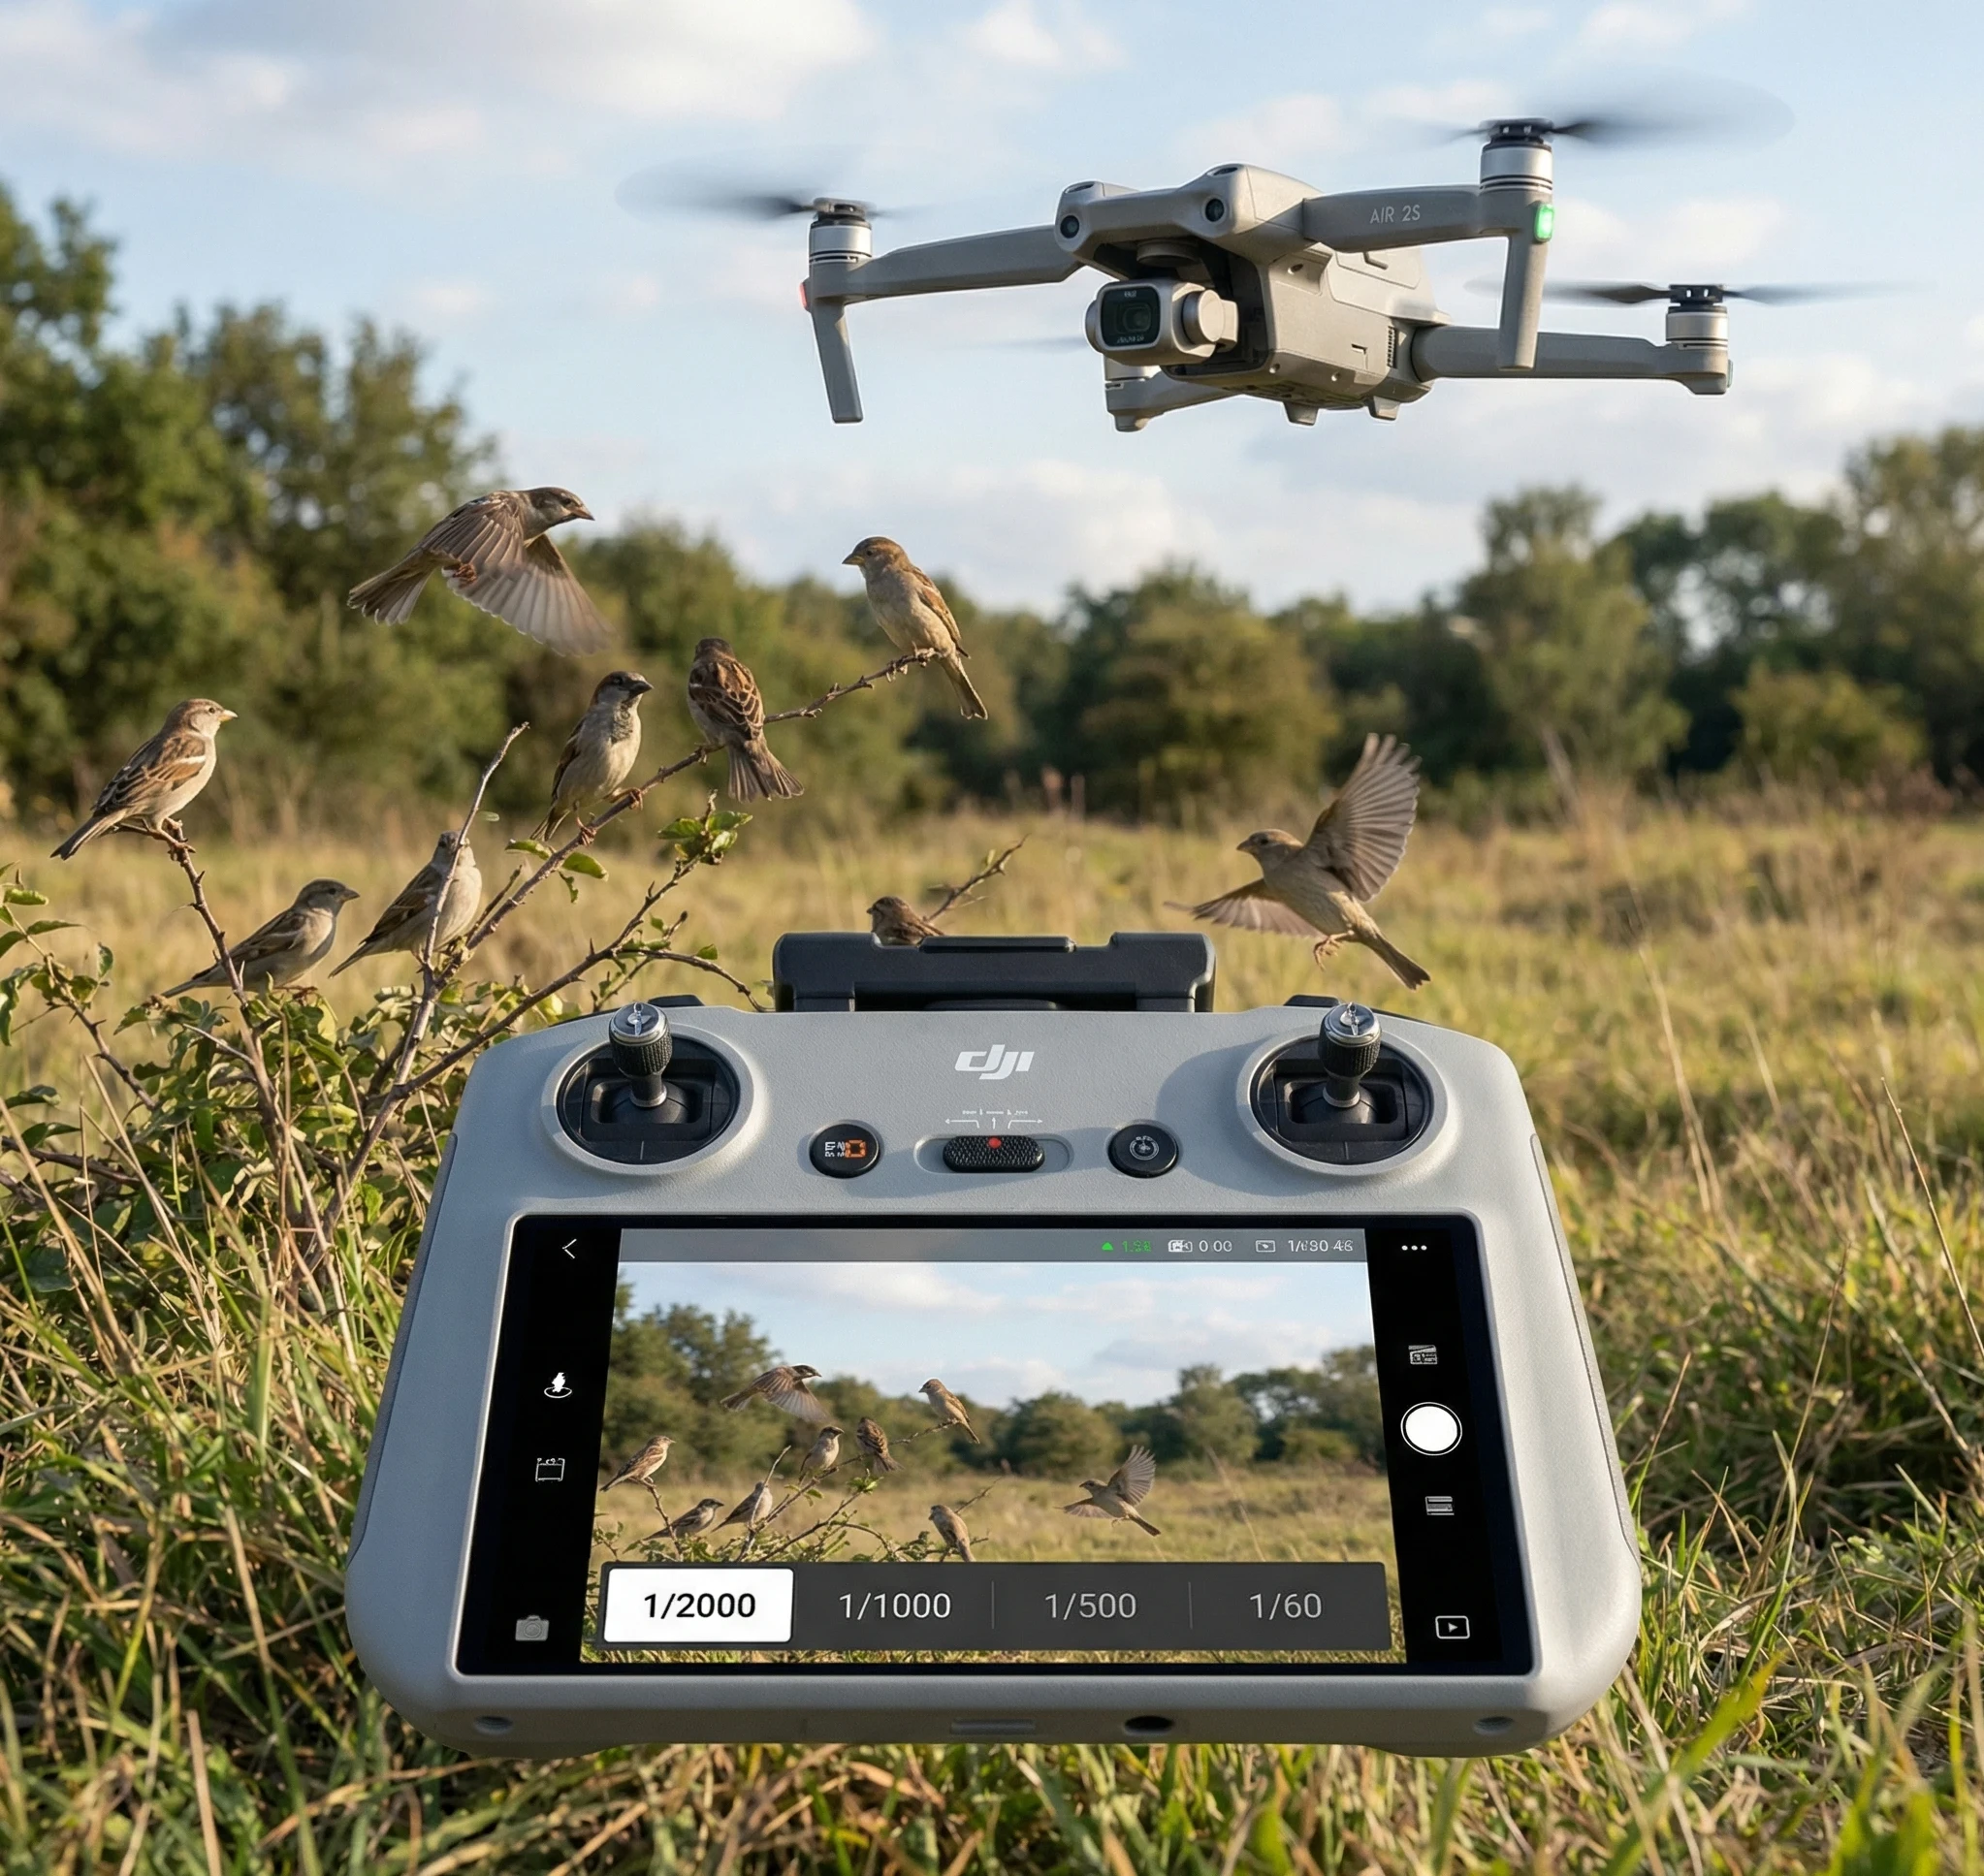
How to Set Shutter Speed on Your Drone
The steps differ a little by drone brand, but most camera drones let you adjust shutter speed using a couple of main methods.
Using Shutter Priority Mode (S or Tv)
This setting is great for getting started.
You pick the shutter speed and the drone adjusts ISO for you to balance exposure.
For beginners, this is a simple way to always use a fast-enough shutter for bird photography. It works well when jumping between sunlight and shade.
Manual Mode with Auto ISO
If your drone supports it, full Manual mode with Auto ISO lets you pick both shutter speed and (if you want) aperture.
The camera keeps exposure balanced.
This is handy for total control, especially if you want your preferred shutter speed “locked in” and aren’t worried about ISO sensitivity.
ISO: Finding the Highest Acceptable Value for Sharp Pictures
Modern drone cameras generally create decent results up to ISO 800, and often ISO 1600 or higher in good light.
As a rule, I keep ISO below 1600 when possible, but when light is low, I don’t hesitate to push it to get the shutter speed I need.
Grain can usually be smoothed out, but a blurry shot is lost for good.
In broad daylight, you can enjoy quick shutter speeds and maintain low ISO. When the light drops—such as at golden hour or under trees—ISO goes up, but sharpness stays your top goal.
Another tip: shots taken from a distance tend to hide noise better.
If your drone is far from the bird, small bits of grain won’t be as obvious when viewing your images on screen or in print.
Burst Mode: The Secret Weapon for Sharp Shots
Shooting birds in motion with the single-shot feature is tricky.
Burst (continuous shooting at 5, 7, or 10 frames per second) captures a quick lineup of images, and nearly always one or two frames are sharper than the rest.
I always skim my burst set and pick the best frame to edit—this method really helps when photographing moving birds and can capture awesome moments, like wing spreads or sudden turns.
Autofocus Best Practices with Fast Shutter Speed
When you’re excited about shutter speed, it’s easy to skip autofocus details, but they go hand in hand for sharp results.
I almost always stick with continuous autofocus (AF-C, sometimes labeled AI-Servo), so the camera keeps tracking movement.
Selecting the center focus point over wide or multi is typically faster at grabbing birds in the frame.
Give your drone time to lock focus before you trigger a burst, and if focus drifts, nudge the controls slightly before re-shooting.
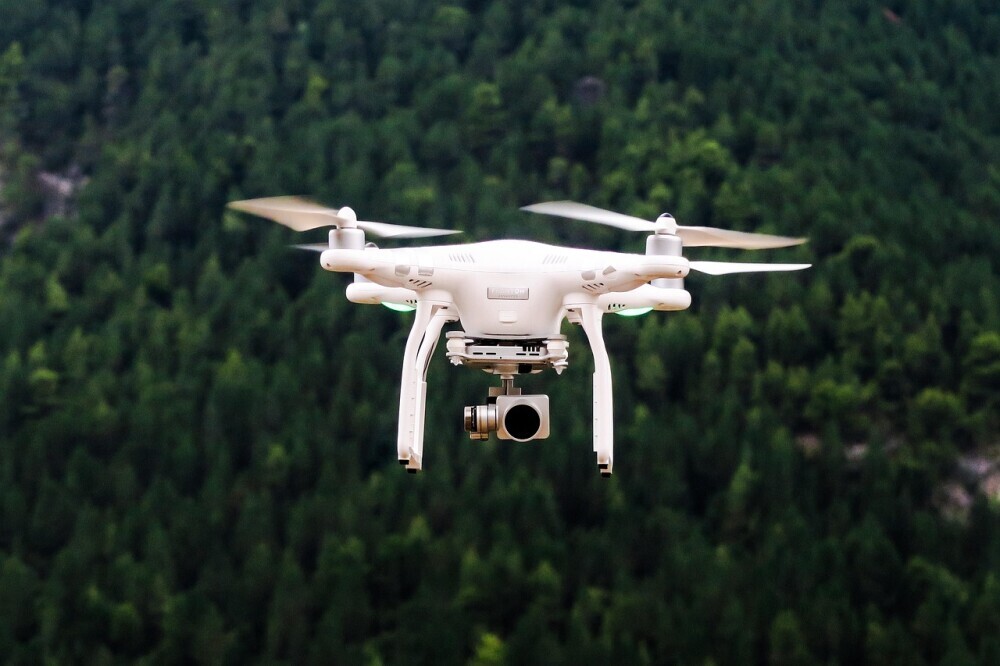
Drone Flight Habits to Help Sharpen Bird Images
Hover and Shoot
Photos are clearer if you let the drone stop moving and hover.
Sideways or jerky movements introduce blur or ruin autofocus.
I follow a “maneuver, hover, and shoot” pattern: get in position, pause for a couple of seconds, shoot a burst, then reposition.
Hovering smooths things out and leads to more keepers.
Fly Slow and Predictably
If your drone offers Cine or Tripod modes, these are great for softening control responses.
Less sensitive sticks mean fewer jitters and allow the camera to do its best work.
Why Chasing Birds Doesn’t Work
It can be tempting to fly after a bird for a dramatic image, but speed mismatches nearly always give you blur.
It can also disturb the birds, so it’s best to fly slowly or hover instead. This approach keeps both photos and wildlife in good shape.
Best Angles for Reducing Motion Blur
Top Down Views
Shooting almost straight down lets you minimize movement between drone and subject.
This is awesome for birds on water or resting on open land, and keeps movement at a minimum.
Side Shots and Panning
Classic side profiles of flying birds can look great.
Gently track and pan in their direction using burst mode.
If you do this smoothly, you sometimes get a sharp bird with a motion-blurred background—a look that feels energetic and cool when it comes off right.
Lighting: The Role of Sunlight and Shade
Golden hour is a go-to for bird photography. The light is soft, colors are vibrant, and you can pick faster shutter speeds without worrying about harsh shadows or blown highlights.
Overcast days are also solid for shooting birds—they soften light and make it easier to push ISO for speed.
Harsh sun near noon can give you bad shadows and glare, and heat haze on hot days can mess with sharpness, no matter the camera settings.
Try shooting in the morning or late afternoon to get the most out of your drone and keep your images sharp.
On cloudy days, you can use a higher ISO to get those fast shutter speeds you need.
The diffuse light keeps your images looking even and ensures details on both the birds and their surroundings stand out without being lost in harsh contrast.
Common Beginner Mistakes with Shutter Speed
- Shooting too slow to save ISO: Always favor fast shutter speed. Noise can be worked on; motion blur can’t be undone.
- Not adjusting settings as light changes: If the light shifts, check your shutter speed and ISO before every photo session—you don’t want to discover mistakes afterward.
- Shooting while flying quickly: Pictures taken while the drone is in motion easily end up blurred. Wait until you’re hovering or nearly still.
- Ignoring wind conditions: Even light wind can shake lightweight drones, making blur more likely. Fast shutters help, but waiting for calm patches is smart.
Simple Practice Exercises to Master Shutter Speed
- Hover practice: Set the drone to hover, then shoot bursts of perched birds or inanimate objects. Check later to see how different shutter speeds affect sharpness.
- Start with bigger or slower birds: Waterfowl or calm birds make easier targets—experiment on them and build skills before working with quick little birds.
- Reviewing your shots: After each session, go through your photos and spot which are sharp and which are blurry. Note the settings and conditions for each sharp or soft frame.
Frequently Asked Questions (FAQs)
What shutter speed works best for sharp drone bird photos?
For still or perched birds, 1/500s–1/1000s is a solid range. For birds in flight, bump it to 1/1600s or faster. For fast-moving small birds, 1/2500s–1/4000s (or higher, if possible) will get the best results.
Is ISO noise really a big deal compared to motion blur?
Sharpness is more important than noise. I’d rather work with a grainy but crisp photo, since you can improve it in editing—blur is much harder if not impossible to fix.
Can drones take clear photos of birds while they’re flying?
Definitely. Fast shutters, burst mode, and smart autofocus make it possible to catch birds mid-flight, even with entry-level drone cameras.
Should I use even faster shutter speeds for tiny or quick birds?
Yes! Tiny birds move and flap faster, so 1/2500s or above is needed to freeze them in action.
Sharp Drone Bird Photography Starts with Shutter Speed
Once you get comfortable with quick shutter speeds, you’ll notice a jump in sharp, usable photos from your drone.
Don’t stress too much about ISO grain—motion clarity is the real key to cool images.
Be patient, give controls a gentle touch, and always keep bird safety in mind for the very best results.
If you want more pointers, check out guides on bird photography composition, advanced camera settings, or troubleshooting blurry images; there’s always more to learn whenever you take your drone out for another adventure.