
Bird photography has always grabbed my attention.
There’s just something special about capturing birds in their natural environments, showing off their personalities and beauty.
It takes a bit of skill, and some knowhow about composition, if you really want your bird photos to stand out from the crowd.
I’m going to walk you through the basics of bird photography composition, so you can give your feathered subjects the spotlight they deserve.
Why Composition Matters in Bird Photography
The way you frame and arrange your bird photos decides just how powerful and eye-catching they’ll be.
Every bird photo tells a story, and good composition lets you choose what story viewers see first.
Whether it’s a robin in your backyard or a rare owl deep in the forest, nailing your composition helps highlight the bird, making your images way more pleasing to the eye.
It’s easy to get sidetracked by camera gear or elaborate setups, but focusing on the basics of composition is a quick way to see instant improvements in your photography.
With a few simple techniques, you can bring out the best in your bird photos even with basic camera equipment.
Emphasize Your Main Subject
Birds are small, sometimes quick, and easily lost among leaves, branches, or background clutter.
I’ve found that if you want viewers to immediately notice and appreciate the bird, it’s really important to make it the clear subject of your frame.
This might mean letting the bird fill more of the frame or just making sure nothing else in the shot competes for attention.
- Get Closer: If possible, move a little closer (or zoom in using your lens) so the bird stands out clearly.
- Choose Simple Settings: Look for situations where the background is less busy, like a bird perched on a single branch rather than a tangled pile of twigs.
I like to set my autofocus point directly on the bird’s eye or head, making the sharpness pop right where you want it most.
A sharp, well-exposed bird in the middle of blurry chaos grabs a viewer’s attention right away.
Keep it Simple: Clean Up Your Composition
Simple compositions almost always look better.
A cluttered shot (with lots of leaves, sticks, or distractions) pulls attention away from the bird.
If I notice the background is busy, I’ll either shift my position slightly or wait for the bird to move somewhere more photogenic.
Using a wide aperture, like f/4 or f/5.6, creates a nicely blurred background. This is called bokeh, and it can be super useful for bird shots.
The blur isolates the bird, making it stand out even more. Settings like low ISO and fast shutter help keep the colors true and highlight the subject without introducing grain or motion blur.
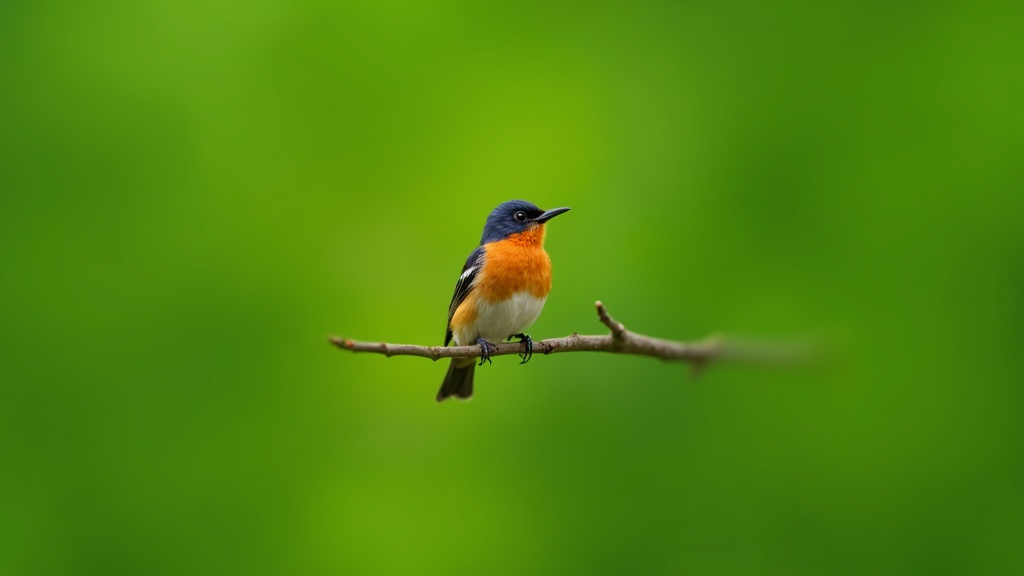
Uniform, Simple Backgrounds that Make the Bird Pop
I’m always scanning for backgrounds that are smooth, with just one main color or tone.
Blue skies, water, gentle fields, or out of focus foliage all make great backgrounds for bird photography.
The cleaner and more uniform the backdrop, the more dramatic your subject looks.
One trick I use a lot is to lower my shooting angle so my bird is lined up with the sky behind, or with a far off patch of greens or browns.
Using distance and focusing on the bird instead of near objects makes backgrounds melt away into soft color, which creates a pleasant artistic effect.
Use the Rule of Thirds for That Classic, Balanced Look
The rule of thirds is a popular guideline that works wonders in bird photography.
Imagine your camera’s screen divided into a grid with two horizontal and two vertical lines (most cameras even have an option to display this grid).
By placing your bird or its eye at one of the intersections where the lines cross, your photo will naturally feel more balanced and engaging.
When I’m out shooting, I pay attention to these grid lines almost out of habit now.

Placing the bird’s eye or face along one of these points makes the composition more dynamic than just centering everything.
This is especially handy when the bird’s pose or head angle is interesting; it gives just enough negative space that the photo breathes, drawing the viewer in without feeling cluttered or static.
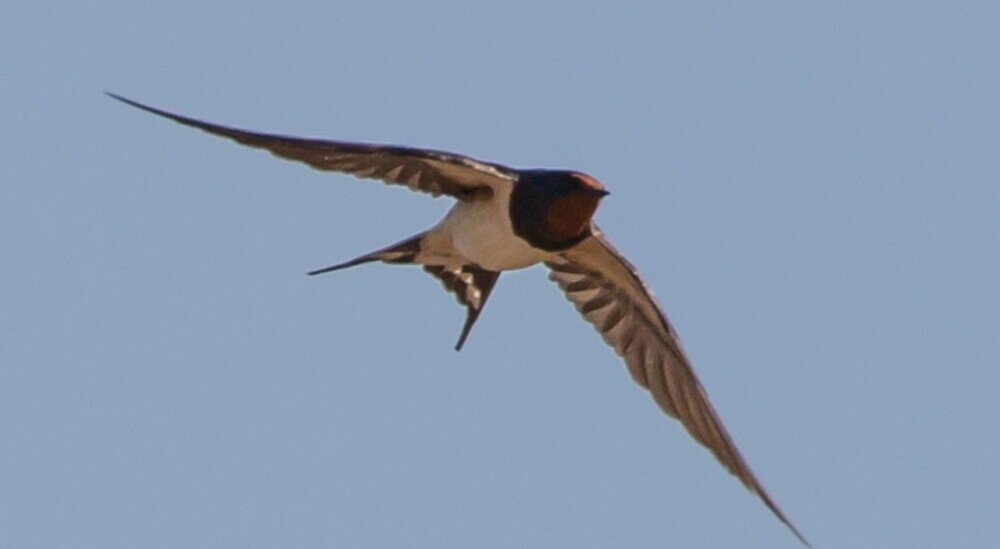
Point the Bird into the Frame
If you want your bird photos to feel lively, allow a bit of open space in front of the bird.
This is called “lead room.”
The direction the bird is looking or moving should guide where you leave extra space.
For example, if your bird is perched and looking left, it helps to keep more space on the left side of the frame.
- Lead Room: Leave space ahead of the bird’s face or beak, not behind it. This keeps the composition comfortable and purposeful.
- Dynamic Feel: Aligning the tail closer to the photo edge, with more space in the direction the bird is heading or looking, helps add movement and interest.
Whenever I capture a bird midflight, I always try to point my camera so there’s space in front of it. This gives a sense of direction and adds a bit of storytelling to the shot.
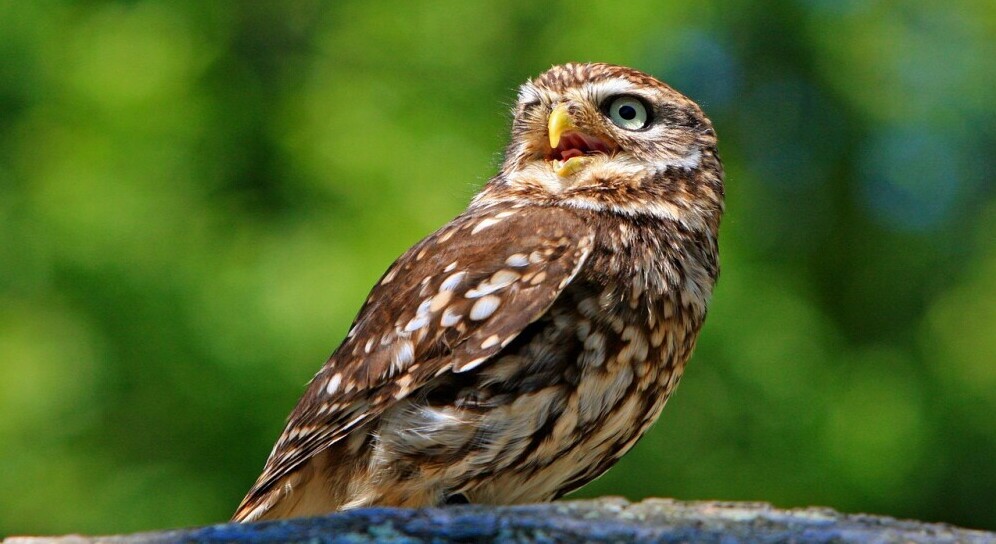
Creative Poses Create Extra Interest
While a simple side profile can look nice, I’m always on the lookout for birds doing something a little different.
Think stretched wings, singing beaks, curious head tilts, or interactions between birds.
Getting these creative or natural poses takes some patience, but they really help your images stand out.
Positioning yourself near favorite perches or feeding sites can help you anticipate interesting behavior.
Fast shutter speeds are handy here, especially if you’re aiming to freeze energetic movement or midflight action.
Most of the shots I really love come from observing for a bit and waiting for those magic little moments, so a little patience truly pays off.
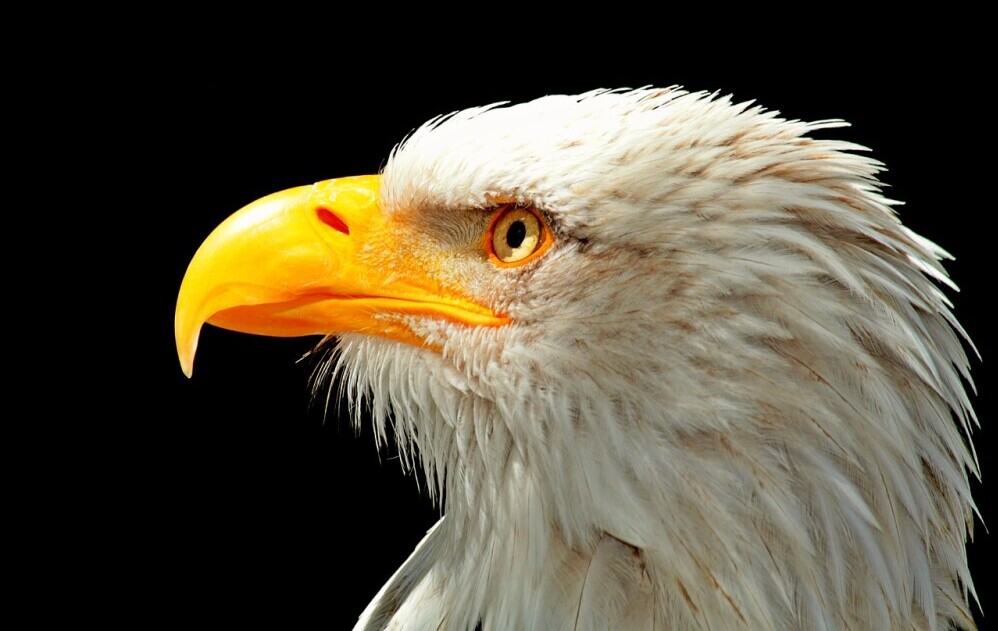
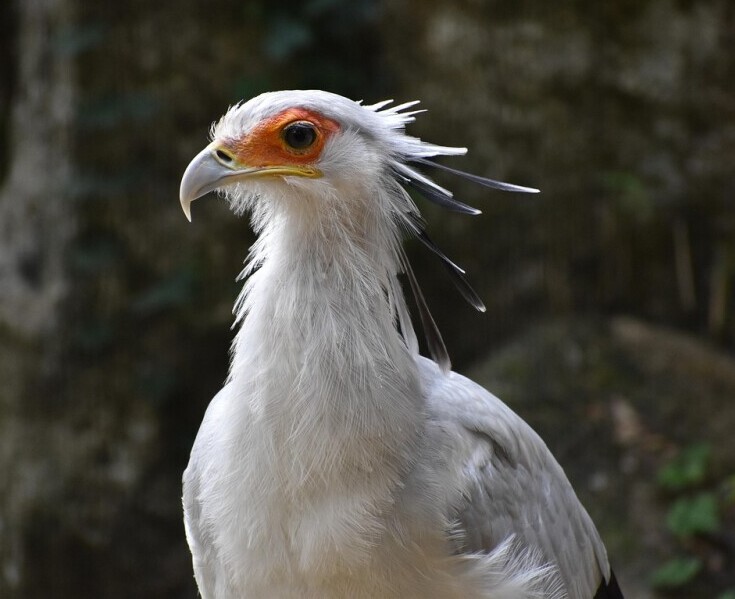
Fill the Frame for Maximum Impact
Closeup shots that fill the frame with the bird instantly draw the eye.
You get more detail in the feathers, eyes, and color patterns, which is always exciting to see at full size.
This approach works especially well for bird portraits or when working with larger, slow moving species.
A telephoto lens really helps, but if you don’t have one, you can still move closer while being careful not to scare your subject.
Cropping carefully during editing can also tighten the frame when your composition could use a little polish.
Filling the frame makes it crystal clear what viewers should focus on and minimizes distractions, so your subject stays front and center.
Quick Guide to Amazing Bird Photography Compositions
- Emphasize the bird by getting close or zooming in, and avoid cluttered backgrounds.
- Simplify the composition as much as possible; less is more in most bird shots.
- Use wide apertures to blur the background and make the bird pop.
- Place the bird according to the rule of thirds, especially the eye or head.
- Point the bird into the frame for natural, energetic shots with lead room.
- Look for creative poses or behaviors to add personality.
- Fill the frame for dramatic, detailed portraits that command attention.
Stick to these basics, and you’ll notice your bird photography compositions start to look polished and professional, no matter your camera gear or experience.
Dig Into Further Tips: A Few Extra Ideas
Once you have the basics down, try getting outside during the early morning or late afternoon when the light is soft and golden.
Birds are more active around these times, and that beautiful lighting makes a big difference in your final image.
I also recommend checking your shots for twigs, wires, or odd distractions around the edges.
Sometimes just a small crop or slight move to the side gets rid of pesky “photobombs.”
Editing software can help tidy up stray elements, adjust exposure, and give a boost to the overall look without going overboard.
Try experimenting with different weather conditions, too. Overcast days give soft, even light and can help brighter birds stand out.
Light rain or morning dew creates an extra touch of atmosphere and sometimes even lets you catch birds preening their feathers.
Don’t be afraid to mix in some variety by visiting new locations. Wetlands, wooded parks, and even your neighborhood garden attract different birds than city centers or coastal areas.
And if you want to step up your skills, consider shooting a small series or theme.
Focusing on birds in flight, shots of families feeding, or unique color patterns helps train your eye and gives you a goal to work toward.
Join local nature walks or birdwatching groups to swap tips and track down new spots for opportunities.
Questions and Answers
Question: What’s the simplest way to make my bird photos look more professional?
Answer: Focus on your composition first; get close enough to the bird, blur the background, and keep your subject sharp and well placed using the rule of thirds. Practice this before worrying about gear upgrades.
Question: How do I handle backgrounds that are always busy or distracting?
Answer: Try shooting from a different angle, use a wider aperture, or wait for your bird to move somewhere with a plainer background like open sky or water. You can also crop or use editing tools to clean things up after the fact.
Question: Are there certain types of birds or locations that are easier for beginners?
Answer: Larger and slower birds (like herons, ducks, or backyard songbirds) are great for practicing. Parks, lakes, and gardens let you get closer without stressing the birds too much, and you usually have more control over your shooting environment.
Quick Guide to Amazing Bird Photography Compositions: Wrapping Up
Bird photography composition is mostly about keeping it simple, making the bird the undeniable star, and using a handful of smart tricks, like lead room, filling the frame, and active backgrounds.
Practicing with these basic guidelines will make a huge difference. A bit of patience and regular practice with familiar, local birds helps, too.
Soon, creating eye-catching, thoughtfully composed images will feel pretty natural.
If you’re interested in more tips and inspiration, there are some super helpful guides and groups online, such as the Audubon photography resources and BirdPhotographers.net.
These offer plenty of real world examples, advice, and a chance to connect with others.
This post beautifully breaks down the art of bird photography composition in an approachable, inspiring way. I appreciate how it emphasizes simplicity and focus over fancy gear — a reminder that storytelling and observation matter more than equipment. The section on using clean backgrounds and lead room is especially valuable, helping photographers bring a sense of space and life to their shots. I also love the practical tips on anticipating behavior and capturing expressive poses — those “magic little moments” really do make an image memorable. The advice to experiment with lighting, weather, and perspective encourages creativity while staying grounded in solid technique. Overall, this guide captures the balance between technical skill and artistic vision, making it a must-read for anyone hoping to elevate their bird photography from casual snapshots to captivating, well-composed portraits of nature’s winged wonders.
Thank you, Andrejs, for your kind and thoughtful comment.
I’m thrilled to hear that the post resonated with you and inspired you to take your bird photography to the next level.
I’m glad you found the tips on composition, lighting, and anticipating behavior helpful. Capturing those ‘magic little moments’ is indeed what makes bird photography so rewarding.
Your appreciation of the balance between technical skill and artistic vision means a lot to me.
Wishing you continued success and joy in your bird photography journey.