
Light is one of those critical aspects that can make or break a bird photo.
After countless early mornings and late afternoons spent in the field, I’ve realized: understanding how light works is truly a game changer.
Even if you’re rocking a top-tier camera and a tack-sharp lens, capturing the mood and detail comes down to how you work with the light.
Here’s my personal take on how light shapes bird photography and some practical tips to help you snag more wow-worthy bird shots.
Why Light Matters So Much in Bird Photography
Birds are incredibly diverse, not just in color and size, but also in their favorite haunts.
Some spend all their time in the open sky, while others stay tucked into thick branches or wet marshes.
The lighting can be totally different in each setting, so learning to read the light is vital.
It’s not just about how bright or dark your photo looks. Light influences color tones, creates mood, and pulls forward detail.
You could have the same bird looking vivid and crisp in morning light, then flat and dull under the harsh midday sun.
Light can help you show off intricate feather detail or, if you’re not careful, turn those feathers into an overexposed blur.
If you put in the work and start noticing good light, you get to dodge the common headaches like blown out highlights, bottomless shadows, or birds vanishing into their backgrounds.
With a bit of practice, you’ll start seeing scenes the way your camera does—and that’s when your photos start popping.
The Best Times of Day for Eye-Catching Bird Photos
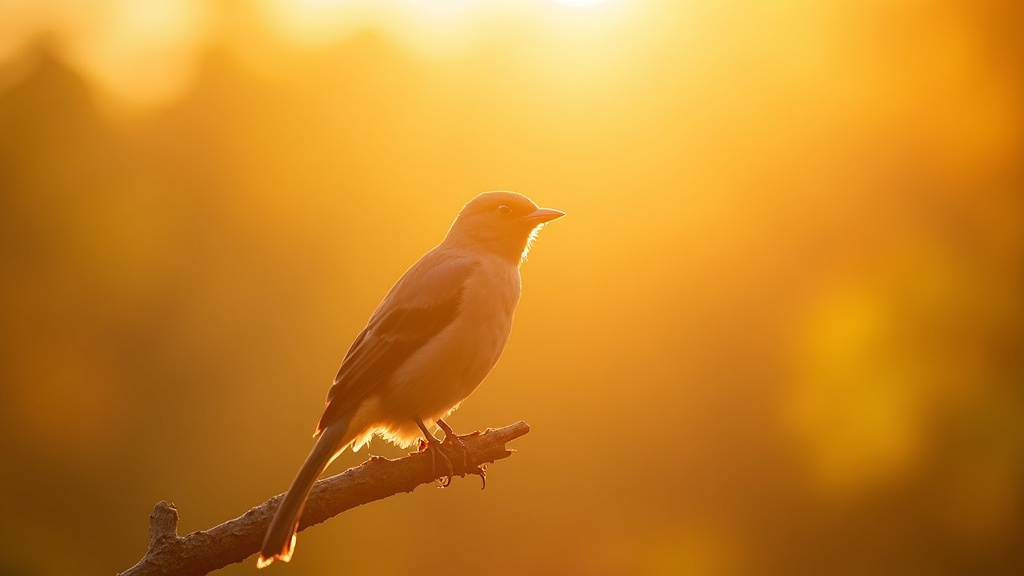
Golden hour—those precious moments around sunrise or sunset—delivers some of the friendliest light for bird photos.
I love how warm and soft the sun gets then, casting long shadows and making colors snap.
If you’re chasing after nesting birds, busy shorebirds, or chirpy songbirds, you’ll notice they come alive in the best light.
During golden hour, with the sun low in the sky, you don’t have to stress about harsh shadows crushing the details on your bird’s face or body.
The gentle, even light pulls color out of feathers and sometimes wraps birds in a golden rim.
This effect is especially clear on white birds or ones with glossy plumage.
To make the most of these hours, check sunrise and sunset times before you head out, and have your gear ready before the light flips.
If you stick around into twilight, you can catch even more playful lighting.
Soft purples and blues begin spreading across the sky, providing a subtle backdrop for birds perched on reeds or fences.
Sometimes, the very last light before sunset—just minutes before dusk—can make familiar birds look surreal, with their outlines glowing against an almost transparent sky.
What Happens When You Shoot Birds in Harsh Midday Light
Shooting under the noon sun can be challenging.
The overhead light flattens the scene, cranks up contrast, and drops dark shadows right under a bird’s beak or wings.
Bright white plumage is the hardest to work with, since it’s prone to losing all detail under direct sunlight.
I can’t count how many times I came home and realized my memory card was loaded with flat, forgettable images after shooting in midday conditions.
Colors get washed out and lose their energy, which is a real buzzkill if you’re aiming to highlight vibrant finches or flashy forest birds.
On top of that, the sharp shadows make your camera work overtime just to balance the bright and dark areas.
You can fix some of this in editing, but you’re better off avoiding tough midday light when possible.
Still, if you only have time to shoot at noon, all is not lost.
Look for birds in the shade, where leaves or clouds naturally diffuse the light.
Shooting under tree canopies or along shaded banks helps smooth the differences in tonal range and preserves color and detail.
When that’s not enough, try using a lens hood to cut down on stray light, or switch up your angles to find a spot where the sun isn’t blasting your subject straight on.
Even on cloudless days, patience and flexible positioning often save the shot.
Cloudy and Overcast Days: Not Bad, Just Different
Cloud cover acts like a gigantic soft-box, spreading light smoothly and gently over everything.
The result?
Shadows virtually disappear, and details jump out evenly on your subject. It’s an ideal scenario for certain types of bird photos—especially if you want to pull off crisp portraits without harsh contrasts.
Black-and-white birds, like  and oystercatchers, stand out most on overcast days.
The downside is the more muted color palette.
On overcast days, the sky looks flat and colors can feel chilled or less lively.
Landscapes might look less epic, but bird portraits take on a classic, balanced appearance.
I usually like to bump up the contrast and saturation just a touch while editing to bring back some punch.
Another plus: overcast skies are fantastic for birds that are easily spooked, since there aren’t sharp shadows or flashes to make them flinch.
I often get closer to shy species on cloudy days, and even capture interesting behavior that I would have missed in bright, dramatic light.
How Light Direction Affects Feather Detail and Mood
The direction of light matters as much as its intensity. Here are a few basics I always keep in mind:
Front lighting: With the sun behind you, light hits the bird head on, revealing all the fine detail of its feathers. Colorful or patterned birds shine most in this setup. Some of my sharpest shots happened when the sun was squarely at my back.
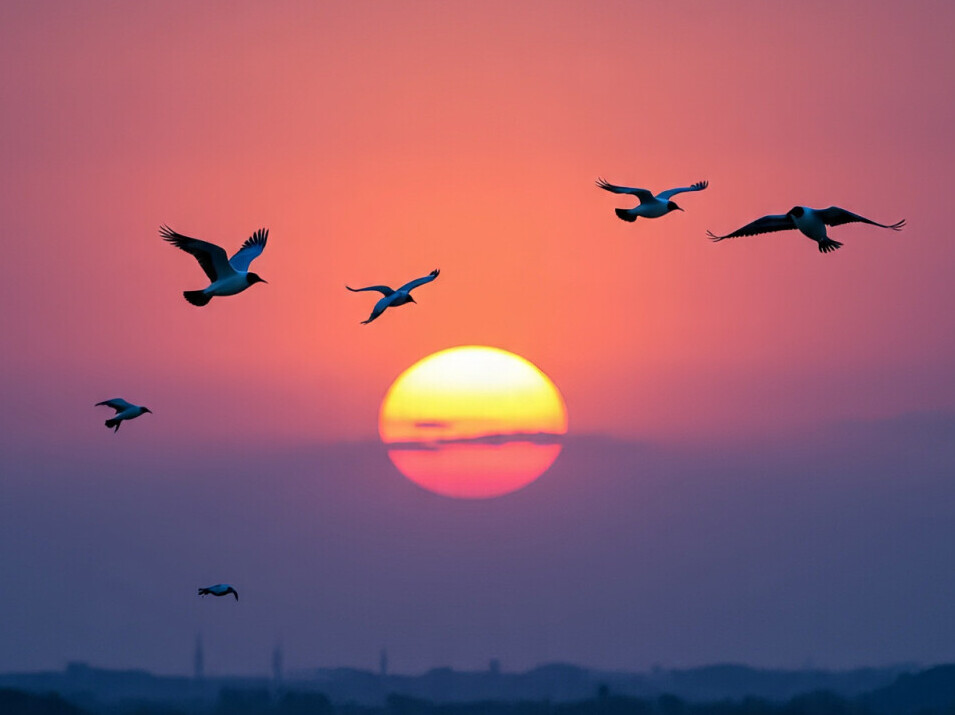
Backlighting: If the sun is behind the bird, not behind you, you can get creative effects like shimmering outlines or wild silhouettes.
Dew, mist, and water droplets really light up with backlighting. Just remember to bump up exposure to keep your bird from turning into a dark lump—but watch out, as the background can sometimes blow out or lose detail.
Sidelighting: When sunlight comes from the side, it sculpts the bird with shadows and brings out the texture in feathers, adding more depth and dimension. With raptors or woodpeckers, sidelighting picks up muscle contours and adds a bit of drama.
Don’t be afraid to switch up your approach. Each style of lighting tells a different story about the bird and its world.
Easy Ways to Create Artistic Bird Photos Using Light
Once you’re comfortable, you can experiment with light to set different moods or push your photos into creative territory. Try these ideas for some fresh inspiration:
- Silhouettes: Shoot facing the rising or setting sun, exposing for the sky. You’ll get striking shadow shapes—swallows balanced on wires, cranes in marshes, or kingfishers on reeds all work great.
- Rim lighting: Strong sunlight from behind can make a bird’s edges glow. This effect is magical in the morning mist or when photographing herons over still water.
- Reflection shots: Still lakes at dawn offer perfect reflections. Duck pairs, egrets, and shorebirds often double up, creating symmetry that pulls in the eye.
- Play with shadows: Late afternoon sidelighting casts long, dynamic shapes. Try to anticipate how a bird’s movement changes its form and sense of energy.
Mixing these approaches can help you stumble upon unique shots.
The beauty of natural light is that no two days will look exactly alike, so keep experimenting and playing with new settings every time you go out.
Trickiest Light to Work With, and When to Avoid It
Some lighting situations are just plain tough for bird photography:
- Direct overhead sun: It casts sharp, downward shadows, wipes out detail, and flattens form. I usually skip midday sessions for this reason.
- Splotchy sunlight: Patches of sun shooting through branches create weird mixes of light and dark on a bird’s feathers. It’s awkward to edit and rarely looks good on camera.
- Rapidly changing light: When clouds zoom past, lighting can flip from bright to dark in seconds. Staying flexible helps, but if you can, wait for a steady patch of light for consistency.
If rough light can’t be avoided, shooting in RAW is your safety net. It lets you pull back more detail during editing.
Also, don’t be afraid to walk around your subject for a few minutes—sometimes a little patience or a new angle is all you need to fix the trickiest lighting problems.
Real Life Lighting Examples: Field Stories
 One crisp autumn morning, I tracked a troop of through golden woods.
The light slid in from the side, highlighting every groove in their wings as they scaled tree trunks.
Later, after the sky cleared and the sun climbed high, the same birds blended into the glare; all the rich colors had faded.
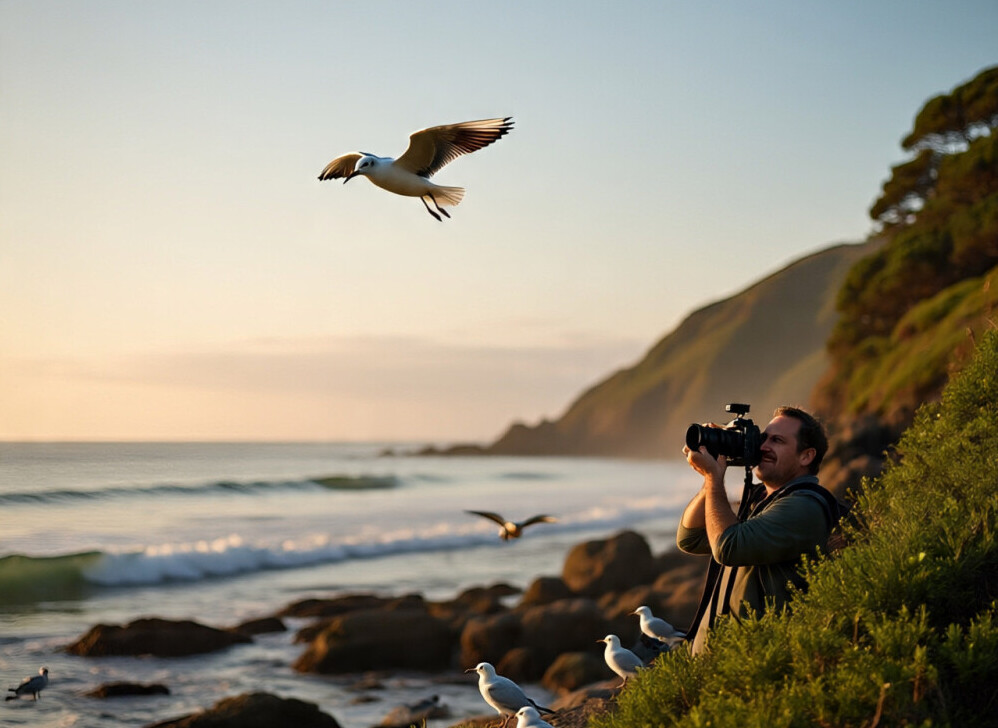
Another time, I spent an evening near a salt marsh as herons hunted at sunset. One bird stretched its wings, and low sun caught every feather, outlining it against the water.
In moments like these, patience pays off — holding out for the right light can make all the difference.
I’ve also found that mixing things up—facing the sun for silhouettes or waiting for a gap in the clouds—leads to more adventurous shots.
There’s a special thrill in stumbling upon unique lighting and knowing you captured something few others have seen.
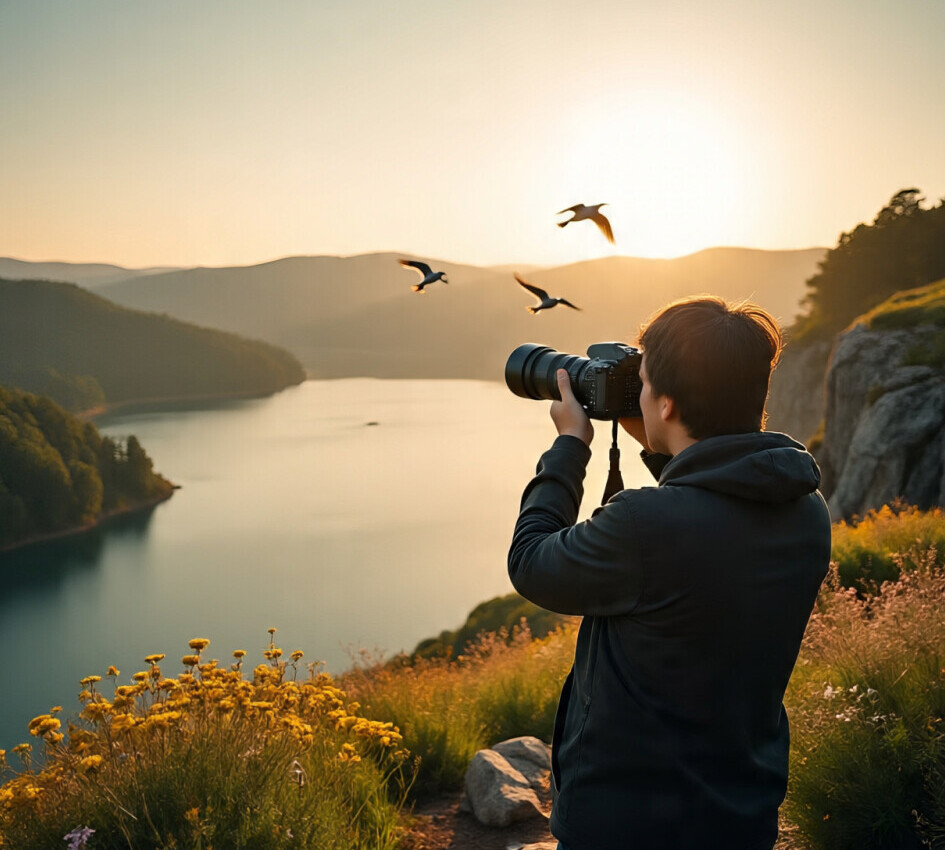
Managing Gear and Camera Settings for Different Light
Wild light calls for a flexible game plan. Here’s what keeps me ready in the field:
- Shoot RAW: This format keeps more information for adjustments later.
- Exposure Compensation: Boost it when shooting into the sun or in shadow; tone it down when handling bright birds against dark backgrounds.
- Spot Metering: Meter just the bird, not the scene, so you get more accurate exposures. This is a lifesaver for backlit or dim settings.
- ISO: Don’t fear bumping ISO on gloomy days—today’s cameras handle grain well, and sharpness matters most for wildlife.
- White Balance: Try “Cloudy” or “Shade” to warm up images on gray days, or keep it on auto and fix in post if you like total control.
Don’t forget to pack an extra memory card and keep your batteries topped up—shooting burst sequences to catch flapping wings or sudden behavior is easier when you’re not worried about running out of space or juice.
Frequently Asked Questions About Light in Bird Photography
Over the years, I’ve been hit with a few repeat questions about light:
Question: What’s the best weather for bird photos?
Answer: Lightly cloudy mornings and evenings are winners—they deliver soft light but still have color and pop. Early and late sun at low angles is the MVP for drama and feather detail.
Question: How do you handle super contrasty scenes?
Answer: Spot meter on the bird, not the background. Shooting in RAW buys you wiggle room for editing. Always aim for lower sun angles if possible—they help balance tough scenes.
Question: Can you use flash or artificial lights?
Answer: Flashes are usually a last resort in wild bird photography since they can startle or disturb the subject. Natural light is your friend. When you absolutely need extra light, use an off-camera flash for fill and always put the bird’s welfare first.
Question: Is editing okay for fixing lighting issues?
Answer: Definitely. Editing can save images by adjusting exposure and balancing highlights and shadows. As long as you stay true to the bird and don’t alter basic facts, post-processing is a regular part of bird photography.
Quick Recap: What to Focus on for Better Bird Lighting
Getting a handle on light is one of the surest ways to take your bird photos up a notch.
Keep an eye on the time of day, play with the direction of light, consider the weather, and experiment a little every time you’re out in the field.
Watch how different light brings out new facets of the birds you love, and you’ll start building a portfolio of images with real magic.
With every trip, you’ll learn something new, so gear up, stay sharp, and soak up all the possibilities light has to offer.
Bird fans, celebrating this part of the hobby is seriously worth the time—you never know what eye-catching moment you’ll stumble upon next!
This post beautifully captures the essence of how light can completely transform bird photography. I really appreciate how it explains not just the when but also the why—from golden hour’s warmth to the soft, balanced tones of overcast skies. The detailed breakdown of light direction—front, side, and backlighting—offers practical insights that photographers at any level can apply right away. I especially loved the creative tips on silhouettes, reflections, and rim lighting; they remind readers that experimenting with light is where art meets technique. The emphasis on patience and observation feels so true—waiting for the perfect light often leads to those magical, once-in-a-lifetime shots. This guide doesn’t just teach camera settings; it inspires a deeper awareness of how light breathes life and emotion into bird photography. Truly a valuable, experience-driven resource for nature and wildlife enthusiasts alike!
Thanks for the kind words, and I am happy that you found the post resonating.
Light is everything in bird photography. It is amazing how it can transform a shot from meh to magic!
I’m glad you appreciated the tips on experimentin’ with light – that’s where the creativity kicks in!
Keep chasing that golden light, and don’t be afraid to get a little unconventional with your shots. Your passion for bird photography is infectious, and I’m hyped to see what you capture next!!